Assemble the airplane – Great Planes J-3 Cub FlatOuts EP ARF - GPMA1120 User Manual
Page 6
IMPORTANT NOTE: As stated in the
Additional Items
Required section you must use a Foam Safe CA glue in the
assembly process. Do not attempt to assemble this plane
with standard CA. It will melt the foam!
❏
1. Remove two of the arms so that it matches the horn
shown on the right. Each of the arms should have two holes.
Enlarge the outer holes in the remaining servo arms with a
3/64" [1.2mm] drill bit. Note: The purpose for this configuration
is to provide mechanical differential to the ailerons. In our test
flying we determined the plane performs best with some
differential in the ailerons.
❏
2. Connect the aileron servo to the receiver. Use your
ESC or a receiver pack to power the receiver. Turn on your
transmitter and center the aileron servo. Do not skip this
step as the aileron servo must be installed into the fuselage
with the servo horn installed as shown.
❏
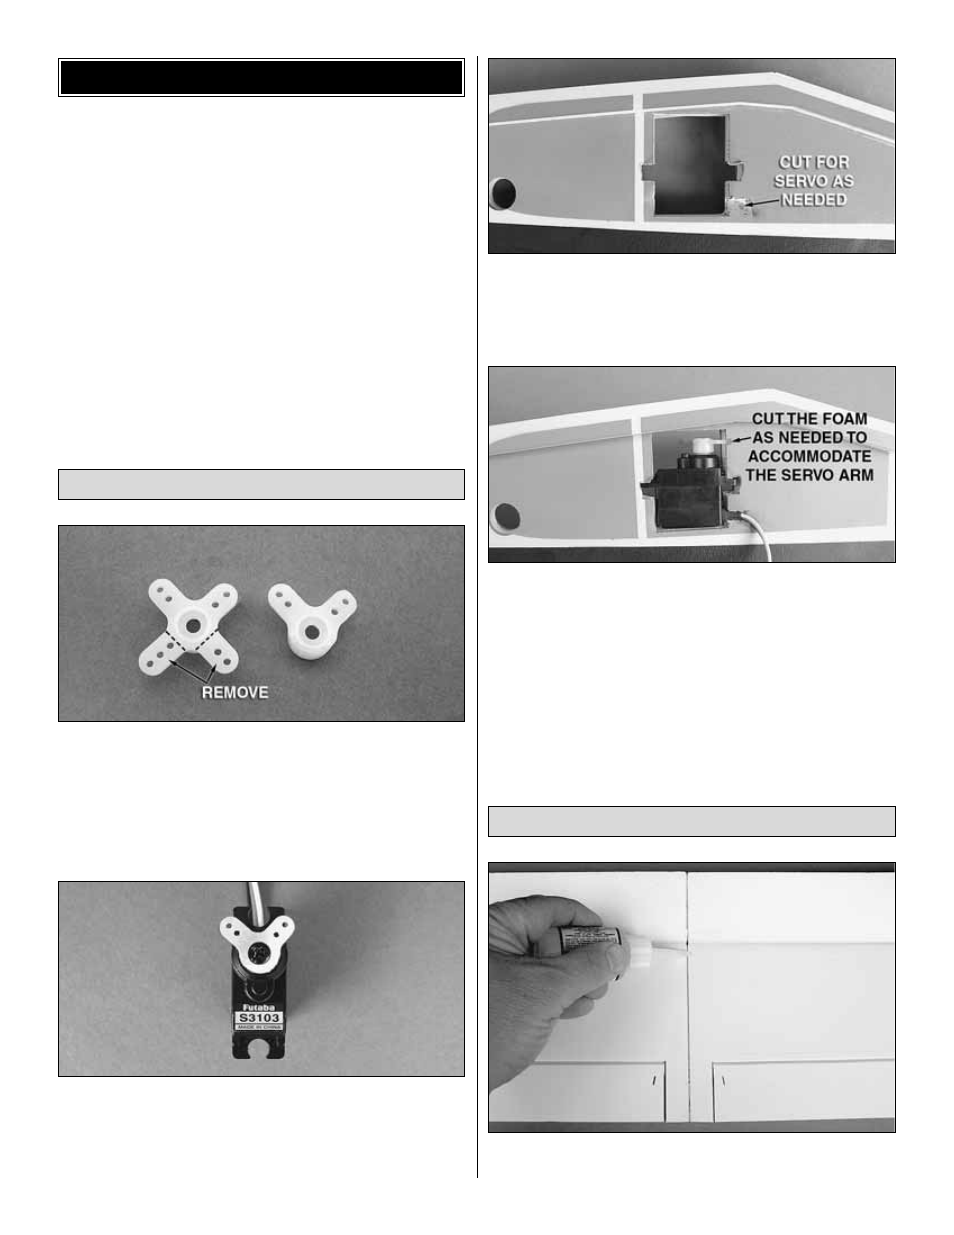
3. Cut a slot in the fuselage on the right side large
enough to accommodate the servo connector in the
locations shown in the picture. Their exact placement will
depend on where the servo lead wires exit out of the aileron
servo being used.
❏
4. Position the servo in the fuselage making sure that the
servo arm is positioned as shown. Push the aileron downward
into the servo bay until it is firmly seated in position. Center the
servo in the fuselage. Cut the foam as needed to
accommodate the servo arm.
❏
5. Apply a couple drops of thick, foam safe CA glue to
each servo case tab, securing the servo to the fuselage. Add
a couple drops of foam safe CA glue near the base of the
servo case as well. It does not require much CA glue to
secure the servo to the fuselage. Excess glue will simply
make it difficult to remove the servo in the future.
❏
1. Locate the left and right wing panels. Place them
upside-down on the bench. Apply a bead of thick foam safe CA
Install the Wing Panels
Install the Aileron Servo
ASSEMBLE THE AIRPLANE
6