Great Planes J-3 Cub FlatOuts EP ARF - GPMA1120 User Manual
Page 10
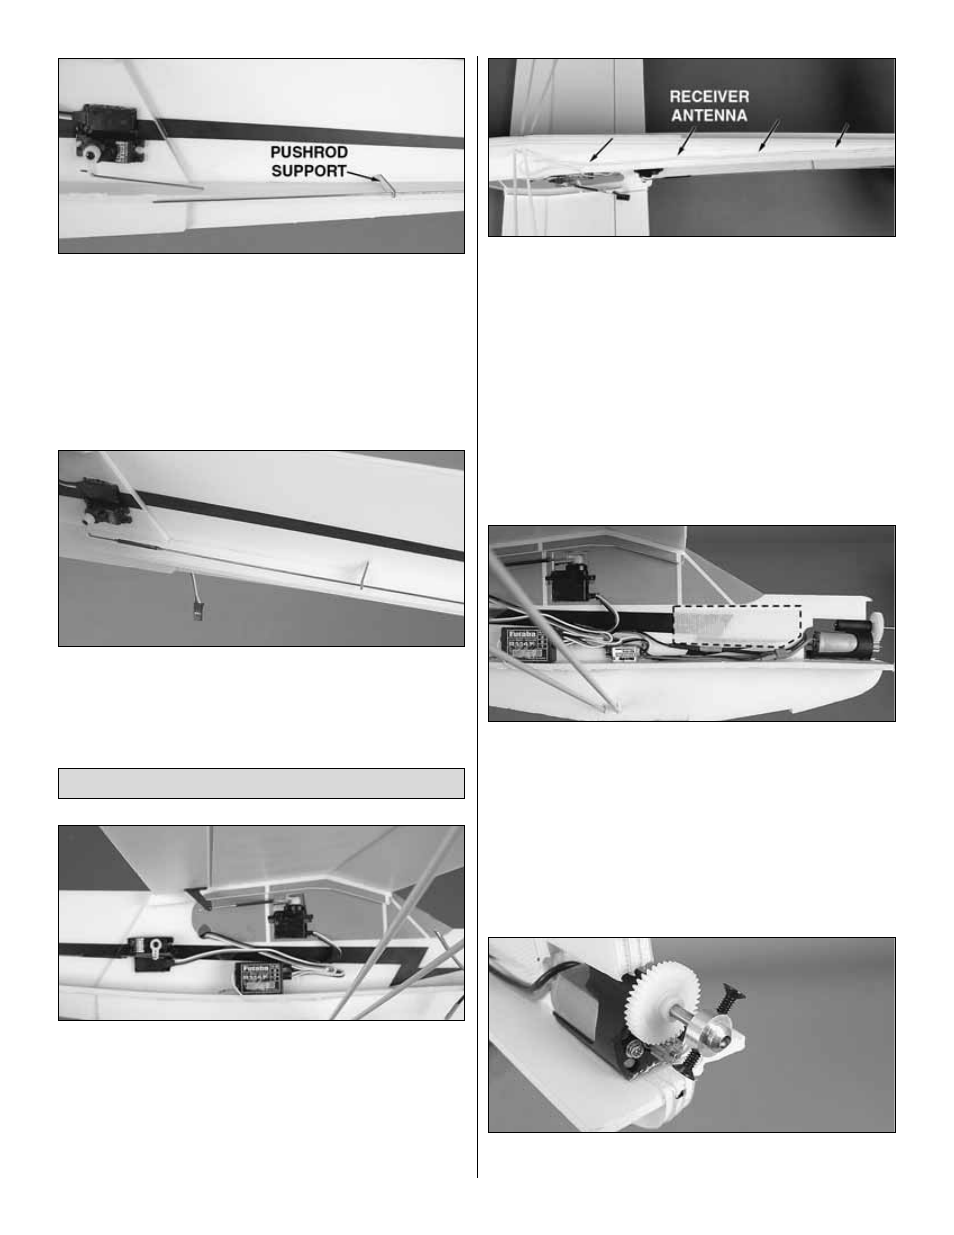
❏
4. Hook the remaining two 2-1/4" [57mm] pushrods into
the outer hole of the elevator and rudder control horns.
Connect the 16-1/4" [413mm] pushrods onto the inner hole
of the elevator and rudder servo horns. Slide a pushrod
support onto the elevator and rudder pushrods. Join the
pushrod wires together with a 1" [25mm] piece of heat-
shrink tubing while centering the control surfaces. Apply a
drop of CA to the ends of the heat-shrink tubing after
shrinking the tubing with a soldering iron.
❏
5. Position the pushrod supports in the middle of the
pushrods and lightly press them into the fuselage creating
indentations in the foam. Use a sharp hobby knife to cut a
hole in the foam at the indentations you made. Insert the
pushrod supports into the holes and glue them in place.
❏
1. Determine the location of the receiver. Wipe the area with
denatured alcohol only once or twice. Excessive wiping will
remove the paint. Cut a piece of double-sided tape to fit your
receiver and stick it to the underside. Connect the aileron,
rudder, and elevator servos to the receiver. Peel the backing
from the double-sided tape and secure the receiver to the
fuselage in the location shown in the picture. For a tidy
installation you may wish to tape the servo leads to the fuselage.
❏
2. Tape the receiver antenna to the bottom of the fuselage
longeron as shown. Be sure that none of the antenna is
exposed on the underside of the airplane, as it could
become damaged on landing.
❏
3. Connect the motor leads from the ESC to the leads
coming from the motor. Plug the ESC into the receiver. Wipe
the area where the ESC will be installed with alcohol as
described in step 1. Secure the ESC to the fuselage with
double-sided tape.
❏
4. Wipe the area where the hook and loop material will be
installed as shown with alcohol as described in step 1. Apply
the “hook” side of the hook and loop material to the fuse.
❏
5. The “loop” side of the hook and loop material should be
applied to your battery.
❏
6. Attach the prop saver by tightening the two screws
against the flat spots on the prop shaft.
Install the Electronics & Propeller
10