Great Planes Fokker Dr.1 WWI ARF - GPMA1142 User Manual
Page 7
ASSEMBLE THE FUSE
Mount the Bottom Wing
❏
1. Locate two of the 3mm x 24mm [1/8" x 15/16"] dowel rods
and insert them into the bottom wing as shown, so that only
about 9mm [11/32"] sticks out. Secure them with medium CA.
❏
2. Test fi t the bottom wing to the fuse and secure it with
two 3mm x 24mm [1/8" x 15/16"] machine screws and 3mm
[1/8"] washers. The fl at side of the wing is the bottom.
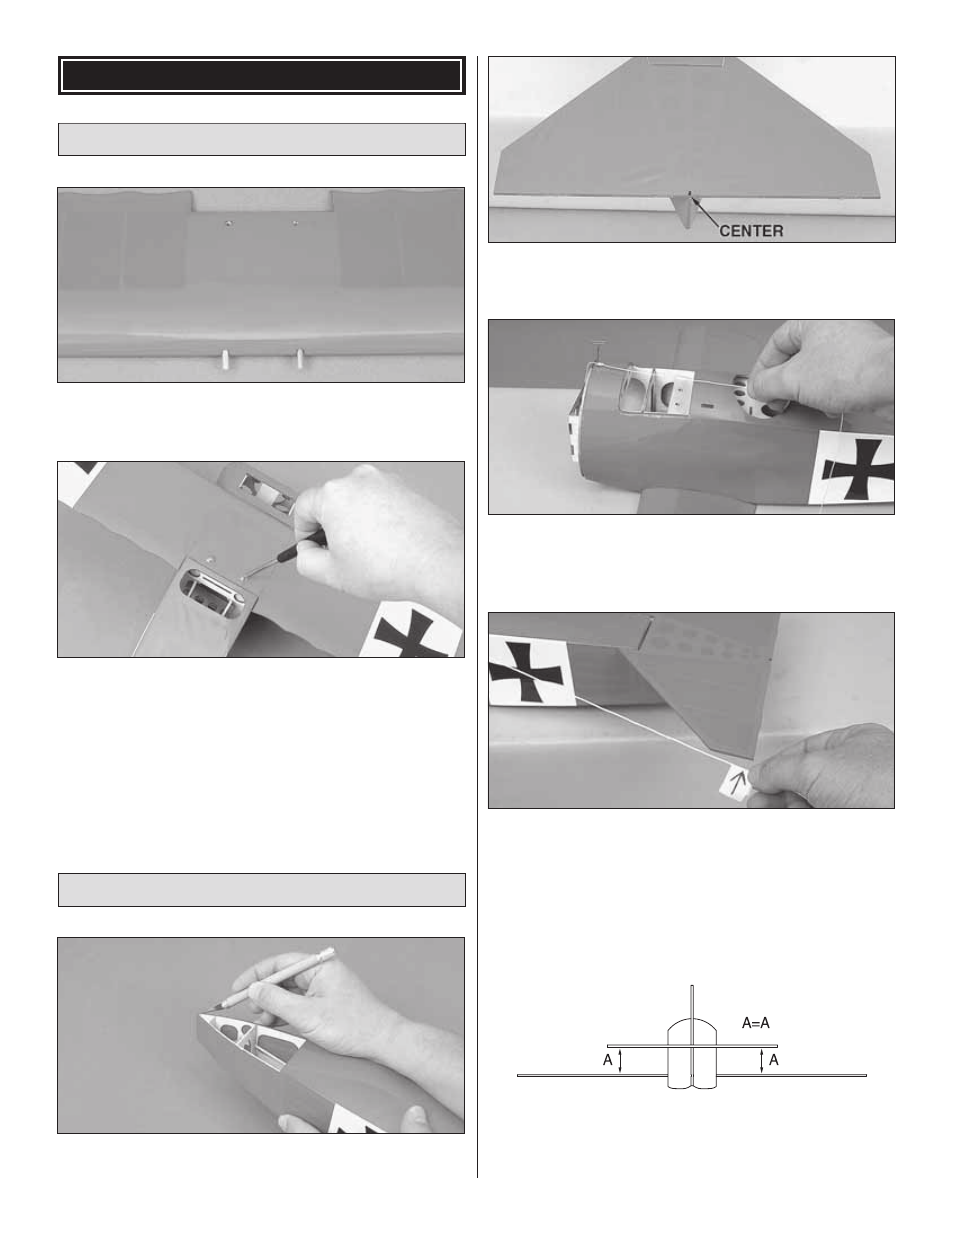
Mount the Stab & Fin
❏
1. Using a sharp hobby knife, remove the covering from
the stab cut-out at the aft end of the fuse.
❏
2. Mark the center of the TE of the stab. Place the stab
onto the stab saddle.
❏
3. Stick a T-pin into the center of the top of the fi rewall. Tie
a small loop in one end of a 900mm [35"] piece of non-elastic
string such as K&S #801 Kevlar thread. Slip the loop in the
string over the T-pin.
❏
4. Fold a piece of masking tape over the other end of the
string and draw an arrow on it. With the stab centered on the
fuse and the TE of the stab fl ush with the aft end of the fuse,
slide the tape along the string and align the arrow with one tip of
the stab. Swing the string over to the same position at the other
end of the stab. If the arrow doesn’t align with the tip, adjust the
stab and the arrow slightly and check both tips again. Adjust
the stab until the stab tips and the TE are centered.
❏
5. View the stab from approximately 3m [10'] behind the
plane. Check that the stab is parallel with the wing. If it is
not, lightly sand the stab saddle until the stab is parallel with
the wing.
7