Great Planes Fokker Dr.1 WWI ARF - GPMA1142 User Manual
Page 13
❏
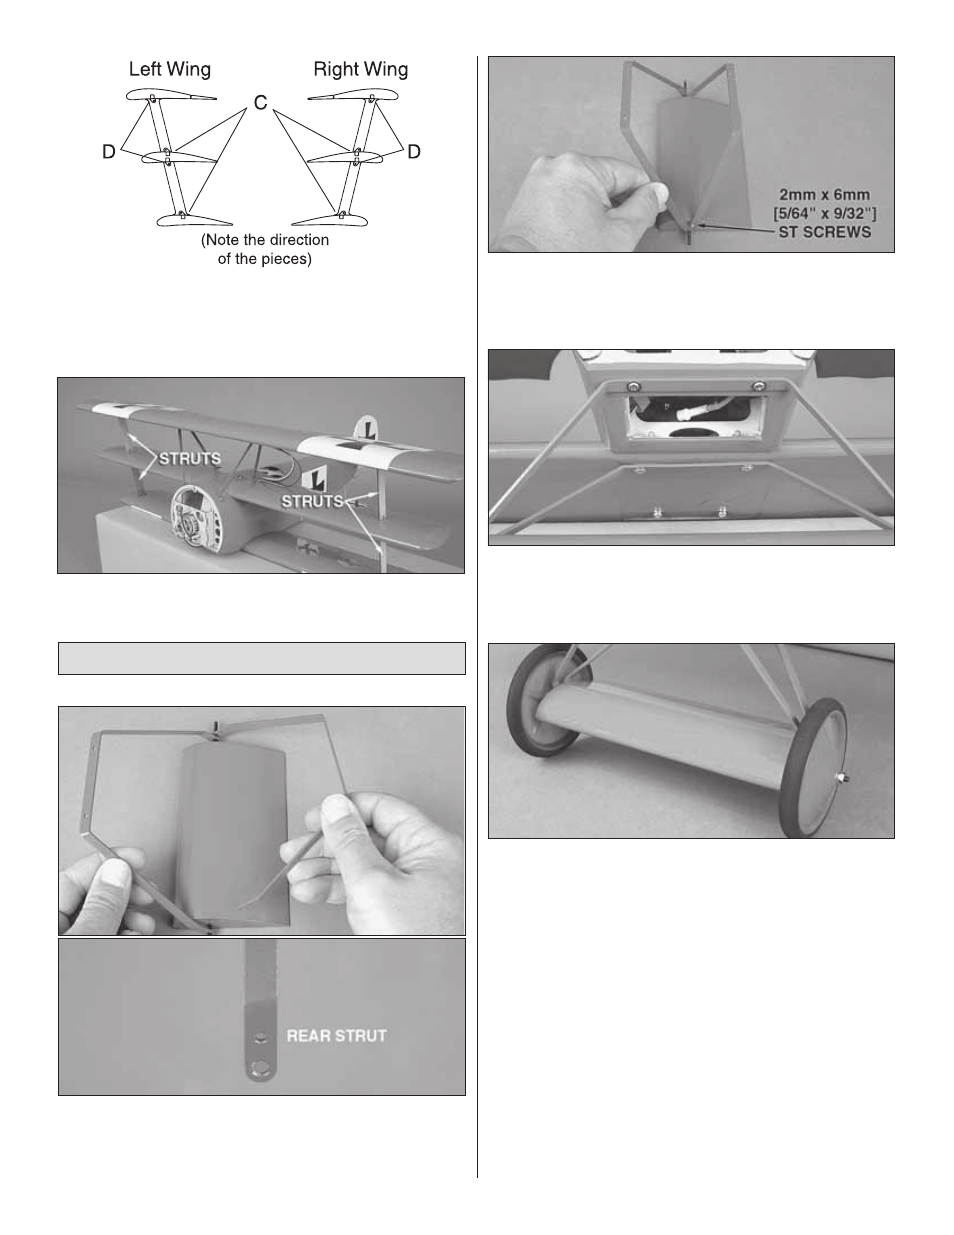
6. Study the above drawing carefully. It shows the direction
and placement of the remaining 8 strut mounts and the four
struts. Be sure to insert and remove a 2mm x 6mm [5/64" x
15/64"] self-tapping screw through each one and apply thin
CA into each hole to harden the threads.
❏
7. Use 2mm x 6mm [5/64" x 15/64"] self-tapping screws to
secure the struts as shown.
Install the Sub-Wing & Landing Gear
❏
1. Carefully thread the axle through the sub-wing and
attach the rear landing gear strut followed by the front landing
gear strut as shown. The rear strut is identifi ed by a second
hole near the axle hole.
❏
2. Secure the sub-wing to the landing gear with two 2mm x
6mm [5/64" x 15/64"] self-tapping screws as shown. Remove
the screws and harden the holes with thin CA. Then, reinstall
the screws.
❏
3. Attach the landing gear to the bottom of the fuse with
four 2mm x 7mm [5/64" x 9/32"] self-tapping washer head
screws. Remove the screws and harden the holes with thin
CA. Then, reinstall the screws.
❏
4. On each end of the axle, place a 3mm [1/8"] washer
and 3mm [1/8"] nut with threadlocker, followed by another
3mm [1/8"] washer and the wheel. Secure the wheel in place
with a 3mm [1/8"] washer and 3mm [1/8"] nut. Apply a drop
of threadlocker to the nut.
13