Great Planes Dazzler 40 ARF - GPMA1038 User Manual
Page 6
❏
4. Make a mark on the center of the wing at the leading
and trailing edge.
❏
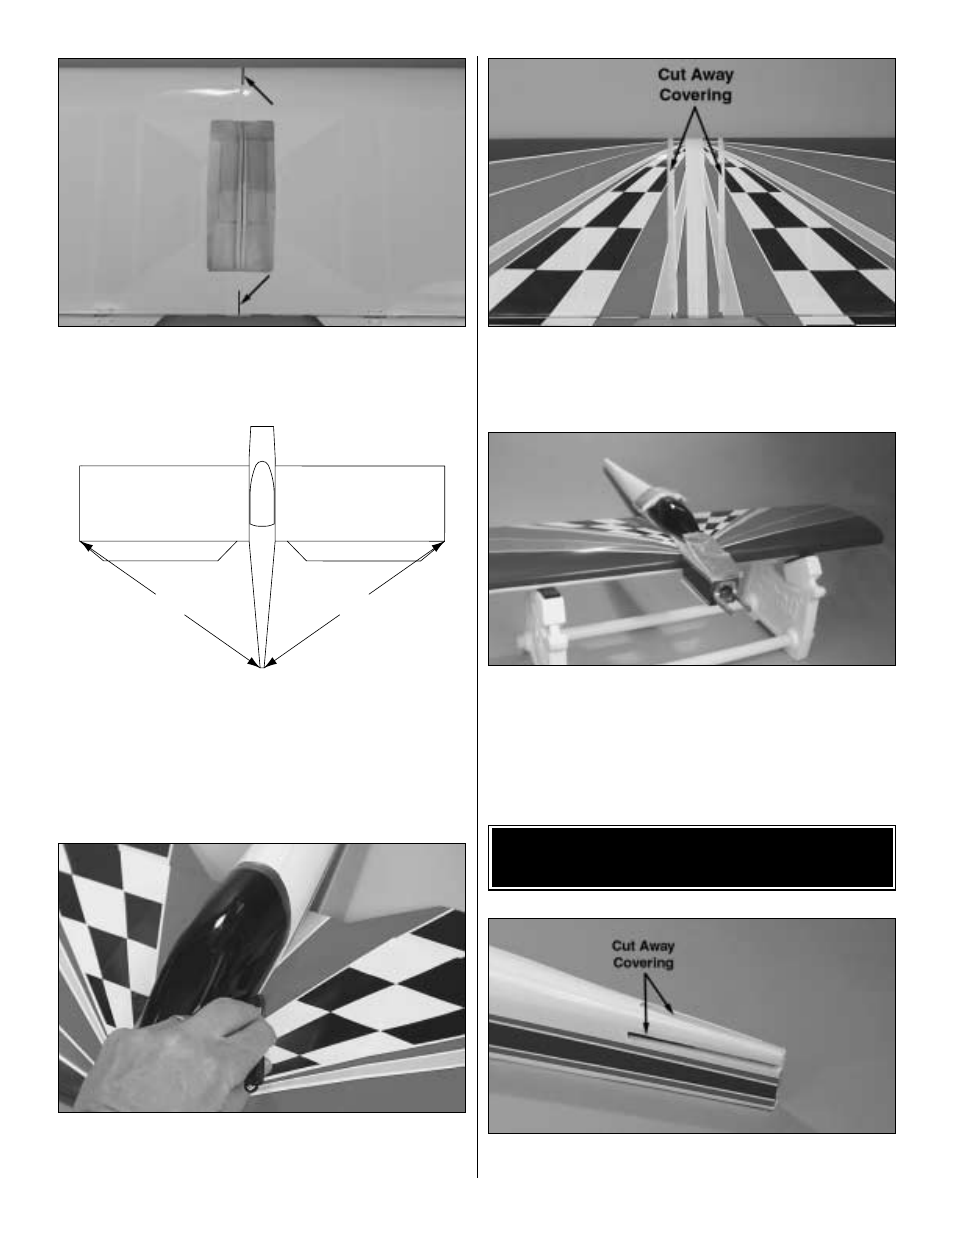
5. Place the wing on the fuselage, aligning the marks you
made on the fuse and wing. Measure from the aft center of
the fuselage to one wing tip and record the distance.
Measure from the same point to the opposite wing tip and
compare it to the first measurement. If the measurements
are not the same, adjust the wig and re-measure until they
are equal.
❏
6. Once the wing is properly positioned, turn the wing and
fuselage over and mark the location of the fuselage on the
top of the wing.
❏
7. Cut away a 1/2" [13mm] strip of the film from the wing.
Be sure the cut is inside of the line. Important: Use only
enough pressure to cut through the film. Cutting into the
wing sheeting will weaken the strength of the wing.
❏
8. Block the wing up off of the bench. Apply 6-minute
epoxy onto the wood where the covering has been cut away
and to the wood blocks. Place the fuselage onto the wing.
Place weight (bags of lead shot work well) onto the fuselage
to hold it in place on the wing and let the glue cure.
❏
1. Cut away the covering from the openings in the fuselage
for the stab and fin.
INSTALL THE STABILIZER
AND ELEVATOR
A
A
A = A
6