Great Planes Curtis P-6E Hawk ARF 1/5 Scale - GPMA1219 User Manual
Page 29
❏ ❏
16. Remove the screw from the aft top cabane, install
the cord around the cabane and then re-install the screw. Do
this on the forward bottom “N” strut as well
❏
17. This completes the wires for the left side. Repeat
steps 9-16 for the opposite side.
❏
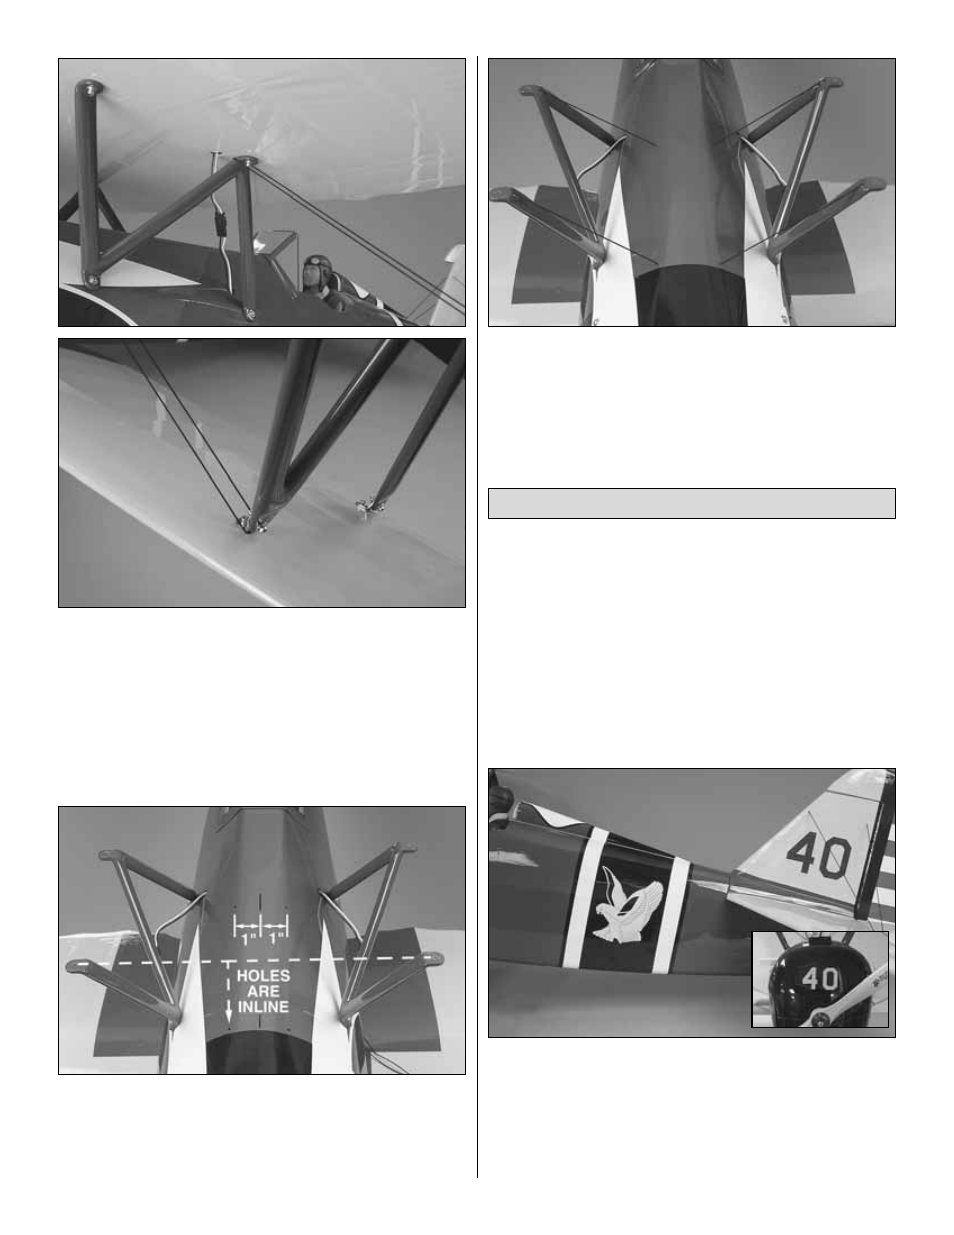
18. Make marks identifying the top center of the fuselage.
Mark four holes as shown. The marks should be inline with
the top of the cabane mounting holes, 1" [25.4mm] on each
side of the centerline. Drill partially into the fuselage with a
5/64" [2mm] drill on each of the four marks.
❏
19. Cut four pieces of elastic cord 4-1/2" [114mm] long.
Glue a cord into each of the four holes. Stretch the cord to
the top of the cabane and glue the cord to the cabane with
a small drop of CA.
❏
1. Use scissors or a sharp hobby knife to cut the decals
from the sheet.
❏
2. Be certain the model is clean and free from oily
fingerprints and dust. Prepare a dishpan or small bucket with
a mixture of liquid dish soap and warm water–about one
teaspoon of soap per gallon of water. Submerse the decal in
the soap and water and peel off the paper backing. Note:
Even though the decals have a “sticky-back” and are not the
water transfer type, submersing them in soap & water allows
accurate positioning and reduces air bubbles underneath.
❏
3. Position decals on the model as shown on the box
cover. Holding the decal down, use a paper towel to wipe
most of the water away.
❏
4. Use a piece of soft balsa or something similar to
squeegee remaining water from under the decal. Apply the
rest of the decals the same way.
Apply the Decals
29