Mount the cowl – Great Planes Curtis P-6E Hawk ARF 1/5 Scale - GPMA1219 User Manual
Page 14
❏
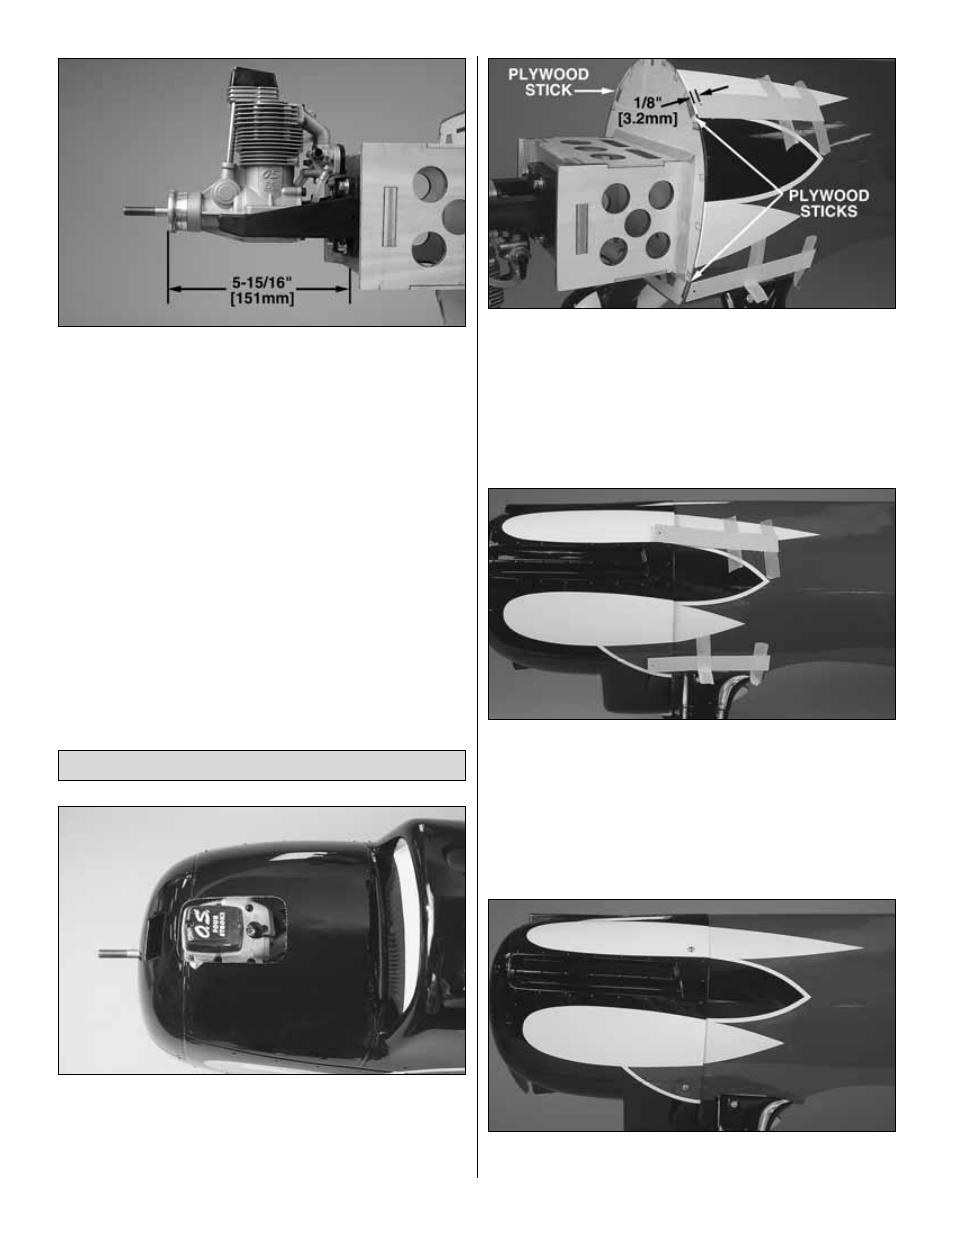
5. Remove the cowl and position the engine on the mount
so the distance from the firewall to the front of the thrust
washer measures 5-15/16" [151mm]. If the distance
measured in the previous step was different than 5-7/8"
[149mm], add 1/16" to 3/32" [1.6mm to 2.4mm] to the
measurement. This is the distance the front of the thrust
washer should be from the firewall. Mark the location of the
engine on the mount. The Great Planes Dead Center
™
Hole
Locator (GPMR8130) works well for this. Drill through the
marks you have made on the engine mount with a #29 or
9/64" [3.6mm] drill bit. Tap each of the holes with an 8-32 tap.
❏
6. Install the engine onto the mount with four each,
8-32 x 1" [25mm] socket head cap screws, #8 flat washers
and #8 lock washers.
❏
1. Slide the cowl over the engine as far as possible. Mark
the location at which the head of the engine hits the cowl.
Remove the cowl and cut a small hole in the cowl at the
mark. First cut the hole undersize, checking the fit as you
enlarge the hole.
❏
2. Use four pieces of thin cardboard or plastic to mark the
location for the cowl mounting screws on the fuselage. The
location should be 1/8" [3.2mm] from the front of the forward
former, centered on the four plywood sticks.
❏
3. Once the hole in the cowl is large enough to clear the
engine head, slide the cowl over the fuselage. Install a
propeller on the engine.
❏
4. Align the cowl with the feathers on the side of the
fuselage. Also center the thrust washer in the front of the
cowl. Make sure the propeller clears the cowl by at least
1/16" [1.6mm]. Use masking tape to hold the cowl in position.
❏
5. Drill a 3/32" [2.4mm] pilot hole through the cowl and
fuselage at each of the four cowl mounting locations.
Enlarge the holes to 1/8" [3.2mm] in the cowl only.
❏
6. Attach the cowl to the fuselage using four #4 x 1/2"
[12.7mm] sheet metal screws and four #4 flat washers.
Mount the Cowl
14