Wing installation, Wing assembly – Great Planes AT-6 Texan ARF 40 MonoKote - GPMA1245 User Manual
Page 5
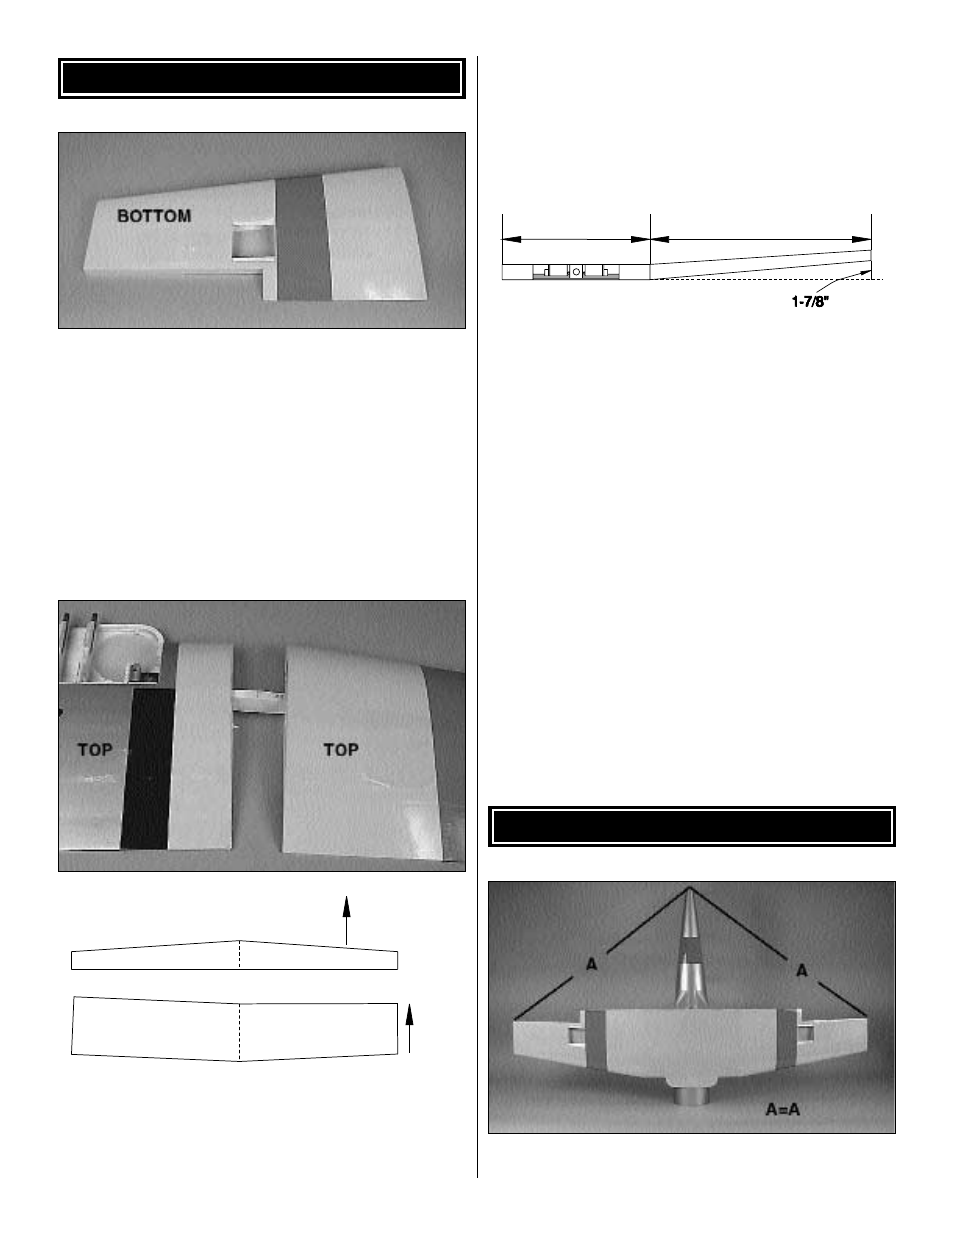
❏
1. Remove the covering from the Aileron Servo
Openings on the bottom of the wing only. Cut 1/8” (3mm)
inside of the opening to allow some material to iron down
inside the opening. Use a sealing iron to secure the
covering around the opening.
❏
2. Locate the preinstalled strings in the Center Section
and Outer Panels. When attaching the outer panels to the
center section, the strings for installing the aileron servos
must be moved so they do not interfere with the fit of the
panels. Don’t remove the string because you will use it to
pull your aileron servo cords through the wing later.
❏ ❏
3. Locate the hardwood wing joiners. Use the sketch
to differentiate the left and right joiners. (The sketch is of
the right wing joiner.) Draw a centerline on both sides of the
right joiner. Test fit the wing joiner into the right wing panel
and the right side of the center section. A snug fit of the
joiner is desirable. If the joiner does not fit properly, lightly
sand any uneven surfaces from the joiner edges and sides.
Note: The wing joiners are tapered to fit into the wing
panels. Make sure the angles are lined up to provide the
correct alignment of the wing panels and center section.
Use the sketch to determine the orientation of the joiner.
Make a dry run of the following step without using any
glue so you will know how to join your wing together.
❏ ❏
4. Untape the preinstalled strings in the Center
Section and Outer Panels. Tie the strings together, being
careful not to pull the strings out of the panels. Note: Don’t
remove the strings because you will use them to pull your
aileron servo cords through the wing later. Use a liberal
amount of 30-minute epoxy to glue the wing joiner into the
right wing panel and center section. Apply epoxy to all sides
of the joiner, joiner pockets, and center ribs of both the right
wing panel and center section. Join the wing panel and
center section. Use masking tape to tightly tape the right
wing panel and center section together. Be certain the
leading and trailing edges align. Wipe off any excess epoxy
from the outside of the wing with a paper towel and rubbing
alcohol. With the center section upright and flat on your
building surface, measure the distance from your work
surface to the tip of the outer panel to make sure you have
the correct amount of polyhedral as shown in the sketch.
❏
5. After the epoxy has cured, repeat the above steps 3
and 4 to join the left wing panel to the center section.
❏
1. Place the wing on the Fuselage. Measure from the aft
center of the fuselage to one wing tip and record the
WING INSTALLATION
CENTER SECTION
TIP SECTION
CENTER
SECTION
TIP
PANEL
FRONT
TOP
WING ASSEMBLY
5