Rear module installation (optional) – Cobalt Networks AES Audio Delay 9301 User Manual
Page 10
Page 10 of 20
CDI-9323 User Manual
••••
(V 0.5)
Rear Module Installation (Optional)
If you are installing the card in a 8310-C-BNC or 8310-BNC frame (one with a 100 BNC rear module
installed across the entire back plane), skip this section.
If you are installing the card into a slot with no rear module, you should have ordered and received a
rear module with the card. The 9301 can be ordered with an RM-9301-A, RM-9301-B, or RM-9301-C
with your card. You will need to install it in your 8310 frame before you can connect cables.
Use the following steps to install the rear module in an 8310 openGear frame:
1. Refer to the openGear 8310 frame User Manual, to ensure that the frame is properly
installed according to instructions.
2. On the rear of the 8310, locate the card frame slot. If you are using a two slot rear IO
module, make certain that the card mating slot is in the slot you with to load the card
in.
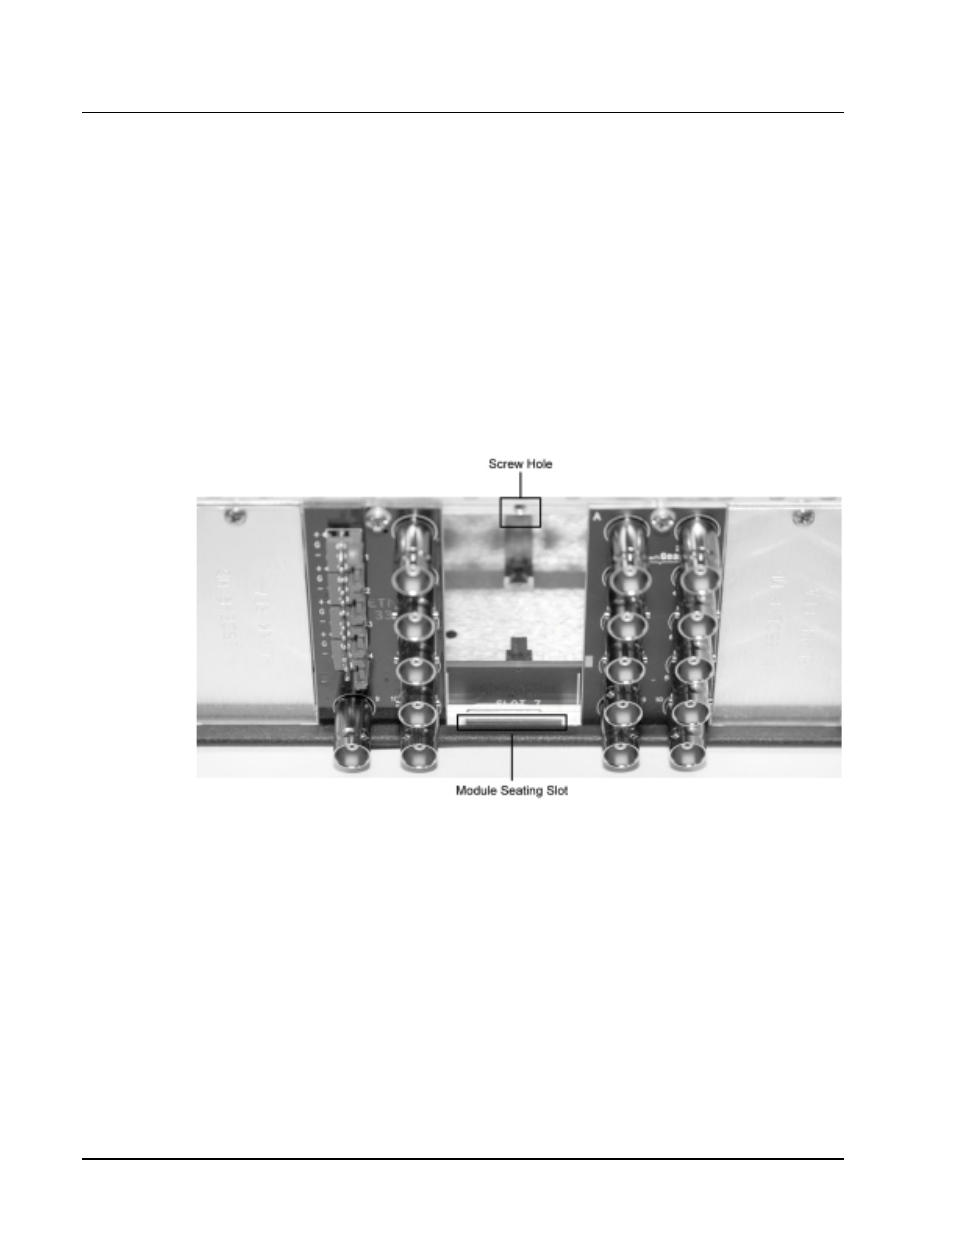
3. As shown in Figure 2, seat the bottom of the rear module in the seating slot at the
base of the frame’s back plane.
Figure 2. Rear Module Installation
4. Align the top hole of the rear module with the screw hole on the top edge of the 8310
back plane.
5. Using a Phillips driver and the supplied screw, fasten the rear module panel to the
8310 back plane. Do not over tighten.
This completes the procedure for installing the 9301 rear module in an 8310 openGear frame.