Install wing struts (optional) final assembly – Great Planes Piper J-3 Cub 40 Kit - GPMA0160 User Manual
Page 35
NOTE: The wing struts are for scale appearance only.
Built according to the plans and instructions, the
airframe has sufficient strength for normal aerobatic
flying without the struts. Before proceeding, make sure
that you have the wing seated and installed on the
fuselage in its final position. However you must use the
struts to fly your cub if it is covered with anything other
than MonoKote.
❏
1. Refer to the fuselage plan and, by measurement, mark
the wing strut strap locations on the fuse sides.
❏
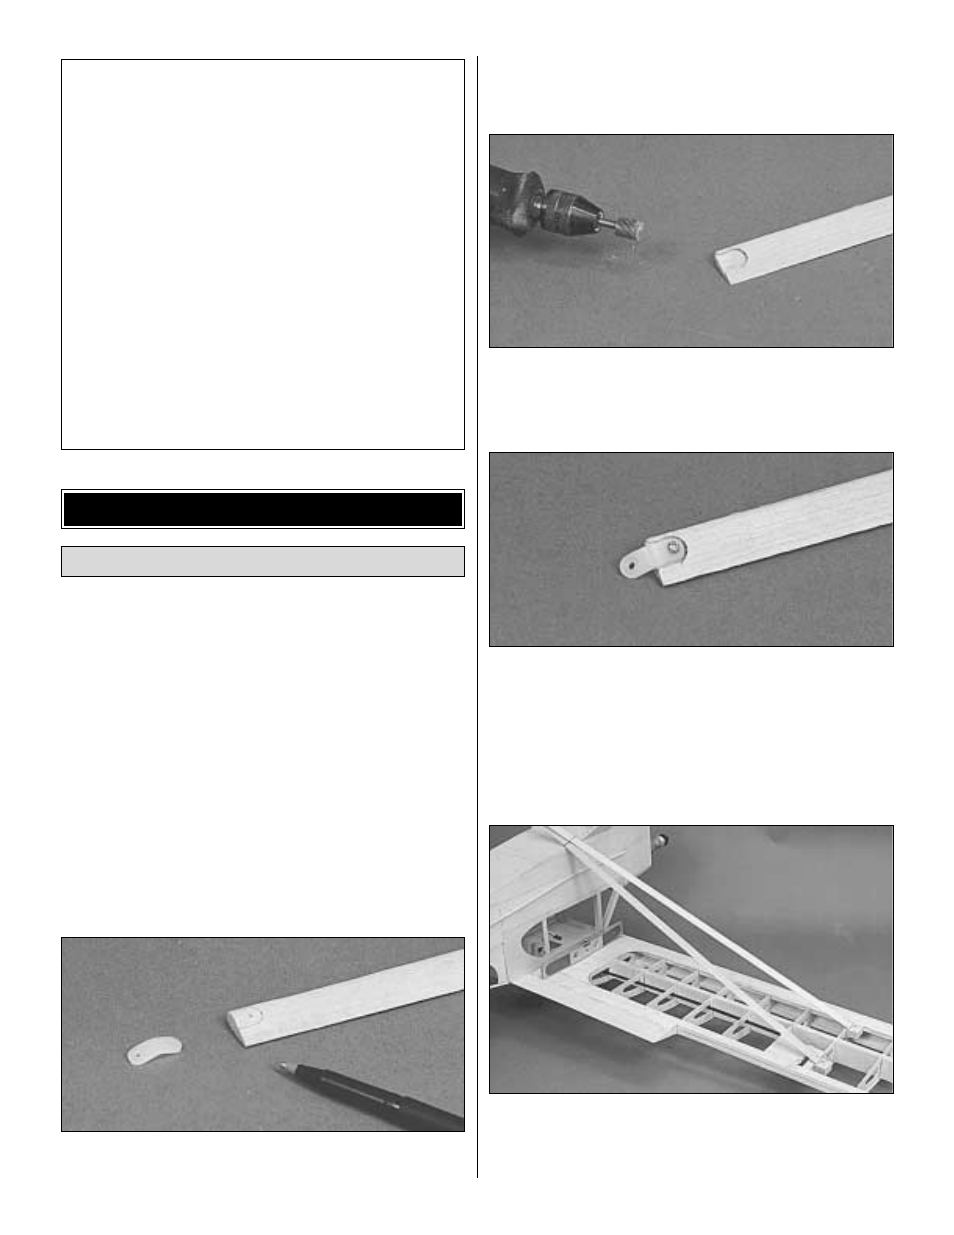
2. Sand all surfaces and the LE and TE of the shaped
basswood Struts (STRUT001) smooth.
❏
3. Bend six nylon straps with pliers just as you did earlier
for the landing gear fairings.
❏
4. Place a nylon strap on the outboard end of each strut
so that 1/2 of the strap overhangs the end of the strut and
trace around the strap. NOTE: Make two Right and two Left
struts and keep in mind that these straps are on the top of
the outboard end of the struts.
❏
5. Cut out the marked area 3/32" deep so the strap is
recessed into the end of the strut.Test fit the nylon strap into the
recessed area and check for the fit. The strap should be slightly
below the strut surface. A Dremel tool works well for this.
❏
6. Drill 1/16" holes and mount a strap to each strut using
#2 x 3/8" sheet metal screws (SCRW024). Apply thick CA
to each strap to help hold it securely in place. Cut and file off
the pointed tip of each screw so it is flush with the surface
of the strut.
IMPORTANT: Follow steps 7-11 in their exact sequence,
to avoid ending up with a locked-in wing twist.
❏
7. Lay the assembled airframe upside down on the work
surface and support the center of the wing so the wing tips
are not touching anything. Use a bubble level placed near the
fuselage to adjust the attitude of the plane until the bottom
Install Wing Struts (Optional)
FINAL ASSEMBLY
These are the recommended control surface throws
(NOTE: Throws are measured at the widest part of the
elevator and rudder.):
High Rate
Low Rate
ELEVATOR:
1-1/8" [29mm] up
5/8" [16mm] up
1-1/8" [29mm] down 5/8" [16mm] down
RUDDER:
1-3/8" [35mm] right
1" [25mm] right
1-3/8" [35mm] left
1" [25mm] left
AILERONS:
3/4" [19mm] up
1/2" [13mm] up
11/16" [17mm] down 7/16" [11mm] down
*NOTE:
These control surface “throws”
are
approximate and provide a good starting point for the
first flights with your Piper Cub. You may wish to
change the throws slightly to provide the smoothness
or quickness that you prefer. Increased elevator throw
may be required for spins and snap rolls.
35