Great Planes ElectriCub Kit - GPMA0156 User Manual
Page 26
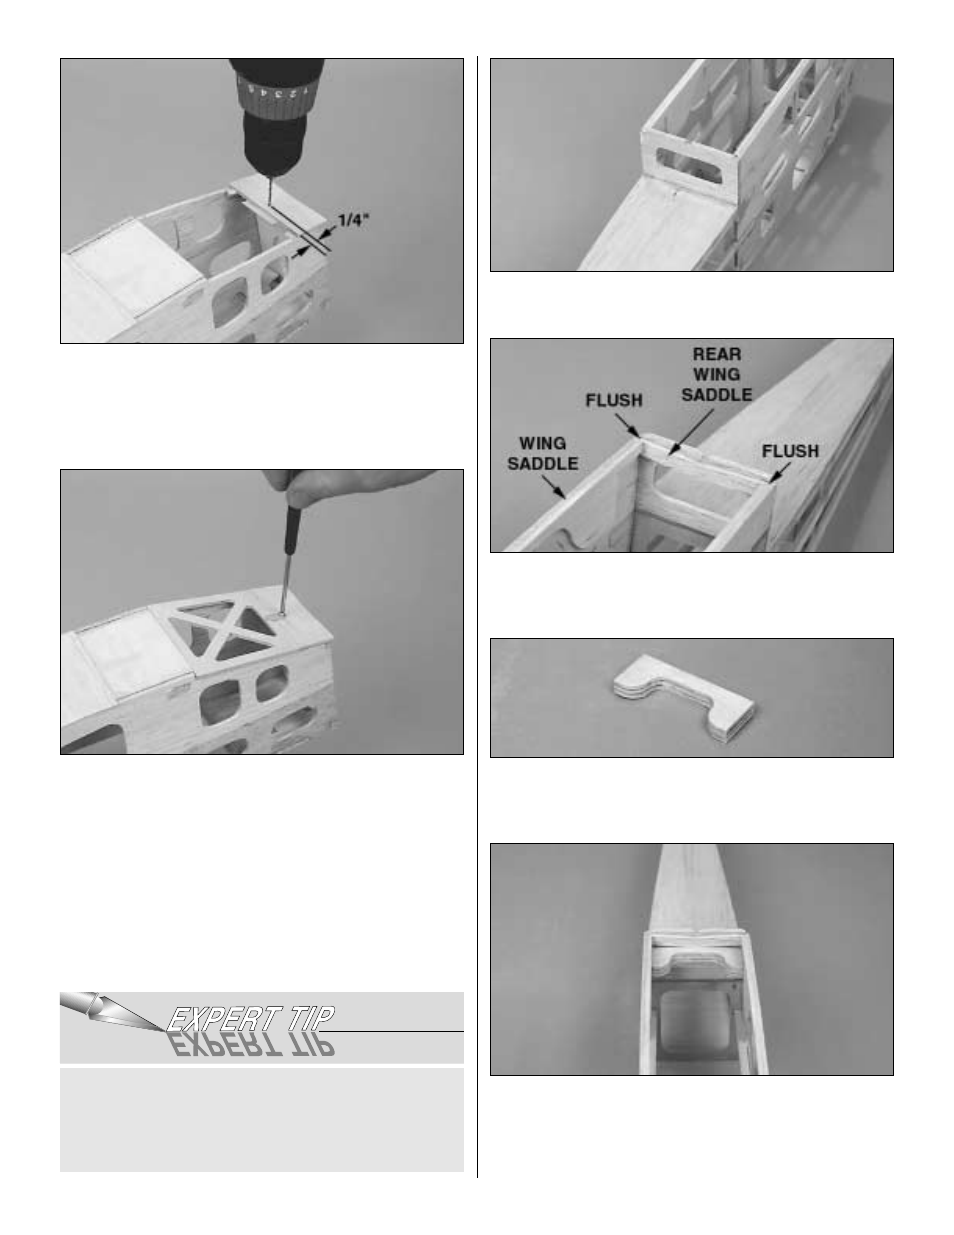
❏
40. Center the hatch locking tab on the aft edge of the
chin plate. Mark the location of the screw hole on the chin
plate and drill a 1/16" pilot hole.
❏
41. Attach the hatch locking tab to the chin plate with a #2
washer and #2 x 3/8" sheet metal screw.
Note: The hatch locking tab is designed to keep the battery
hatch closed during flight, yet it allows quick access to the
front compartment for easy insertion and removal of the
motor battery. You must adjust the tab screw for
sufficient friction so it will not allow the battery hatch to
open during flight. Periodically check and re-tighten the
screw if necessary.
❏
42. Glue the die-cut 1/8" balsa former F-3A to the rear
edges of the upper fuse sides and the aft deck base.
❏
43. Glue the die-cut 1/8" balsa rear wing saddle into the
slots in the wing saddle doublers, flush with the top of the
wing saddle.
❏
44. Use epoxy to glue the three die-cut 1/8" plywood wing
bolt plates together. Use clamps to hold the plates together
until the epoxy cures.
❏
45. Lightly sand the edges of the wing bolt plate to remove
any excess epoxy. Test fit the wing bolt plate into the slots in
the fuse sides, sanding as necessary to provide a good fit.
When satisfied with the fit, use epoxy to glue the wing bolt
plate to the fuse.
To reduce the weight of the wood structure, you can
enlarge the lightening holes by 1/16" in the lower fuselage
sides. A drum sander or a piece of sandpaper wrapped
around a dowel makes quick work of it.
26