Great Planes Super Sportster 40 MkII ARF - GPMA1042 User Manual
Page 18
❏
4. Paint the pilot. Acrylic paints found at craft stores are
recommended as they usually have a satin finish and wash
up with water.
❏
5. Securely glue the pilot into position.
❏
6. Glue the canopy into position with R/C-56 Canopy
Glue (JOZR5007), clear RTV silicone or CA. If using CA,
first use a fine-point ballpoint pen to draw the outline of the
canopy onto the covering. Use a hobby knife to trim a 1/16"
[2mm] strip of covering just inside the canopy outline, or use
a T-pin to poke several holes through the covering into the
balsa. Remove the ink line with a tissue dampened with
alcohol. Glue the canopy into position using CA sparingly.
Otherwise, it will “fog” the canopy as it hardens.
❏
7. Apply 1/4" [6mm] striping tape around the edges of the
canopy as shown.
❏
8. Since the right side of the fuselage gets coated with
much oil from the engine exhaust, it would be a good idea
to apply white or clear RTV silicone around the edges of the
canopy where it contacts the fuselage. If the gap between
the canopy and the fuselage is not thoroughly sealed, over
time, this residue may loosen the glue joint between the
canopy and fuse and eventually seep into the cockpit.
❏
1. Look for areas of bare balsa in the engine compartment
that may not have been coated with epoxy. If there are any,
coat them with fuelproof paint or 30-minute epoxy. This can
be done with an epoxy brush, or a piece of a paper towel.
❏
2. Coat the bare wood on the front of the middle of the
wing and the inside of the radio compartment near the
edges of the covering with fuelproof paint or epoxy. Only a
thin coating is all that is required–just to keep exhaust
residue or cleaners from soaking into the wood.
1. Use scissors or a sharp hobby knife to trim the decals
from the sheet.
2. Determine the location of the decals using the photos on
the kit box cover as a guide.
3. Be certain the model is clean and free from oily
fingerprints and dust. Prepare a container such as a dishpan
or a small bucket with a mixture of liquid dish soap and
warm water–about one teaspoon of soap per gallon of
water. Submerse the decal in the solution and peel off the
paper backing.
4. Position the decal on the model where desired. Holding
the decal, use a paper towel to wipe most of the water away.
5. Use a piece of soft balsa or something similar to
squeegee remaining water from under the decal. Apply the
rest of the decals the same way. This “soap and water”
technique allows for accurate placement of the decal and
eliminates air bubbles.
At this stage the model should be in ready-to-fly condition
with all of the systems installed including the engine, landing
gear, propeller and spinner and the radio system. The fuel
tank should be empty.
❏
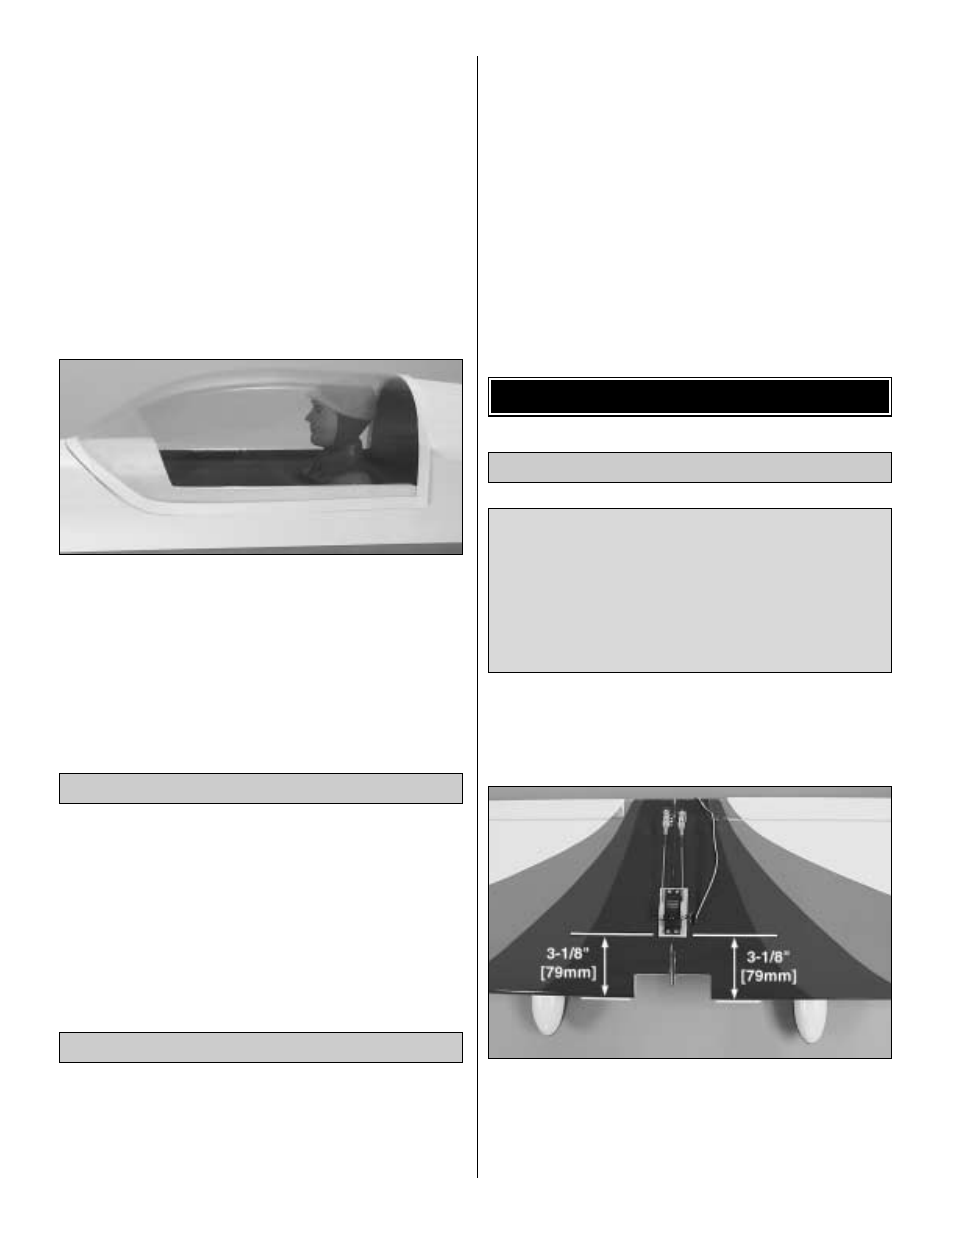
1. If using a Great Planes C.G. Machine to balance the
model, read the note following this step, then proceed to
step 2. If you do not have a Great Planes C.G. Machine, use
a felt-tip pen or 1/16" to 1/8" [1.5 to 3mm] tape to accurately
mark the C.G. on the top of the wing 3-1/8" [79mm] from the
leading edge of the wing next to both sides of the fuselage.
More than any other factor, the C.G. (center of gravity,
also referred to as the balance point) can have the
greatest effect on how a model flies, and may determine
whether or not your first flight will be successful. If you
value this model and wish to enjoy it for many flights, DO
NOT OVERLOOK THIS IMPORTANT PROCEDURE. A
model that is not properly balanced will be unstable and
possibly unflyable.
Balance the Model (C.G.)
GET THE MODEL READY TO FLY
Apply the Decals
Fuelproof the Model
18