Finish the model install the receiver – Great Planes Revolver GP/EP ARF 70" - GPMA1019 User Manual
Page 17
17
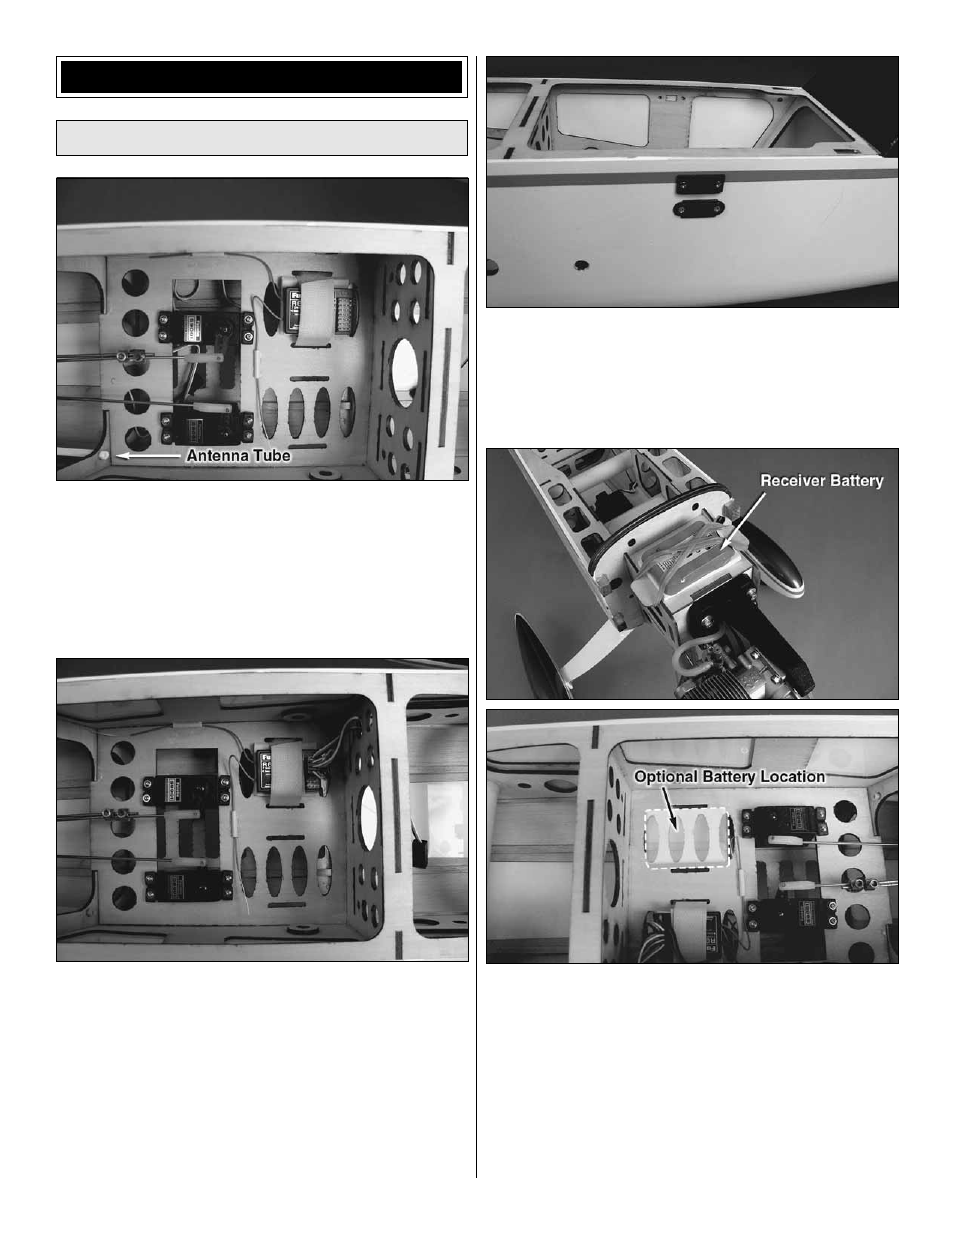
FINISH THE MODEL
Install the Receiver
❏
1. Make a strap from the included hook and loop material
to fi t your receiver. Cut a piece of foam rubber (not included)
to fi t your receiver and then strap the receiver in front of the
servos as shown. We have installed a 2.4GHz receiver and
secured our antenna leads with scrap plastic tube. If you will
be installing a conventional 72MHz receiver we have pre-
installed a plastic tube for your antenna. It is located behind
the servo tray on the right side of the fuselage.
❏
2. Connect the servos to the receiver following the
instructions with your radio system. If you are installing an
electric power system, depending on the ESC being used,
you may need a servo extension to reach the receiver.
❏
3. Pre-cut openings are provided on both sides of the
fuselage for mounting an on/off switch. The hole spacing is
made for a Futaba mini switch harness. If you are using a
different switch, you may need to modify the pre-cut opening,
or mount it in a different location. An optional charge jack
receptacle can be mounted below the switch.
❏
4. We have provided two different locations for mounting
the receiver battery. With the O.S .91 four stroke engine
installed, our plane balanced with the battery installed on
the fi rewall box. We have also provided a mounting location
next to the receiver. Install the battery where it best balances
the airplane. If you mount the battery on the fi rewall box,
install the battery on a piece of foam and hold it in place
with rubber bands. You will need a 12" [305mm] extension
on the battery lead to reach the receiver. If you mount it next
to the receiver, secure the receiver with the Velcro included
with the airplane.