Great Planes Proud Bird ARF - GPMA1260 User Manual
Page 9
9
❏
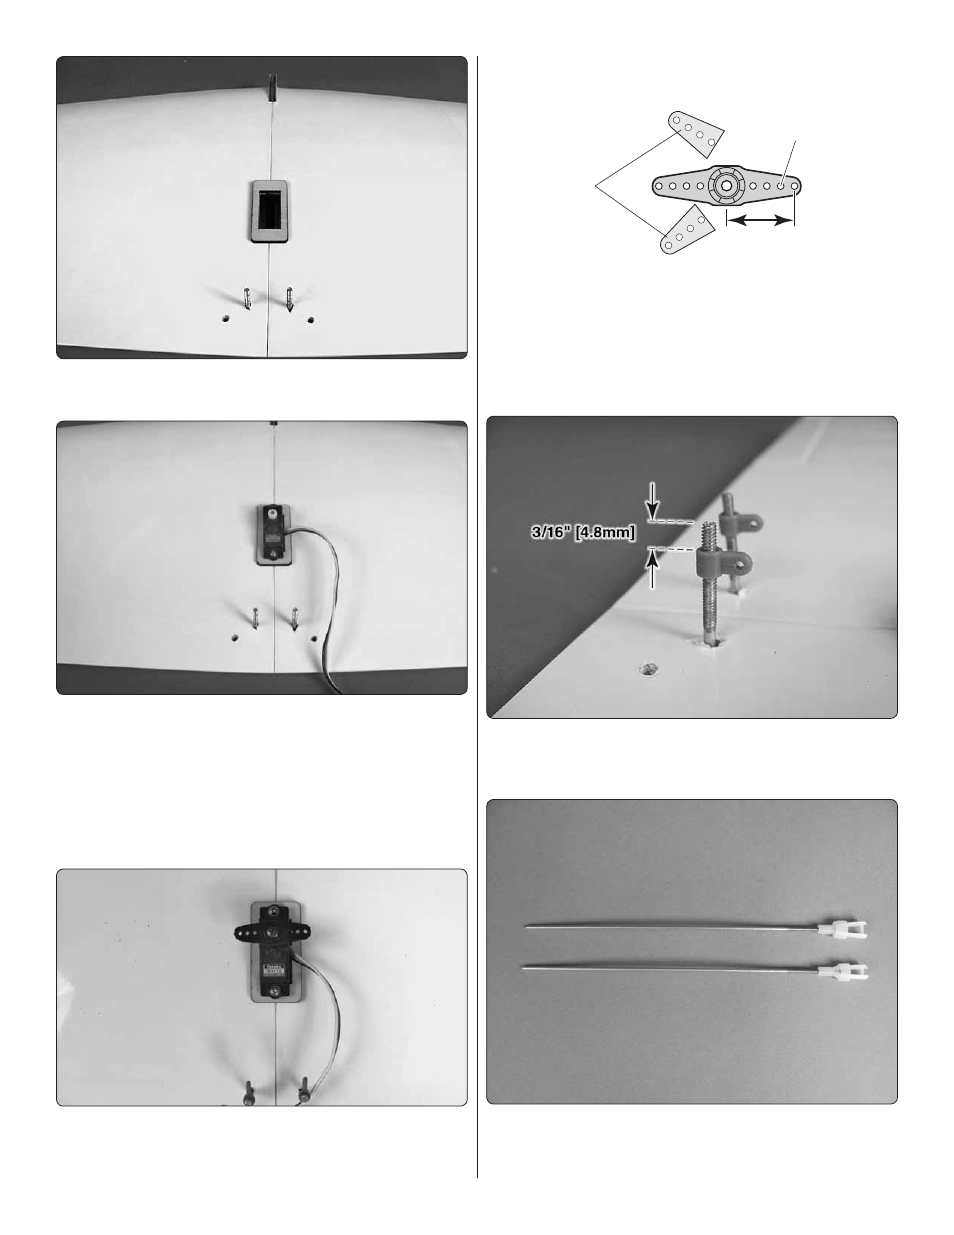
11. As you did with the wing bolt plate, remove the covering
and glue the aileron servo tray over the servo bay in the wing.
❏
12. Install the rubber grommets and eyelets included with
your servo hardware. Mount the servo as shown. Drill 1/16"
[1.6mm] holes through the servo tray to mount the aileron servo.
Remove the servo and thread a servo mounting screw into
each hole and then remove it. Apply a drop or two of thin CA
glue to each hole to harden the surrounding wood. When the
CA has hardened, install the servo with the servo mounting
screws included with the servo.
❏
13. Electronically center the aileron servo using your radio
system. Mount a four-armed servo arm onto the aileron servo.
If the servo arm does not fi t “square” to the servo case, remove
it and rotate it 90 degrees and re-install it. Repeat this until
you fi nd which way the servo arm fi ts best onto the servo.
Cut Off
Unused Arms
5/64" [2mm]
17/32" [13.5mm]
Make note of its orientation, remove it, and cut off the two
unused arms as shown in the picture. Because the aileron
pushrods will connect to the holes 17/32" [13.5mm] from
the center of the servo arm, cut off the excess arm length
beyond these holes. Enlarge those holes with a 5/64" [2mm]
drill bit. Install the arm on the servo and secure it with the
servo arm screw.
❏
14. Thread a nylon torque rod horn onto each torque rod.
The horns should be positioned 3/16" [4.8mm] from the ends
of the rods.
❏
15. Thread a nylon clevis onto each 2x90mm pushrod
wire 20 complete turns. Slide a silicone clevis onto the base
of each clevis.