Great Planes Proud Bird ARF - GPMA1260 User Manual
Page 13
13
❏
11. Prepare three CA hinges with T-pins and insert them
into the rudder (we recommend test fi tting the rudder and tail
wheel wire onto the fuselage without glue before completing
this step). Clean the section of the tail wheel wire that fi ts
into the rudder with denatured alcohol. Apply a drop or two
of household oil to the tail wheel hinge point bearing. Mix up
a small batch of epoxy and use a toothpick to coat the inside
of the hole in the rudder as well as the hole you drilled in the
previous step. Apply a very light coating of epoxy onto the tail
wheel hinge point. Insert the tail wheel wire into the rudder
and the hinges and hinge point into the fuselage. Wipe away
any excess epoxy with alcohol. Remove the T-pins from the
hinges and apply 6 to 7 drops of thin CA to both sides of each
hinge. Tug on the rudder to ensure that it is securely hinged.
❏
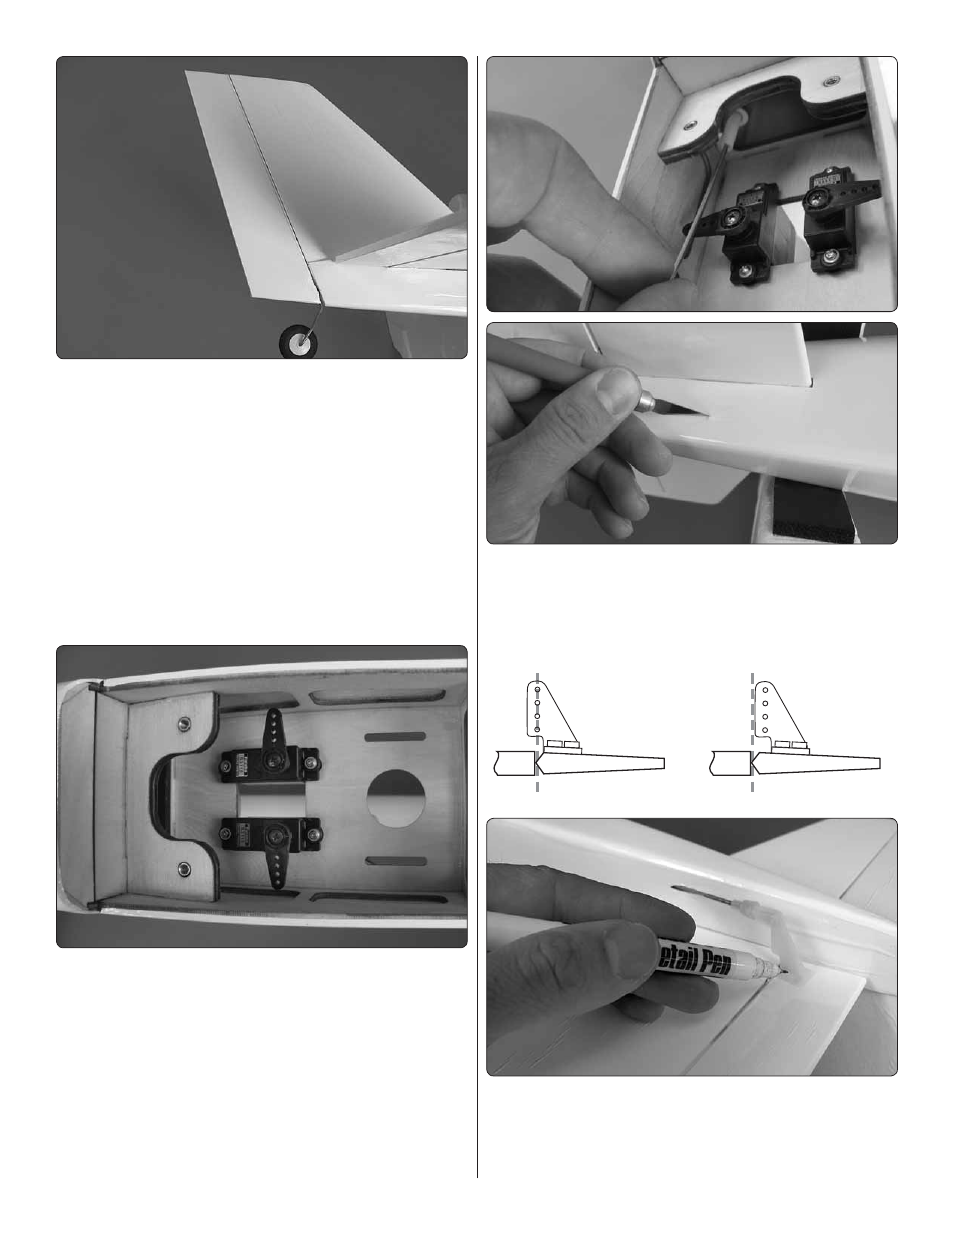
12. Mount the tail surface servos in the orientation shown.
Electronically center the servos using your radio system.
Determine the best fi t of your servo horns and cut away the
unused arms.
❏
13. Insert a 21-5/8" [550mm] long pushrod into each of the
tail pushrod tubes. Gently push them against the covering that
is over the exit slots. This will show you exactly where you need
to trim away the covering from the exit slots. Trim the covering.
Hinge Line
Hinge Line
Correct
Incorrect
❏
14. Thread a clevis onto a pushrod. Connect the clevis to
the outer hole of a control horn and insert the pushrod into
the elevator pushrod tube. Align the holes in the control horn
over the elevator hinge line and mark the location for the
mounting holes.