Finish the model – Great Planes Proud Bird ARF - GPMA1260 User Manual
Page 19
19
❏
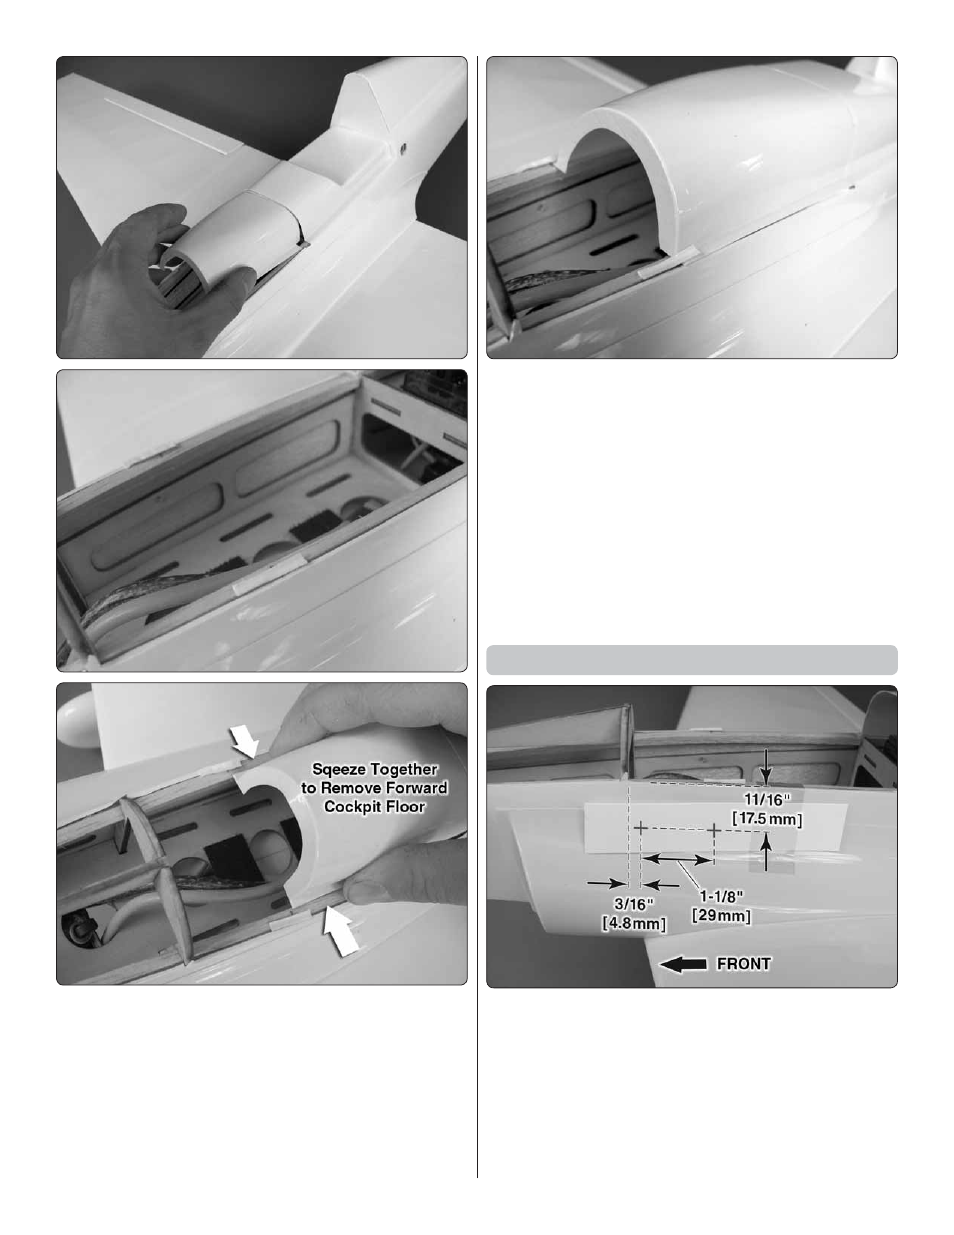
7. Test fi t the forward cockpit fl oor in place. The back end
of the forward fl oor fi ts underneath the aft cockpit fl oor. The
forward cockpit fl oor is meant to be removable to provide you
access to the battery. How you set it up to be removable is
up to you. We used some scrap material from trimming the
parts. To do this, choose a length of material that has a 90
degree bend and cut two strips approximately 1/2" [13mm]
long and 1/8" [3.2mm] wide with the 90 degree bend going
down the lengths of the strips. The crease in the strips will
help keep them rigid. With the forward cockpit fl oor in place,
glue the strips to the cockpit sides as shown, overlapping the
front edges of the fl oor piece. To remove the forward cockpit
fl oor, simply squeeze together the two front sides to unhook
the piece from the strips.
Finish the Model
❏
1. Cut strips of card stock or something similar approximately
4" [102mm] long and tape the aft ends of the strips to the
fuselage in the location shown (one on each side of the
fuselage). Use the measurements shown in the picture and
mark the pieces of card stock for the cowl mounting screws.
Use a T-pin to make small holes at your marks in the card stock.