Final assembly – Great Planes Mister Mulligan EP ARF - GPMA1485 User Manual
Page 22
22
❏
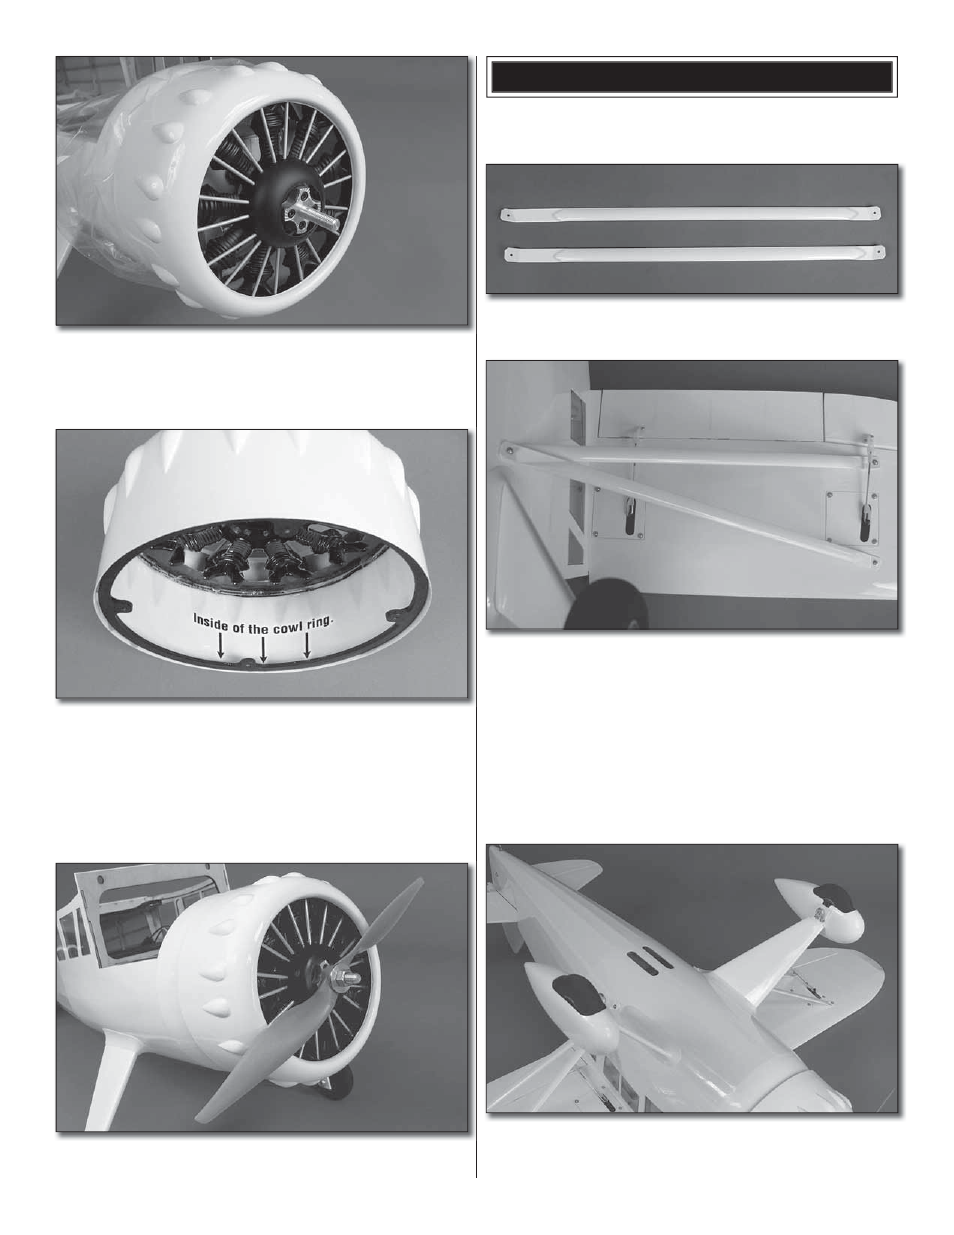
10. Apply a thin layer of 6-minute epoxy along the inside
edge of the cowl. Slide the cowl over the cowl ring and
position the cowl so that one of the dummy engine cylinders
is straight up and the prop adapter is centered.
❏
11. Once the epoxy has cured, remove the cowl and
plastic bag. To increase the strength of the joint between the
cowl and cowl ring, apply a small fillet of epoxy on the inside
of the cowl ring.
❏
12. Once the epoxy has cured, reinstall the cowl using
the 4-40 x 1/2" [13mm] socket head cap screws, #4 lock
washers and #4 flat washers.
❏
13. Install the propeller using the prop washer and nut
that came with the motor. Tighten the prop nut securely.
FINAL ASSEMBLY
❏
1.
Connect the aileron and flap servo leads to the
Y-connectors. Install the wing using two 1/4-20 nylon wing bolts.
❏
2. Identify the two right wing struts. Use the picture above
to identify the proper orientation of each strut.
❏
3. Turn the model over and install the wing struts onto
the wing and the fuselage using three 2-56 x 1/2" [12.7mm]
machine screws, three #2 lock washers, and three #2 flat
washers. Add a bit of thread locking compound to the screw
threads for added security. Lay the front strut over the rear
strut at the fuselage attachment point. Then, install the screw.
❏
4. Identify the left wing struts and install them using
three 2-56 x 1/2" [12.7mm] machine screws, three #2 lock
washers, and three #2 flat washers.
❏
5. Install the left and right wheel pants using four 4-40 x
1/2" [12.7mm] SHCS, four #4 lock washers, and four #4 flat
washers.