Tailwheel and rudder installation – Great Planes Mister Mulligan EP ARF - GPMA1485 User Manual
Page 15
15
remove the tail and lightly sand the bottom of the horizontal
stab slot on the high side and the top of the slot on the low
side. Re-fit the horizontal and vertical tail and check the
alignment once again.
❏
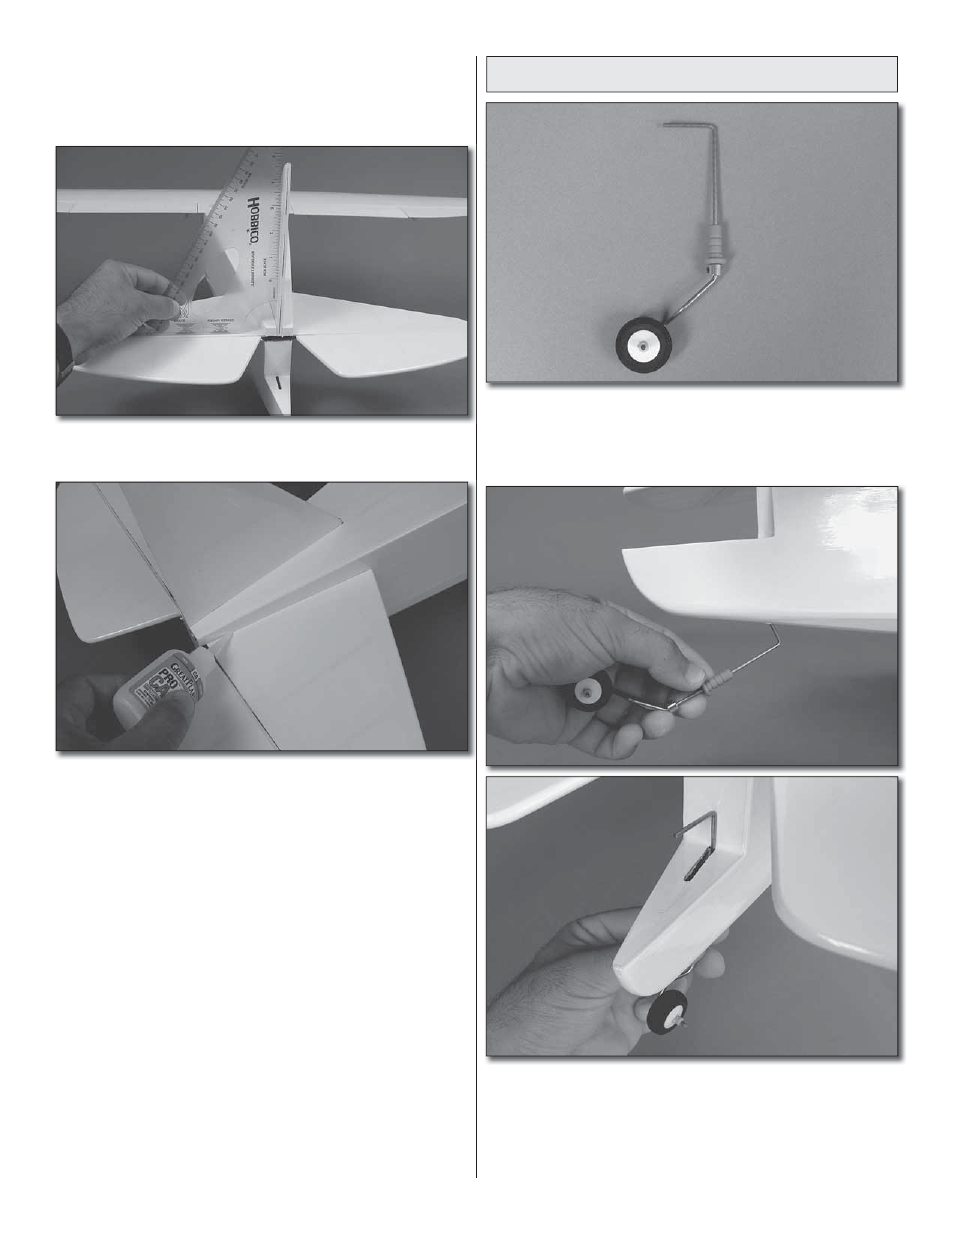
5. Using a large builder’s triangle, check the vertical tail to
see that it is square with the horizontal tail.
❏
6. Pull the vertical fin out of the fuselage. Using a toothpick
apply 30-minute epoxy to the top of the horizontal stabilizer,
through the vertical fin slot. Glue the horizontal and vertical
tail to the fuselage using thin CA. Wick several generous
beads of CA into the tail to fuselage joints. Remember to
apply glue to both sides and the top and bottom of the
horizontal stabilizer.
❏
7. Remove the wing.
Tailwheel and Rudder Installation
❏
1. Clean the surface of the plastic tailwheel bushing using
denatured alcohol. Sand the bent portion of the tailwheel
wire. Apply a drop of oil onto the tailwheel wire to prevent the
wire from being glued to the bushing.
❏
2. Insert the tailwheel assembly into the fuselage from
the bottom. Using 6-minute epoxy, glue the tailwheel bushing
into the fuselage. Don’t get epoxy in the bushing or on the
wire.