Great Planes Mister Mulligan EP ARF - GPMA1485 User Manual
Page 12
12
❏ ❏
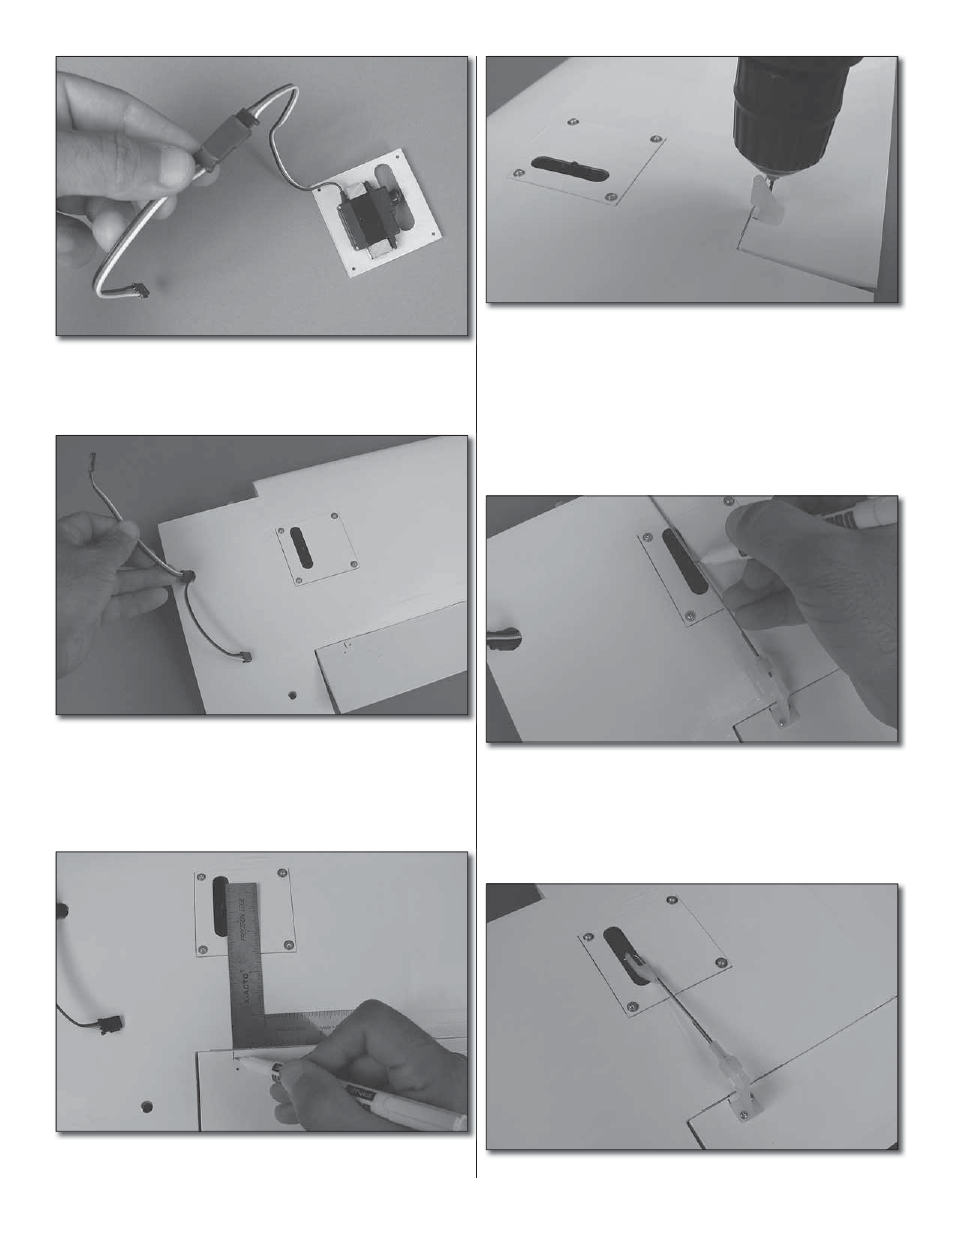
5. Attach a 6" [152mm] servo lead extension to the flap
servo. Secure the connection using 3/8" [9.5mm] heat shrink
tubing or electrical tape.
❏ ❏
6. Route the servo lead through the wing and out
of the hole in the sheeting as shown. Install the servo bay
cover in the orientation shown using four #2 x 3/8" [9.5mm]
sheetmetal screws and four #2 flat washers. Harden the
threads in the wood with thin CA as instructed before.
❏ ❏
7. Make a mark on the flap LE directly behind the
servo arm.
❏ ❏
8. Hold a small control horn over the mark you made with
the pushrod holes directly over the hinge line. Drill two 3/8"
[9.5mm] deep holes using a 1/16" [1.6mm] drill bit. Be careful
not to drill completely through the flap. Install the control horn
using two #2x3/8" [9.5mm] sheetmetal screws. Harden the
threads in the wood with thin CA.
❏ ❏
9. Prepare a 6" [152mm] pushrod the same way you
prepared the aileron servos using one nylon clevis and a
silicone clevis retainer.
❏ ❏
10. Attach the pushrod to the outermost hole in the
flap control horn. Extend the pushrod forward and line it
up with the outermost hole in the servo arm. With the flap
retracted and the servo in the retracted position as shown,
mark your first bend point on the pushrod. Make a 90° bend
at the mark you made.
❏ ❏
11. Attach the pushrod to the servo using a nylon Faslink.