Decal application, Balance the model – Great Planes Kunai 1.4M EP Rx-R - GPMA1816 User Manual
Page 13
13
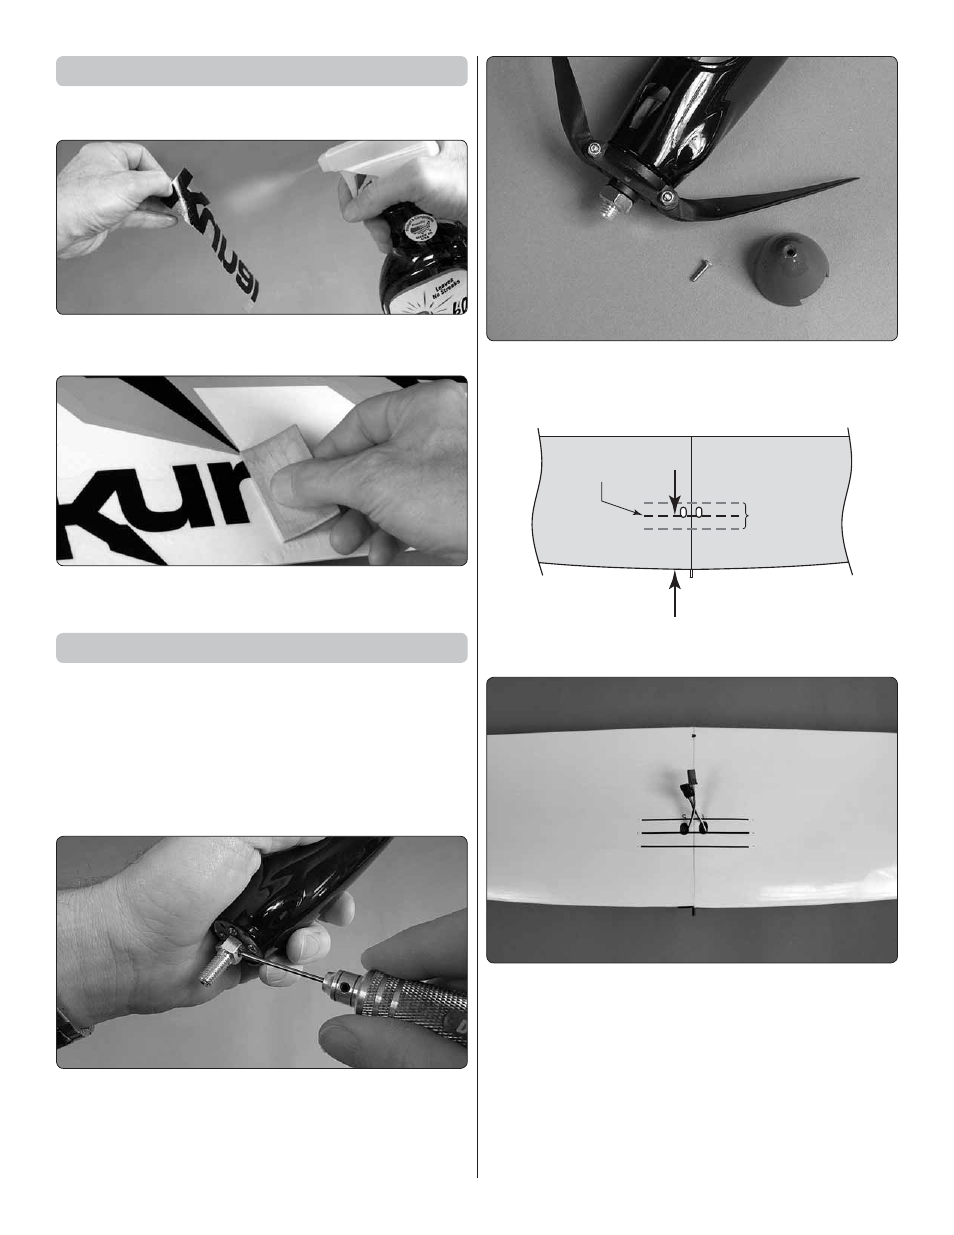
Decal Application
To facilitate positioning and eliminate air bubbles, apply the
decals wet.
❏
1. Peel the decal from the sheet and spray the sticky side
with window cleaner.
❏
2. Position the decal and squeegee out air bubbles
and window cleaner with a piece of soft balsa or similar.
Balance the Model
Balanced anywhere within the recommended C.G. range
the Kunai fl ies well. Balanced toward the aft end of the C.G.
range the Kunai will respond faster and glide slower for
maximizing lift in rising air as well as reduced ground speed
for feather-like landings, but will also require more pilot input
in windier conditions. Balanced nearer the forward end of the
C.G. range the Kunai will be more stable for faster speeds
and better wind penetration.
❏
1. If you haven’t yet done so, mount the propeller shaft to
the motor using a drop of threadlocker on the set screws and
a quality, 1.5mm hex driver to tighten the screws—be certain
the back of the propeller shaft does not contact the heads of
the motor mounting screws.
❏
2. Mount the back plate/propeller hub assembly to
the propeller shaft and tighten the nut. Then, mount the
spinner cone.
2-3/4" [ 70 mm]
+/- 1/2" [ 13 mm]
C.G. Range
Recommended
Starting C.G.
❏
3. The recommended beginning C.G. location is 2-3/4"
[70m] back from the leading edge of the wing where it meets
the fuselage. The forward and aft C.G. are 1/2" [13mm] either
side of that. Measure and mark the C.G. on the bottom of the
wing according to the measurements—narrow strips of tape
allow you to feel the lines with your fi ngers when suspending
the plane while balancing.
❏
4. Mount the wing to the fuselage. The Kunai must be
in ready-to-fl y condition with the battery installed and the
propeller mounted.