Assemble the fuselage – Great Planes Fling DL ARF - GPMA1070 User Manual
Page 7
❏
9. Repeat steps 1-8 for the other wing half.
❏
1. With the front half of the left wing flat on your
workbench and the center joint on wax paper, raise the right
wing tip 3-1/8" [79mm] to properly set the dihedral. Block the
raised right wing at the desired height and make a mental
note of the position needed for it to maintain that dihedral.
❏
2. Remove the joiner from the wings. Cover the joiner, left
and right wing ribs and pockets in the wing panels with a
moderate, but not excessive, amount of 30-minute epoxy.
Join the wing halves together. Ensure that the left wing
remains flat and that the right wing tip is 3-1/8" [79mm] from
your work bench and can remain that way undisturbed until
the epoxy has hardened. Remove any excess epoxy with a
paper towel and denatured alcohol, being careful not to
disturb the joint. Hint: Use masking tape to hold the wing
together while the epoxy hardens.
❏
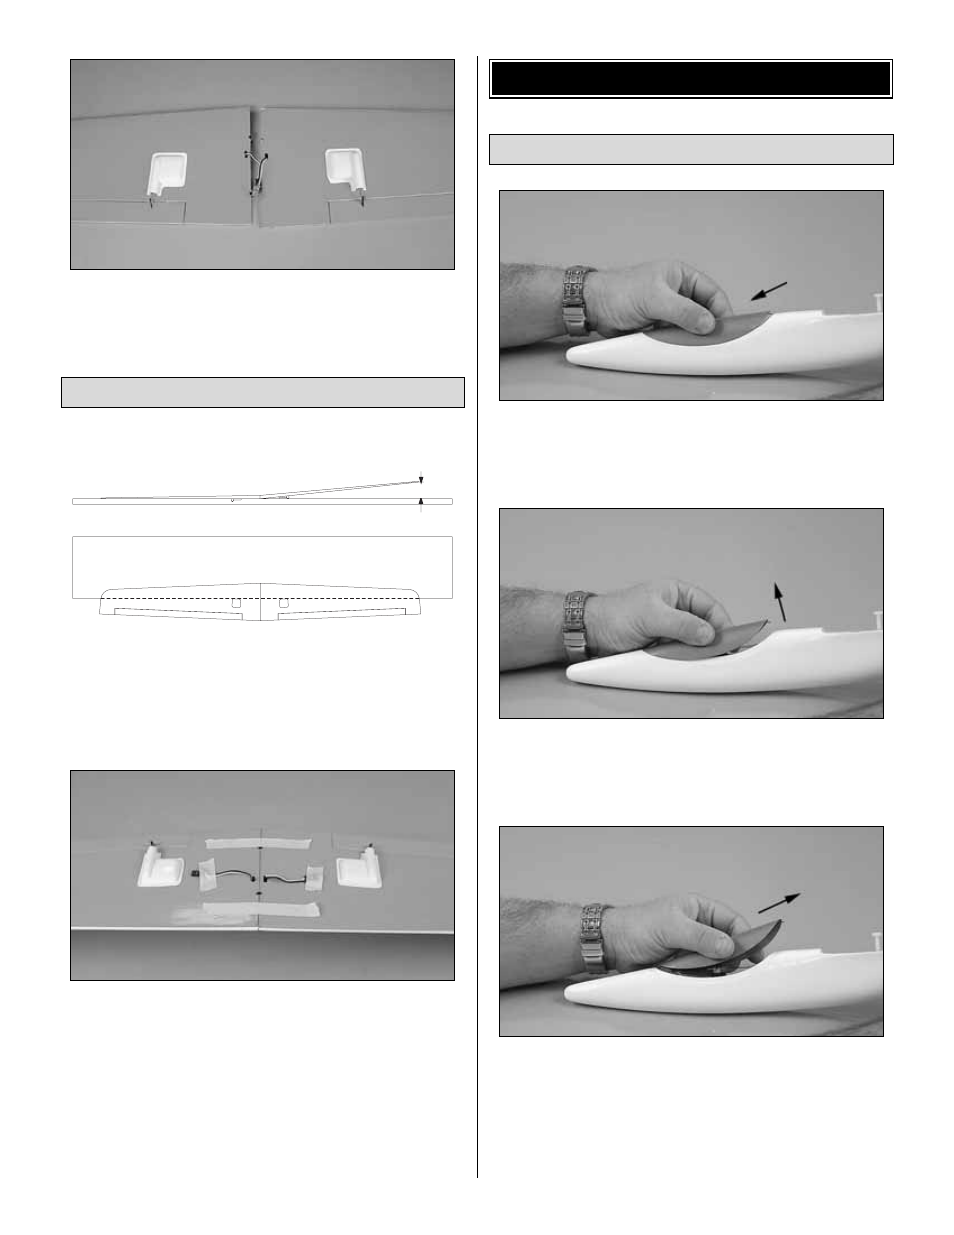
1. Slide the canopy forward.
❏
2. Lift the rear of the canopy so the wire clears the fuse.
❏
3. Slide the canopy aft until the front wire releases.
❏
4. To attach the canopy, reverse the previous steps.
Canopy Removal
ASSEMBLE THE FUSELAGE
3-1/8" [79mm]
Rear View
Top View
Join the Wing
7