Great Planes ElectroStik EP ARF - GPMA1574 User Manual
Page 9
9
❏
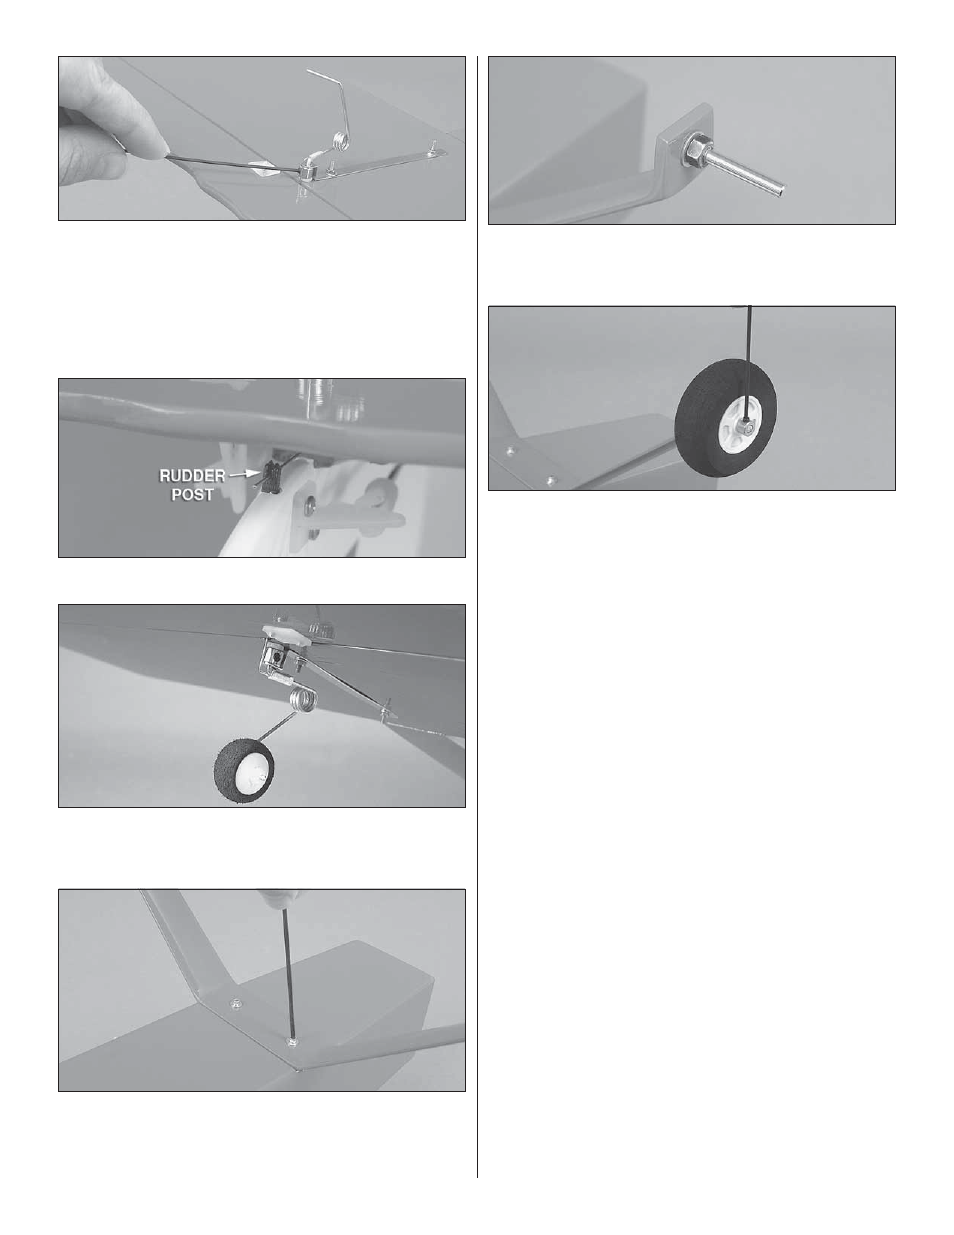
3. Slide a 3/32" [2.4mm] wheel collar between the nylon
tail gear bearing and the tail wheel bracket as shown. Thread
the steering wire between the horizontal stabilizer and the
elevator as shown and insert the tail wheel assembly through
the tail wheel bracket. Secure it by inserting a 4-40 set screw
and tightening it with a .050 [1.2mm] hex driver. Be sure to
use threadlocking cement on the set screw.
❏
4. Slide the steering wire into the rudder post as shown.
❏
5. Slide the tail wheel in place on the tail wheel axle. Slide
the nylon retainer in place onto the axle and secure it by
pressing it into place as shown.
❏
6. Put the landing gear in place as shown. Using a 3/32"
[2.4mm] hex driver, secure the brace with a 4-40 x 1/2"
[12.7mm] hex head bolt and #4 washer in each hole. Be sure
to use threadlocking cement on each bolt.
❏
7. Slide the axles through the landing gear brace as
shown. Secure each axle with a #8 washer and 3/16" [5mm]
nut. Be sure to use threadlocking cement.
❏
8. Slide the main wheels onto the axles. Secure them in
place by putting a 6-32 set screw in a 5/32" [4mm] wheel
collar and tightening it down as shown. Use threadlocking
cement on the set screw.
Note: It is a good idea to remove the wheels and wheel collars
and grind fl at spots on the axles where the set screws made
marks from being tightened. A rotary tool such as a Dremel
with a cutoff wheel or a metal fi le can be used to make the
fl at spots. Then re-install the wheels onto the axles using the
wheel collars, set screws, and threadlocking compound. Be
sure that the wheels rotate freely. Oil the wheels at the axles
if necessary.