Great Planes ElectroStik EP ARF - GPMA1574 User Manual
Page 12
12
❏
6. Locate the included segments of hook and loop material
and feed the ends through the slots as shown. These will
serve to hold your motor battery in place during fl ight. Be
sure to overlap the ends by about 1-1/2" [38mm] underneath
the battery tray.
❏
7. Use hook and loop material or double-sided tape (not
included) to secure your receiver inside the fuselage. If you
prefer, wrap your receiver in a piece of foam rubber (not
included) and strap it into place with tie wraps (not included).
Plug the servos into your receiver along with the ESC
connector and your 6" (152.4mm) servo extension.
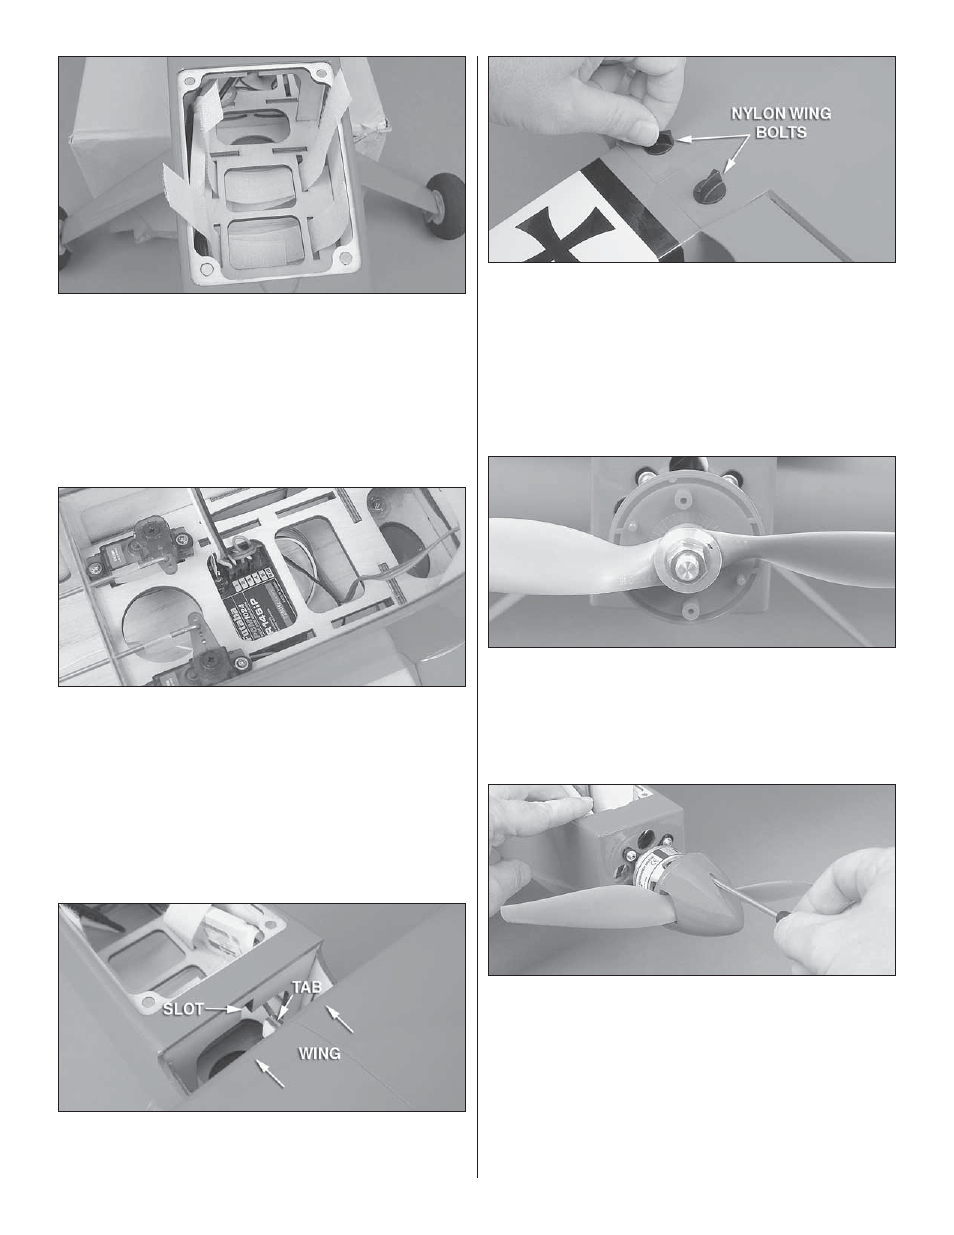
❏
8. Connect the aileron servo to the aileron extension and
slide the tab on the front of the wing into the slot on the fuse
as shown.
❏
9. Secure the wing by inserting the two 10-24 nylon wing
bolts into the wing and tightening them down as shown.
❏
10. Now is a good time to test the rotation of the motor
before the prop is installed. Use your radio system and motor
battery to temporarily power the motor. If the motor rotates
clockwise when viewed from the front, correct the rotation
by choosing any two of the three motor leads and reversing
their positions.
❏
11. Push the spinner backplate all the way onto the
motor shaft. The center hole may be enlarged with a prop
reamer or drill if necessary. Place the prop on the shaft so
that it is perpendicular to the screw receptacles as shown.
Finger tighten the prop nut and washer. Hold the prop shaft
and tighten the prop nut securely with a prop wrench.
❏
12. Attach the spinner cone to the backplate using the
two #4 x 1/2" [12.7mm] screws.