Great Planes Cessna 182 Skylane 40 ARF - GPMA1228 User Manual
Page 8
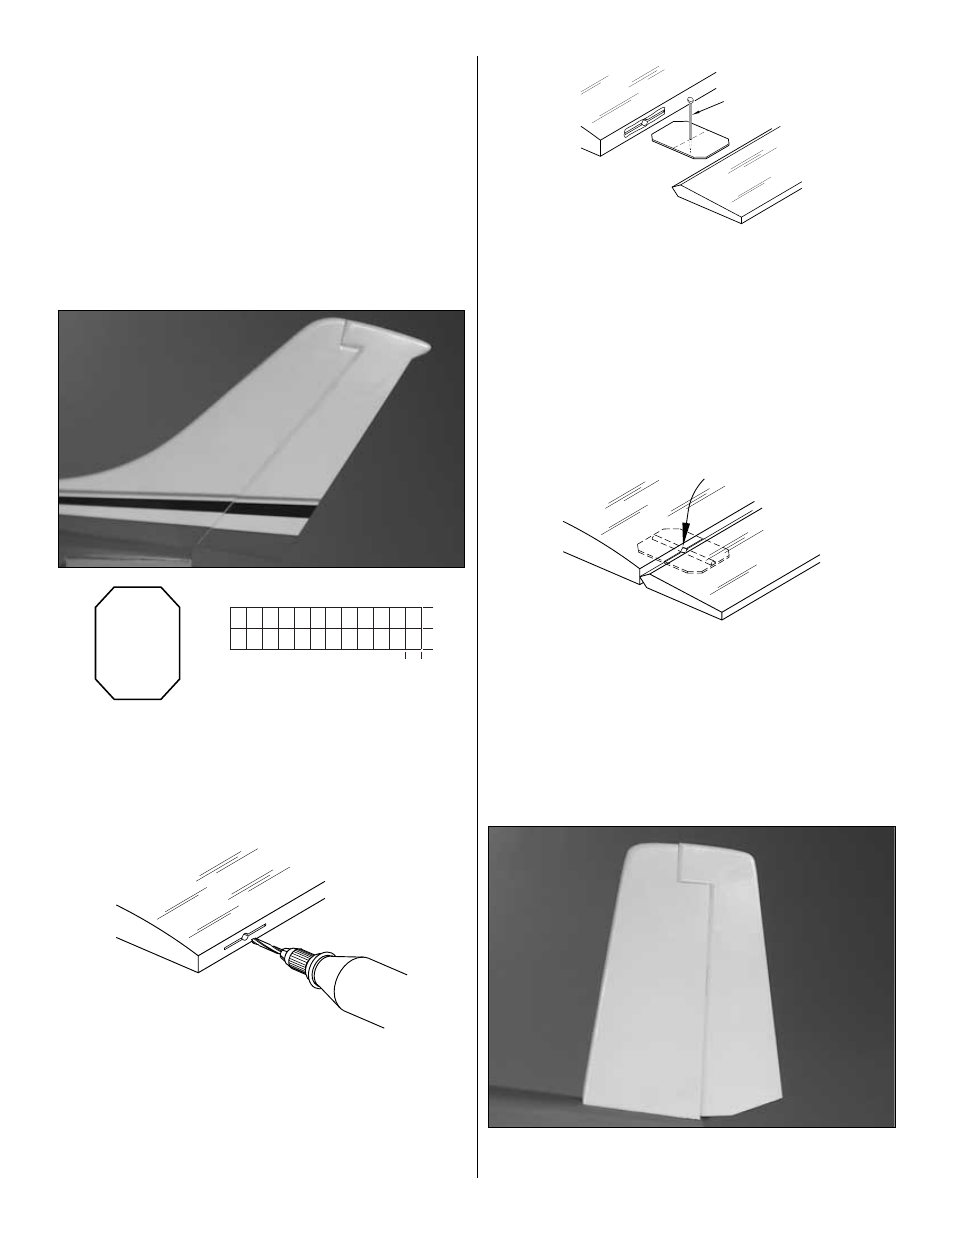
along both the sides of the fin where it meets the fuselage
and remove the covering 1/32" [.8mm] inside the line, being
careful not to cut into the underlying wood. Sand the bottom
of the fin and the slot in the fuselage if the fin is out of
alignment. Do not force the forward section of the fin into
position, as this will result in poor flight characteristics. Use
30-minute epoxy to glue the fin in position. Work the epoxy
into the slot in the fuselage, filling any loose-fitting joints
between the fuselage and stabilizer. Check the alignment of
the fin to the stabilizer with a triangle, then secure it in
position with masking tape until the epoxy has cured.
Double-check the alignment of the fin with the stabilizer
while the epoxy cures.
❏
5. Test fit the rudder to the fin with the hinges. If the
hinges are difficult to install or don’t go in far enough,
carefully enlarge the hinge slots with a hobby knife and a
#11 blade. (Cut the hinges to the size shown above from the
2" x 9" [51mm x 229mm] hinge material.) Use the following
procedure for gluing the hinges and tail gear assembly:
❏
A. Drill a 3/32" [2.5mm] hole, 1/2" [13mm] deep, in the
center of the hinge slot. If you use a Dremel
®
MultiPro
™
for
this task, it will result in a cleaner hole than if you use a
slower speed drill. Drilling the hole will twist some of the
wood fibers into the slot, making it difficult to insert the
hinge, so you should reinsert the knife blade, working it back
and forth a few times to clean out the slot.
❏
B. If the hinges don’t remain centered, remove the rudder
and insert a pin in the center of the hinges. Make sure there
is approximately a 1/64" [.4mm] gap between the rudder and
the fin.
❏
C. Add six drops of thin CA to the center of the hinges on
both sides. Use a paper towel to absorb excess CA from the
hinge gap before it cures. Do not use CA accelerator; allow
the CA to cure slowly.
❏
6. Use the same hinging method to join the Elevators to
the stab.
ASSEMBLE, THEN APPLY 6 DROPS
OF THIN CA TO CENTER
OF HINGE, ON BOTH SIDES
TEMPORARY PIN
TO KEEP HINGE
CENTERED
DRILL A 3/32" [2.5mm] HOLE
1/2" [13mm] DEEP, IN CENTER
OF HINGE SLOT
1"
[25mm]
1"
[25mm]
3/4"
[19mm]
8