Final assembly – Great Planes Cessna 182 Skylane 40 ARF - GPMA1228 User Manual
Page 20
can, we have had success with Pactra Formula-U and
Chevron paint. Always test your painting methods on
leftover plastic before you try it on your model!
❏
3. Roughen the outside 1/8" [3mm] of the inside windshield
edge, being careful not to scratch any exposed areas. Glue
the canopy into position with 6-minute epoxy or R/C-56 glue.
❏
4. Trim the side windows so 1/16" [1.5mm] remains for
the windows to rest on the inside of the fuselage. Because
the windows fit recessed into the fuselage from the inside,
this lip must remain on the windows. Roughen the outside
edges of the windows and glue them inside the fuselage
with 6-minute epoxy or R/C-56 glue.
❏
5. Trim the rear window by removing the lip from the outer
edge. Do not cut to the window outline.
❏
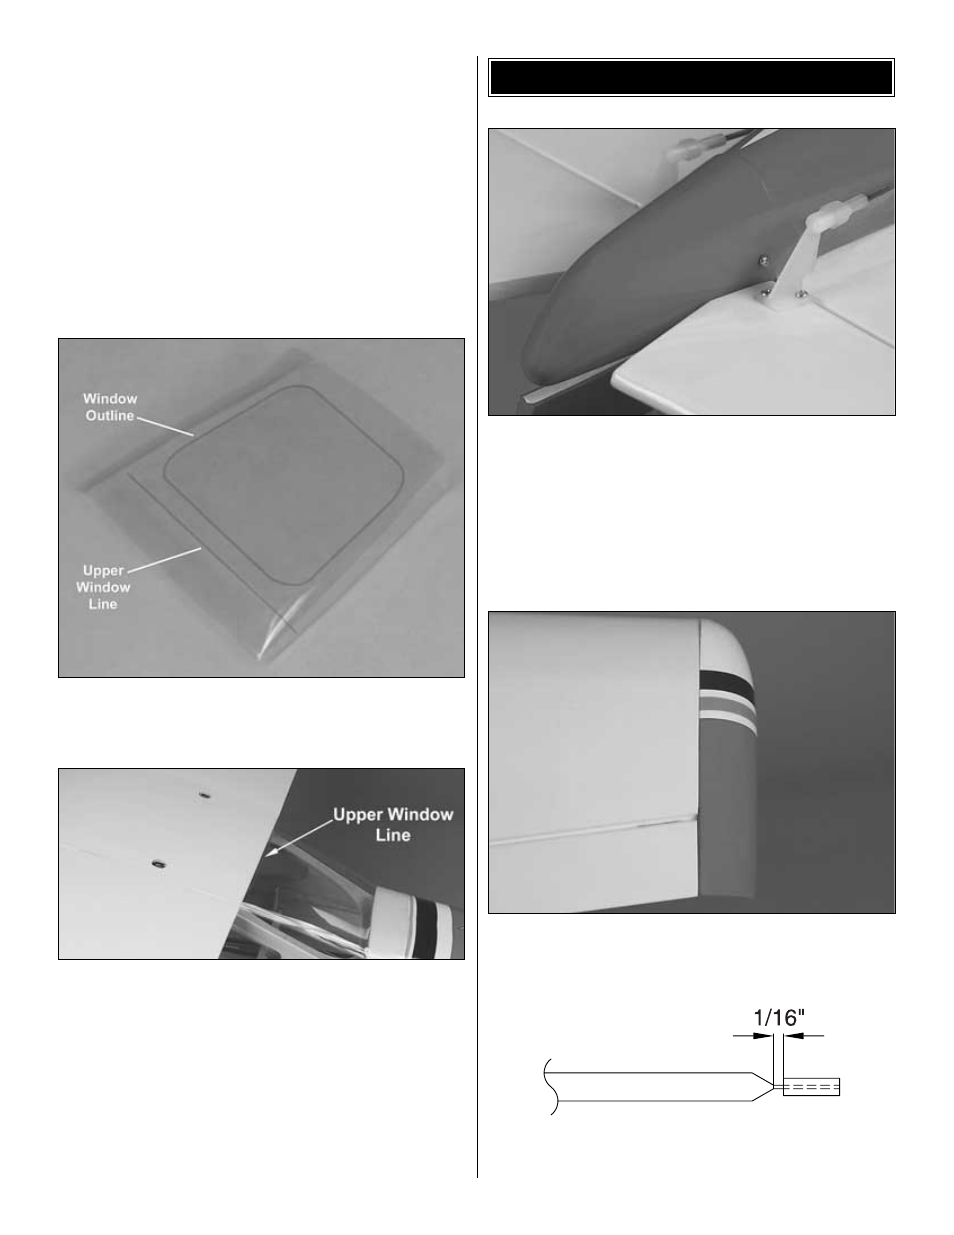
6. Place the wing into position and slightly tighten the wing
bolts. Slide the rear window underneath the wing. The rear
window is positioned correctly when the upper window line
is against the trailing edge of the wing.
❏
7. Use the photos on the box in trimming the window. There
should be at least 1/4" [6mm] overlap of the rear window
onto the fuselage along each side of the window, and 1/2"
[13mm] at the rear. Once trimmed, paint the edge of the
window to match the fuselage. Glue the rear window to the
fuselage using 6-minute epoxy or R/C-56 glue.
❏
1. Position the tail cone onto the aft end of the fuselage.
The tail cone aligns with the rudder when it is in the neutral
position. Leave a constant gap between the rudder and tail
cone. Drill the locations for the two #2 x 3/8" sheet metal
screws using a 1/16" [1.5mm] drill bit. Wick two to three
drops of thin CA into the holes to harden the underlying
balsa. Enlarge the holes in the tail cone using a 3/32"
[2.5mm] drill bit. Attach the tail cone to the fuselage using
the two sheet metal screws.
❏
2. Roughen the inside of the wing tips using 120-grit sandpaper.
Attach the wing tips to the wing using medium CA. Leave a
1/16" [1.5mm] gap between the aileron and wing tip.
❏
3. Prepare the struts by inserting the strut ends into the
struts. Position the end so there is a 1/16" [1.5mm] gap
FINAL ASSEMBLY
20