GME TX4400 User Manual
Page 20
PAGE 20
INSTRUCTION MANUAL
TX4400
Cable
Microphone plug
Lift locking tab
to release plug
to access the threads in the chassis . This will bring your
TX4400's front panel in line with that of your previous radio
and eliminate the need to reinstall the mounting bracket .
Be sure to tighten the gimbal knobs securely as there will
be a little more weight forward of the mounting bracket
with this installation .
FITTING THE MICROPHONE
The microphone uses a miniature 6 pin telephone style plug
and socket .
To fit the microphone:
1 . Position the microphone plug so the plastic tab faces
downwards . Press the plug into the socket until
it ‘clicks’ .
2 . Gently press the rubber strain relief into the hole
surrounding the socket so that the slot around the strain
relief fits neatly inside the lip of the hole .
Removing the microphone .
1 . Squeeze the rubber strain relief near the front panel to
disengage the slot, and slide the strain relief back along
the microphone cord .
2 . Press the small plastic tab on the microphone plug
towards the plug to unlock it, while gently pulling the
plug outwards . If the plug does not come out easily, the
tab has not released correctly and should be pressed
again . You may need a small bladed screwdriver for this
task, as the tab can be difficult to reach with
your fingers .
REAR MICROPHONE CONNECTION
TX4400M
The TX4400M comes with the LEM6M rear accessory pack
factory fitted .
To fit the rear mounting microphone optional
accessory kit (LEM6M):
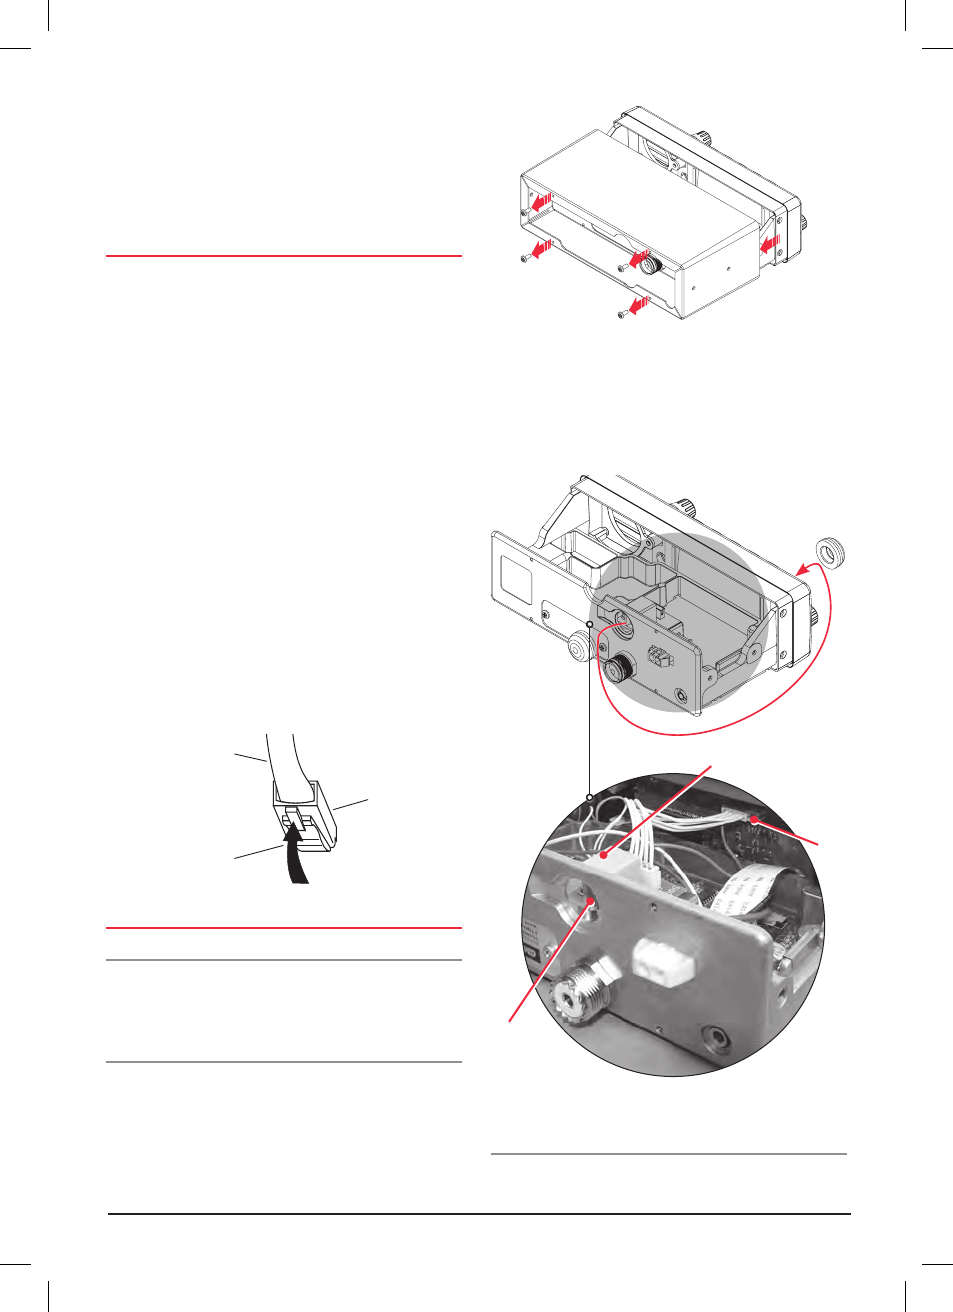
1 . Remove the 4 screws from the rear panel securing the
cover and slide the cover from the radio (Figure 1) .
2 . Turn the TX4400 upside down, remove the black
grommet from the back of the radio and insert into the
front panel microphone socket aperture of the TX4400
(Figure 2) .
Figure 1 .
3 . Secure the rear microphone printed circuit board
(PCB) supplied with the LEM6M accessory kit with
the screws provided (Figure 3) .
4 . Connect the 6 pin lead attached to the rear microphone
PCB and the 6 pin socket on the front PCB .
Figure 2 .
Figure 3 .
5 . Refit the cover and fasten with the 4 screws
Microphone Extension Lead
The LEM6P is a 4 metre microphone extension lead that can
be fitted to the microphone socket .
Connection
to front
PCB
Rear
microphone
socket
Rear microphone PCB