Installation – GME TX4400 User Manual
Page 19
TX4400
INSTRUCTION MANUAL
PAGE 19
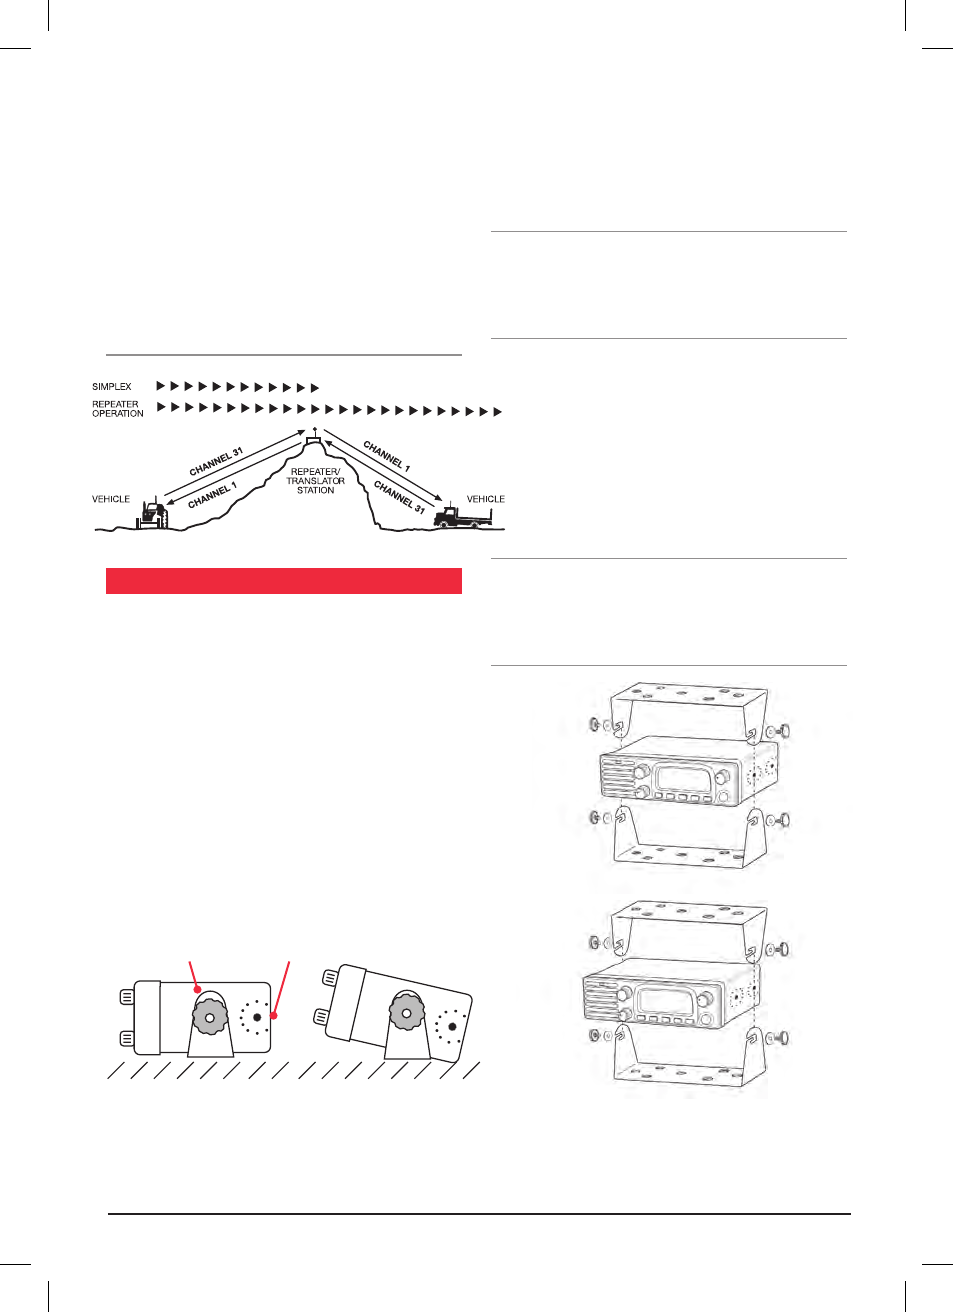
to transmit and receive on different channels (known as
DUPLEX) . Your TX4400 has a Duplex key to allow you to
operate through repeaters .-
The Duplex function only operates on channels 1 - 8, as
these are the channels that have been designated for
repeater use . When Duplex mode is selected, your TX4400
receives on the selected channel (e .g . channel 1) but
automatically transmits 30 channels higher (i .e . channel
31) . The UHF repeater receives your signal on Channel 31
and retransmits it on channel 1 for others to hear .
SIMPLEX/DUPLEX RANGE COMPARISON
INSTALLATION
The TX4400 is supplied with a double action mounting
bracket and vibration proof washers . The mounting bracket
can be secured in any convenient location (i .e . under the
dash, above the dash, on the centre console etc) .
The TX4400 mounting bracket is designed with a unique
dual position gimbal mounting slot . This design not only
allows the TX4400 to be tilted over a much greater range,
but also provides a slim, low profile mounting position for
installations where space is very limited .
When installing the radio, avoid mounting it close to
heaters or air conditioners . Screw the mounting cradle to a
firm surface . The vibration proof washers have an adhesive
backing on one side . The vibration proof washers have an
adhesive backing on one side .
This allows them to remain in the correct position when
removing or refitting the radio . Slide the TX4400 into the
bracket, adjust it for the correct viewing angle and tighten
the gimbal knobs securely . Finally, connect the power and
antenna leads to the sockets provided on the rear of the
radio .
Note: The sides of your TX4400 have two pairs of gimbal
mounting holes - one pair in the centre of the case and
the other pair towards the rear . A black label covers the
rearward gimbal holes . For most installations, the mounting
bracket should be installed using the central gimbal holes .
When installing the radio, avoid mounting it close to
heaters or air conditioners . Screw the mounting cradle
to a firm surface . The vibration proof washers have
an adhesive backing on one side . This allows them
to remain in the correct position when removing or
refitting the radio . Slide the TX4400 into the bracket,
adjust it for the correct viewing angle and tighten the
gimbal knobs securely . Finally, connect the power and
antenna leads to the sockets provided on the rear of
the radio .
Note. The sides of your TX4400 have two pairs of gimbal
mounting holes - one pair in the centre of the case and
the other pair towards the rear . A black label covers the
rearward gimbal holes . For most installations, the mounting
bracket should be installed using the central gimbal holes .
If your TX4400 is replacing an existing TX4200 or TX4000
installation, you can fit your TX4400 to the existing bracket
by utilising the gimbal mounting holes near the rear of the
case . Simply screw the gimbal knobs through the label
Rear Mount
Centre Mount
LOW PROFILE MOUNTING
RAISED TILT MOUNTING
Centre Mounting
Position
Rear Mounting
Position