Installing the compact power amplifier, Step 2, Step 3 – Galaxy Audio JIB/PA50 User Manual
Page 5
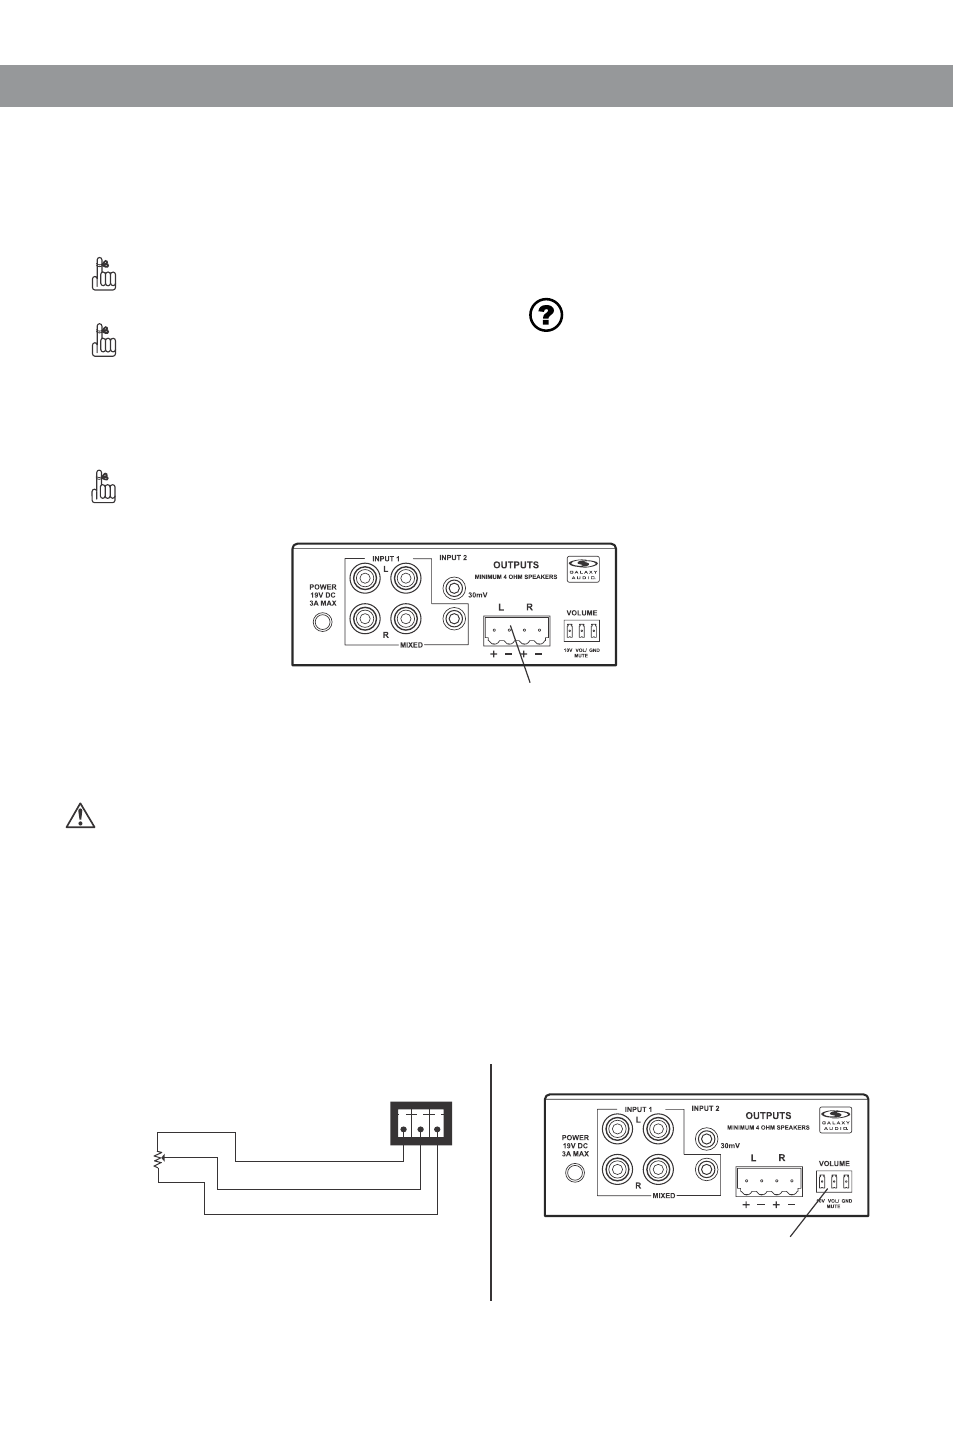
Step 2
Amp Receptacle for the
Blue 4-Pin Captive
Screw Plug
Step 3
Amp Receptacle for the
Green 3-Pin Captive
Screw Plug
Figure 4
Figure 5
VOLUME
10k Pot Volume
Wiring Diagram
10V (Pin 1)
Vol/Mute (Pin 2)
GND (Pin 3)
Pot Volume
10K Ohm
1.
2.
1.
2.
3.
3.
4.
4
Installing the Compact Power Amplifier
Installing the Compact Power Amplifier
Use standard RCA connectors and/or 1/8"
(3.5mm) mini-cables to connect the input
devices (e.g., the projector, other audio sources)
to the power amp.
Match the wiring polarity. For example, red
for positive, black or white for negative.
Make sure no wire strand bridges (shorts)
the adjacent terminals.
Insert all four wires on each speaker into the
blue 4-pin captive screw plug supplied with the
power amp.
Use a #1 Phillips screwdriver to tighten the
locking screws.
Insert the captive screw plug into the
receptacle on the amp’s rear panel
(see drawing).
Attach the power amp plug to the
amplifier.
Do you need to wire the 10k pot
volume? If Yes, proceed to Step 3
below
When wiring the 10V, Vol/Mute and GND
outputs, strip off the insulation from the
external volume control wire by 3/16". Make
sure the wire ends do not touch. Keep
exposed wire ends short after stripping. If the
wires touch, they may short the amp.
Follow the 10k Pot Volume Wiring Diagram
to connect the external volume control to the
amp (Figure 4).
Insert all three pins from the external
volume control into the green 3-pin
captive screw plug supplied with the
amp (see drawing).
Use a #1 flat blade screwdriver to
tighten the locking screws.
Insert the captive screw plug into the
receptacle on the amp’s rear panel
(Figure 5).