Assemble the tail – Flyzone HCAA1961 User Manual
Page 4
Remove the fuselage from the packaging. Be careful
when removing the fuselage from the packaging as the
control wire is preinstalled in the fuselage and
connected to the control surfaces. Lay the parts out on
a table ensuring the control wires are not intertwined or
twisted together. Remove the twist tie around the
antenna wire and let the excess wire hang freely from
the fuselage as shown in the pictures below. DO NOT
CUT OFF EXCESS ANTENNA WIRE!
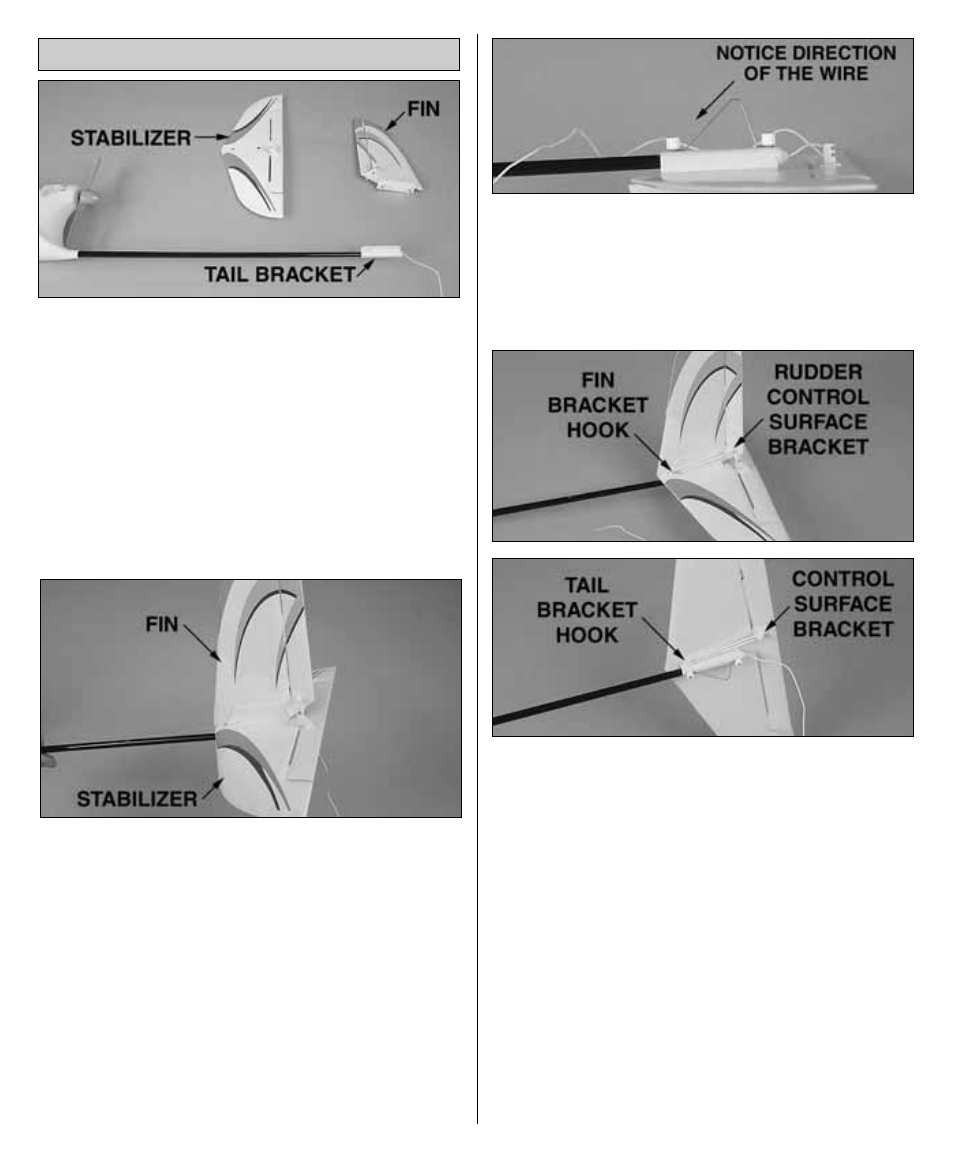
Remove the retaining nuts and tail skid wire from the bolts
of the fin. Position the stabilizer on the bracket on the tail of
the fuselage. The indentations on the underside of the
stabilizer will line up with the pegs on the tail bracket. The
control wire should be on top of the stabilizer. Make sure
the control wires are out of the way, then slide the fins
threaded posts through the stabilizer until the fin and
stabilizer are seated together as shown. Be sure that the
antenna wire that passes through the fuselage will not
become damaged by the threaded posts. If necessary,
use a toothpick or something similar to insert into the
threaded post holes and push the wire aside.
Replace the metal tail skid wire; note the direction of
the wire. Attach two nylon retaining nuts to the bolts on
the fin. Tighten these nuts down to hold the tail
assembly together. Do not over tighten as the elevator
and rudder could become damaged.
Locate the two small control surface bands. Attach one band
to the outer hook on the fin bracket and the rudder control
surface. Attach the second band to the hook on the tail
bracket and the underside of the elevator control surface.
ASSEMBLE THE TAIL
4