Operating instructions – EDCO SK-10 User Manual
Page 6
E-MPS-I-0612
Printed in USA
©2012
TVW
Page 6
100 Thomas Johnson Drive, Frederick, MD 21702-4600 USA
Phone (301) 663-1600 • 1-800-638-3326
Fax (301) 663-1607 • 1-800-447-3326
Website: www.edcoinc.com
Email: [email protected]
Operating Instructions
•
START ENGINE AND ALLOW IT TO REACH OPERATING SPEED.
Position the saw over the cutting line. Bring the engine to full speed.
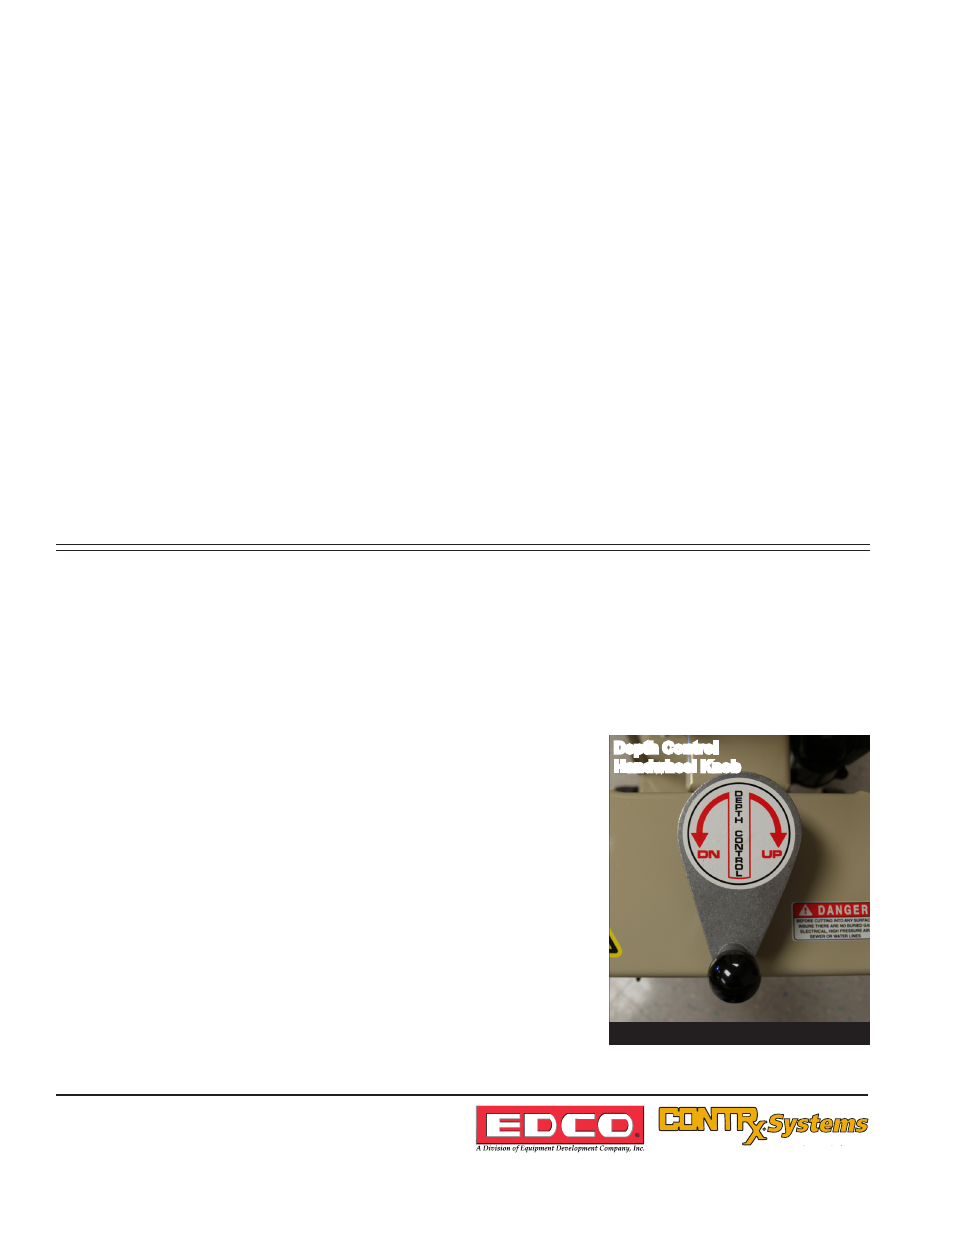
Lower the blade into the slab surface by slowly turning the depth
control handwheel knob. NOTE - the 14 inch blade has a maximum
cutting depth of 4 3/4”. Do not allow the arbor flanges to contact slab
surface.
When the selected cutting depth is reached, lock the depth control
handwheel knob and proceed to push the saw forward. The saw
blade must remain straight, do not twist, and do not force blade, the
engine or motor should not strain when cutting.
•
BEFORE STARTING THE ENGINE OR MOTOR: Raise the saw blade clear of the working surface. The
blade is raised using the depth control handwheel knob mounted on the upper handle assembly
(Figure 6)
.
Lift the knob to unlock and turn the handwheel clockwise until the blade is clearly off the ground.
•
FOR WET CUTTING: Attach the water supply. A flow rate of approximately 2 gallons per minute (minimum)
is required. Attach the water hose to the coolant valve. Use the valve to control the flow of water.
•
FOR DRY CUTTING: Provide a respirator and dust control system.
•
FOR ELECTRIC MODELS: Be sure the “OFF” button is depressed. Hook up the electrical power source by
plugging into the connector provided. If the cord does not mate with the connector, consult a qualified
licensed electrician before continuing. Be sure that the equipment is properly grounded.
•
FOR GASOLINE MODELS: Put the engine stop switch in the “RUN” position. Consult the engine manufac-
turers operating instructions and follow the directions for starting and breaking in the engine.
•
FOR PNEUMATIC MODELS: Before connecting the air source, be sure the “WHIPCHEK
TM
” cable is prop-
erly installed and the flow control lever is in the “OFF” position. Adjust the air pressure to 90 psi (100 psi
MAX.) using the air regulator valve
(see Figure 4 on page 4)
. Open the flow control lever gradually to start
and adjust the oil regulator knob as required for your application.
Figure 6
Depth Control
Handwheel Knob