Inspect & tension belts, Blade lift controls – EDCO CPU-12 User Manual
Page 10
E-CPU12-I-0113
Printed in USA
©2013
TVW
Page 10
100 Thomas Johnson Drive, Frederick, MD 21702-4600 USA
Phone (301) 663-1600 • 1-800-638-3326
Fax (301) 663-1607 • 1-800-447-3326
Website: www.edcoinc.com
Email: [email protected]
Inspect & Tension Belts:
•
Proper belt tension must be maintained to transmit the engine power to the cutter drum. Slipping belts will over
heat, the cutter life will be shortened and the cutting speed limited. Over tensioned belts will shorten the belt and
bearing life. 70 ft. lbs. of defl ection at the center between the pulley’s, is recommended.
!! IMPORTANT!!
After tensioning belts make sure engine is level and then tighten all mounting hardware and jam nuts.
•
On new machines and after installation of new belts, adjust belt tension after the fi rst four hours, then tension as
necessary.
•
Loosen engine/motor mounting hardware slightly. (Figure 8)
•
Use the two jack-screw belt tensioning bolts to adjust the
engine/motor until the belts are tight. Re-torque the mounting
hardware.
To Tension Belts:
Figure 8
Jacking Bolts
Jam Nuts
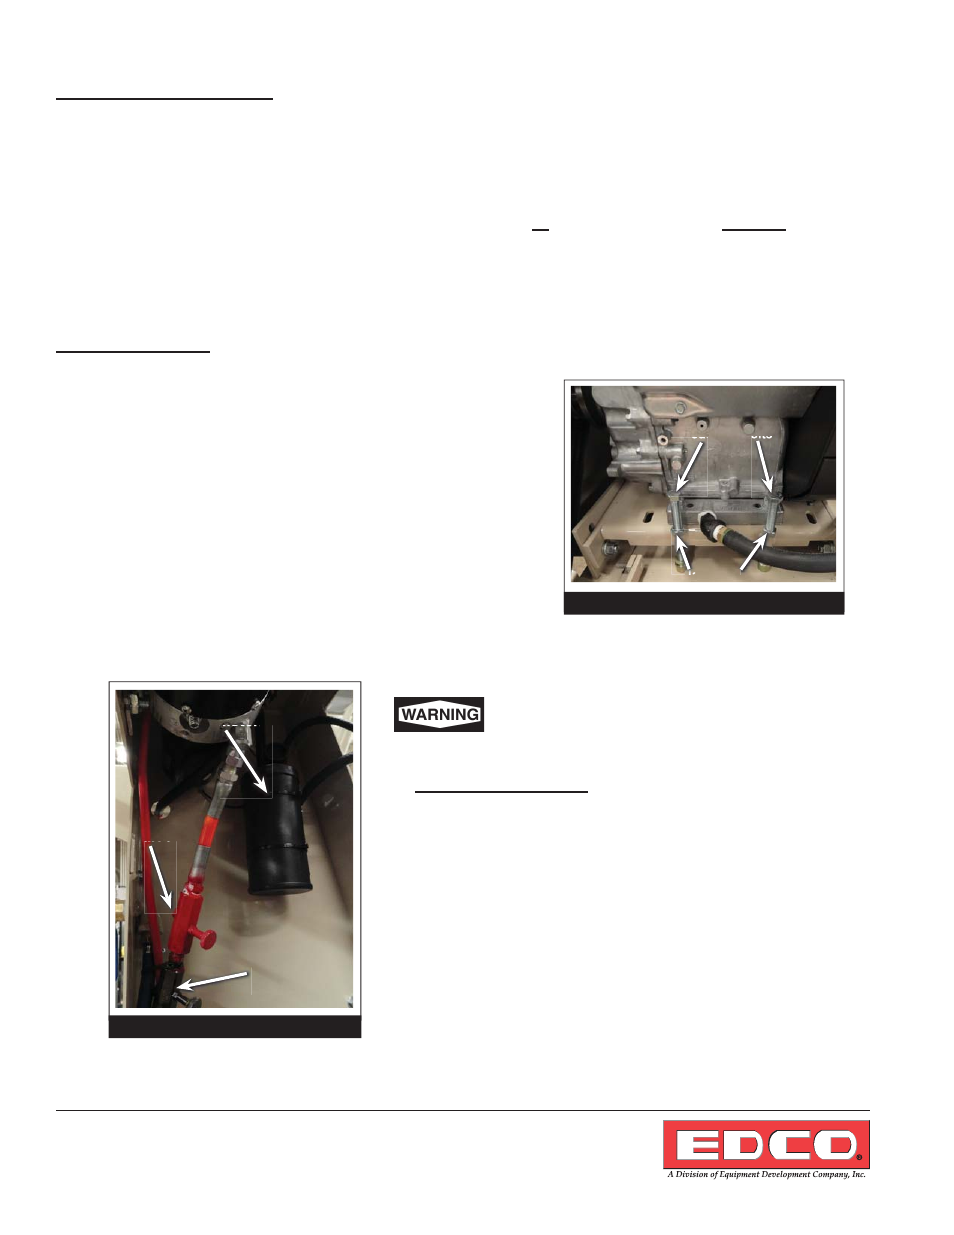
Blade Lift Controls:
(Figure 9)
(Controls Hydraulic Fluid Flow)
A - (Red) Blade Lowering Control Valve
To re-adjust:
• Turn
Knob
out-fast
in-slow
•
Retighten lock nut
B- (Black) Blade Raising Control Valve
C- Carbon Canister
Remember to remove all rings, watches
and jewelry prior to doing maintenance near
hydraulic pump!
Figure 9
A - Blade
Lowering
Control
Valve
B - Blade
Raising Con-
trol Valve
C - Carbon
Canister