D.A.S. Audio Variant Series Manual User Manual
Page 13
The AXA-AC bracket has been designed to set
up an VA array*.
Horizontal wall mounting array:
.- maximum of 3 boxes.
.- attachment to the center box.
Vertical wall mounting array:
.- maximum of 3 boxes.
.- attachment to the bottom box.
Ceiling mounting:
.- maximum 6 boxes.
- attachment to the top box.
Refer to the user’s manual of these accesories,
on our website, for more details.
(*) - VA array only have the mechanical setup of
an array configuration.
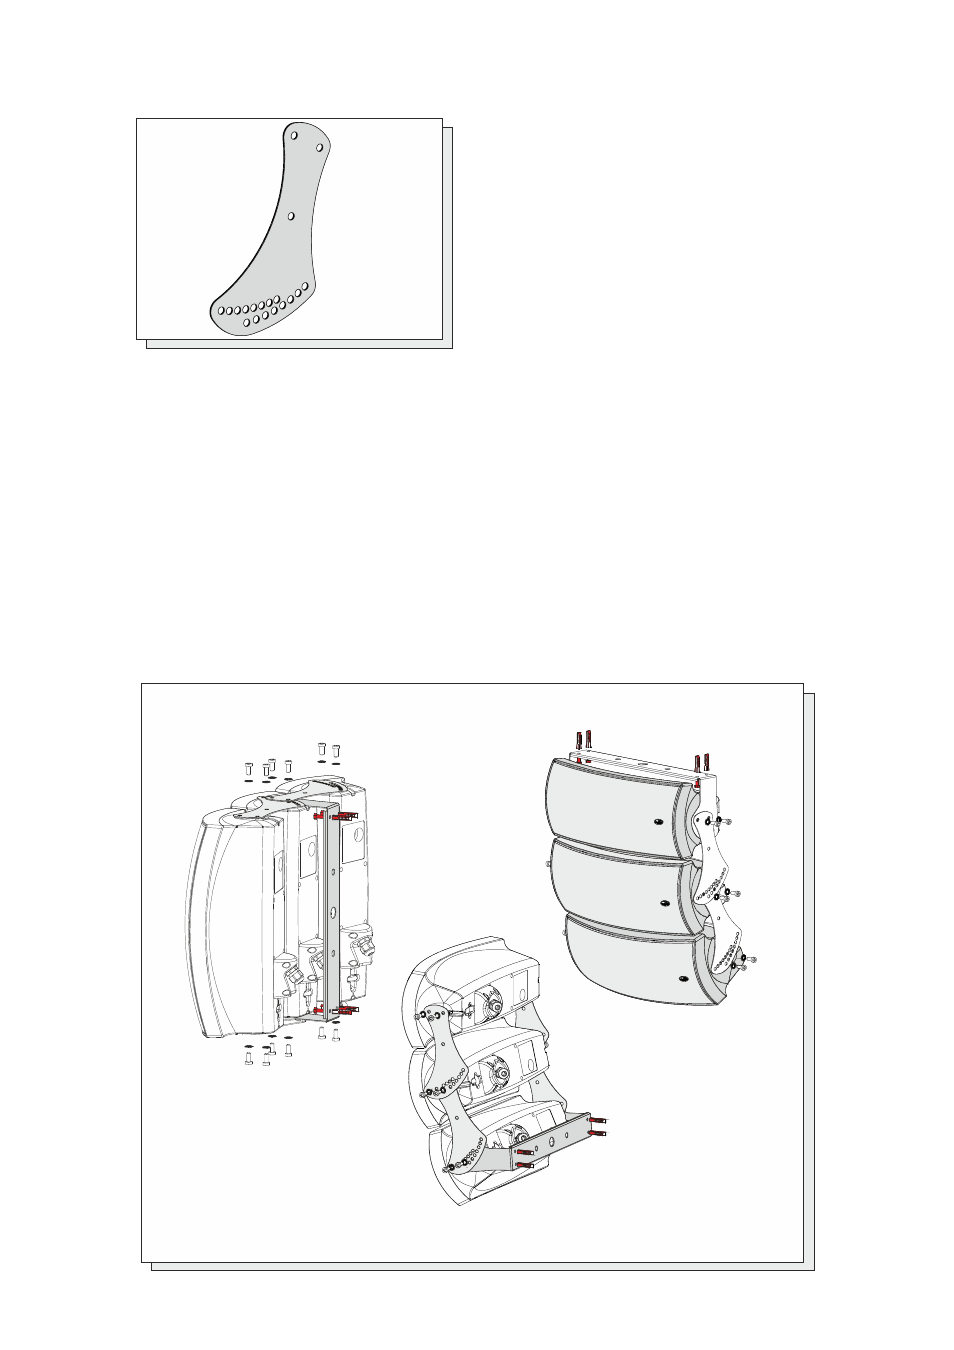
AXA- AC.
Mounting instructions
1.- Remove the cover pieces (top and bottom
sides).
2.- Place the last box with the AXA-AC
3.- Insert allen screws and lock washers selecting
the angles provided between 0º and 42º in 6º
steps. Use the wide washer (incl) to supplement
the distance between the last box and the AXA-
AC.
4.- Place the next box and the new AXA-AC.
5.- Insert allen screws and lock washers selecting
the angles provided between 0º and 42º in 6º
steps.
6.- Repeat points 4 and 5 to add more boxes.
7.- Attach the AXU to the wall or ceiling.
8.- Place the appropriate (center bottom top) box
between the support arms of the AXU-AC.
9.- Insert allen screws and lock washers.
Package contents
4x DIN 6912 M6x12
4x DIN 7980 M6 (lock washer)
2x DIN 9021 M6 (washer)
Manual del Usuario
/ VA series / User’s Manual
Horizontal wall mounting
Vertical ceiling mounting
Vertical wall mounting
13