The ultimate connection, Step1: connecting your satellite/cable receiver, Step 2: connecting your vcr to the receiver – RCA RV-9978 User Manual
Page 14: Connecting auxiliary components
Attention! The text in this document has been recognized automatically. To view the original document, you can use the "Original mode".
CONNECTING AUXILIARY COMPONENTS
THE ULTIMATE CONNECTION
Should you choose to utilize your new receiver to its fullest potential by running all your audio components
through it, you will need purchase additional connectors. How many and what kind is purely situational.
The following is a complete description of all the jacks on the back of the receiver and how they can be utilized
to provide greater enjoyment. Remember when connecting audio and video cables that, in addition to being
color-coded for connection accuracy, RIGHT Jacks always connect to RIGHTJacks and LEFT to LEFT, but IN Jacks
connect to OUTJacks and OUTJacks connect to IN,
NOTE: Please be advised the Jacks are given generalized names and locations. Your TVA/CR/cable box/satellite
receiver/ etc. might have a different configuration of Jacks with different names. The diagrams below are
outlined in the simplest possible detail.
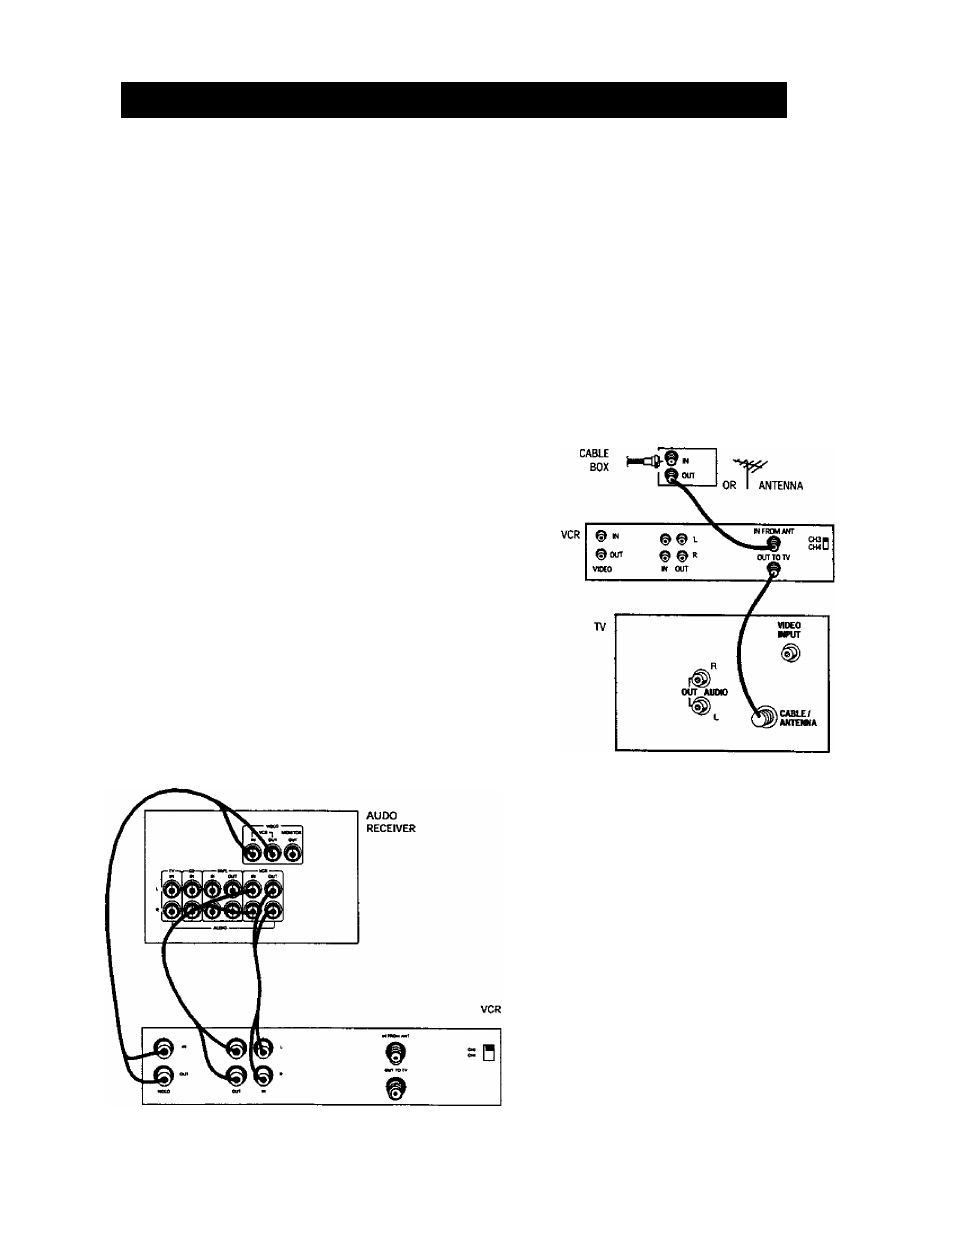
STEP1: CONNECTING YOUR
SATELLITE/CABLE RECEIVER
Connect the "OUT" jack on your cable/satellite
receiver box to the "IN FROM ANTENNA" Jack on the
back of your VCR.
Then connect the "OUT to TV" Jack on the back of
your VCR to the "CABLE/ANTENNA” Jack on the back
of your TV.
STEP 2: CONNECTING
YOUR VCR TO THE RECEIVER
Using video cables, connect the video VCR "IN" and
"OUT" Jacks on the back of your receiver to the "OUT"
and "IN" videojacks on the back of your VCR.
Using audio cables, connect the right and left "IN" and
"OUT" audio VCR Jacks on the back of your receiver to
the right and left "IN" and "OUT" Jacks on the back of
your VCR.
14