Installation instructions, Sheet 2 of 5, Pole mounted icon – Cooper Lighting Pole Mount Icon User Manual
Page 2: Fig. 2b fig. 2c, Fig. 3a fig. 3b
These instructions do not claim to cover all details or variations in the equipment, procedure, or process described, nor to provide directions for meeting every possible
contingency during installation, operation or maintenance. When additional information is desired to satisfy a problem not covered sufficiently for user’s purpose, please
contact your nearest representative.
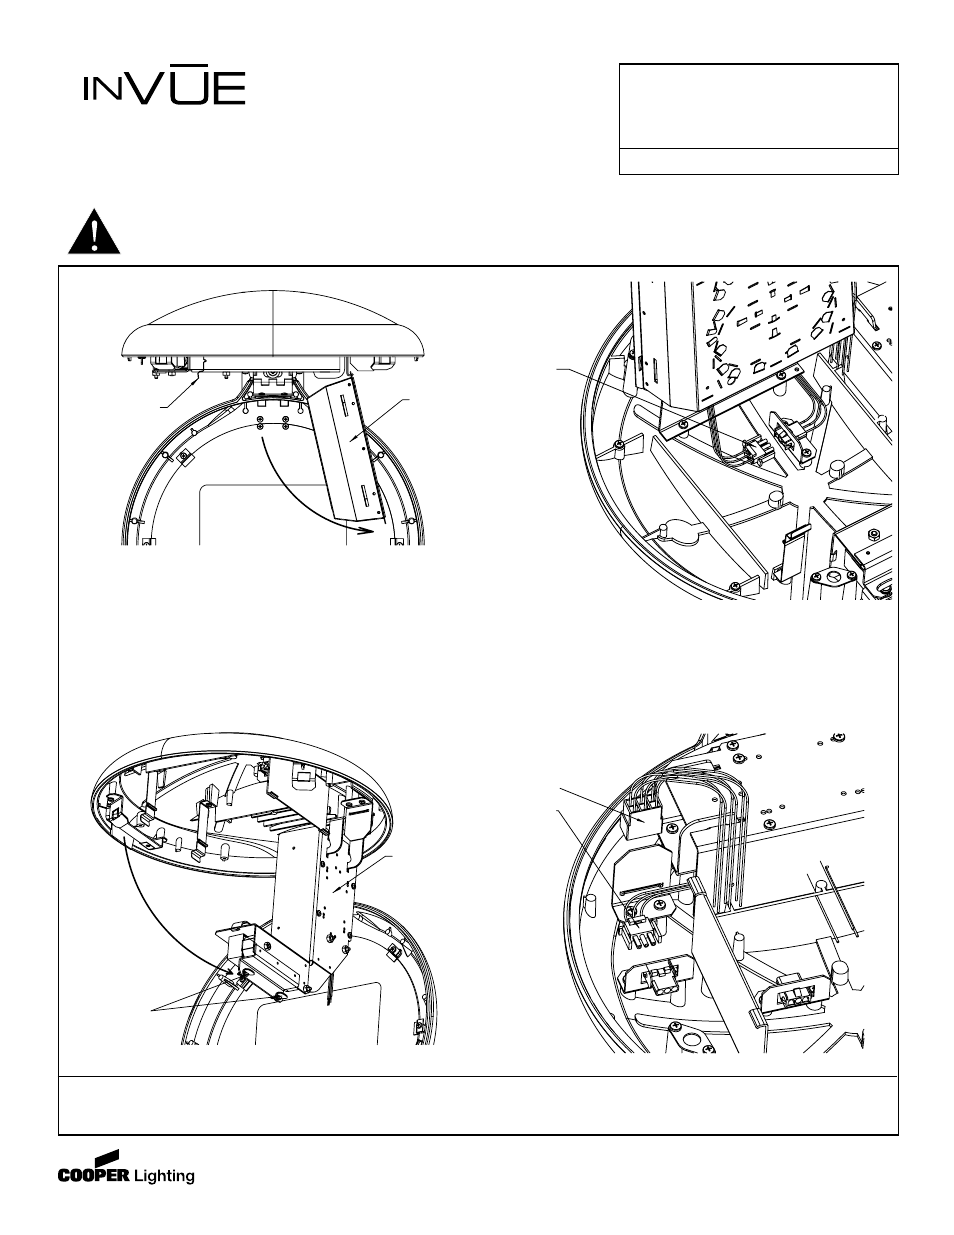
3. Power Supply Tray Removal -
Unscrew the two THUMB SCREWS and swing the POWER SUPPLY TRAY down as shown in Figure 3a. Disconnect the POWER
CONNECTOR and the OPTIC CONNECTOR from HOUSING. See Figure 3b. The POWER SUPPLY TRAY can now be lifted off the
bracket.
Customer First Center • 1121 Hwy 74 South • Peachtree City, GA 30269
IMI-593 AVU040206
Pole Mounted Icon
Sheet 2 of 5
3/11/04
IMI-593
INSTALLATION INSTRUCTIONS
IMPORTANT: READ CAREFULLY BEFORE INSTALLING FIXTURE.
RETAIN FOR FUTURE REFERENCE.
TM
WARNING:
Risk of Electric Shock. Disconnect power at fuse or circuit breaker before installing
or servicing.
Power Supply
Tray
Thumb Screws
Reflector
Connector
Reflector Tabs
Reflector
Fig. 2b
Fig. 2c
Power Connector
Optic Connector
Fig. 3a
Fig. 3b