Changing the cutter unit, Changing the tape cassette, Cleaning – Brother P-Touch PT-110 User Manual
Page 2
Attention! The text in this document has been recognized automatically. To view the original document, you can use the "Original mode".
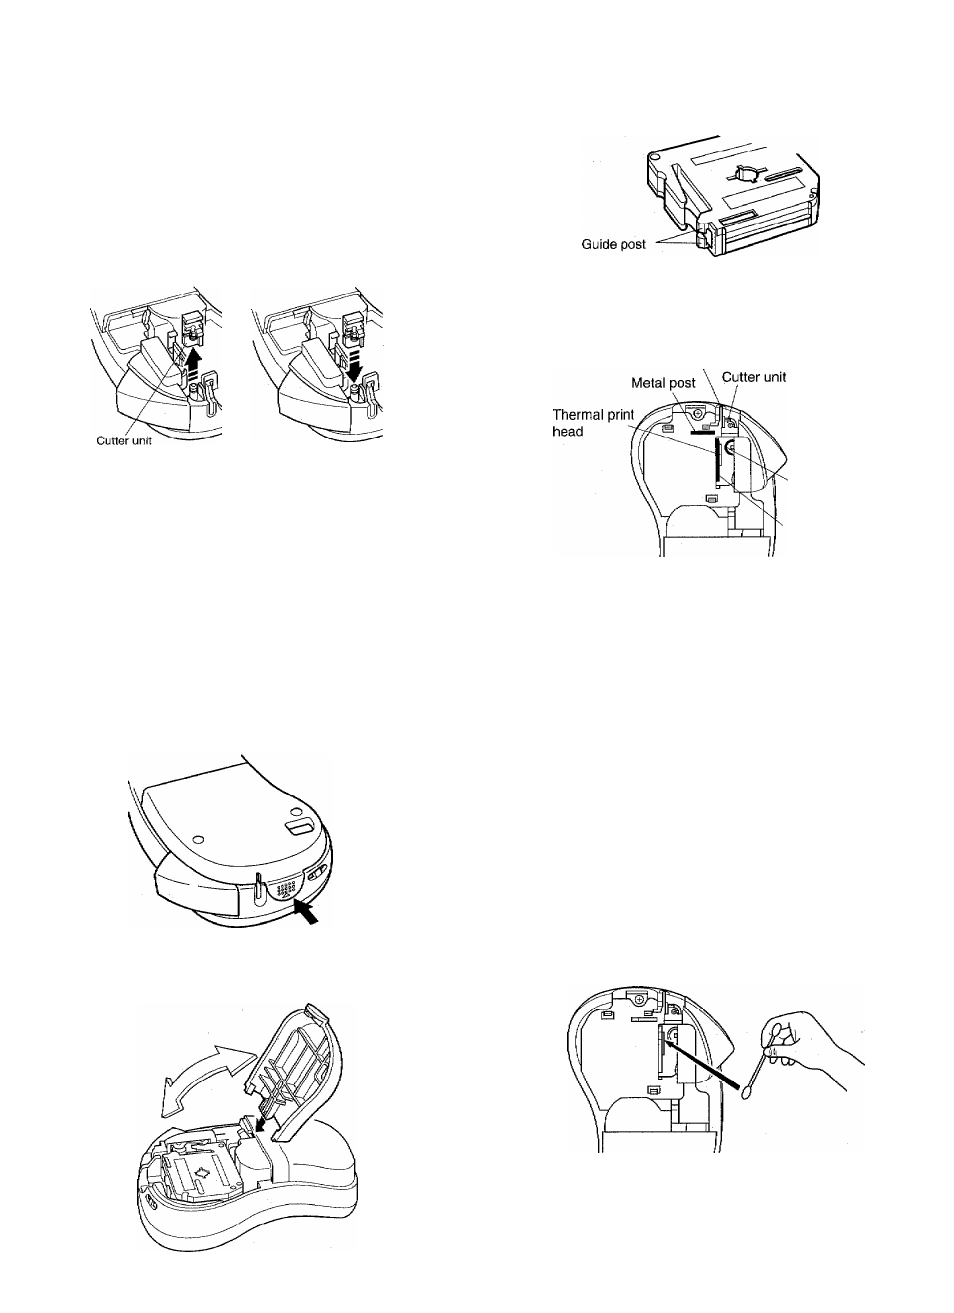
Changing the cutter unit
If the cutter becomes blunt and ceases to cut the tape
cleanly, replace it.
1) Open the cassette compartment.
2) Grasp the tab on the cutter unit and lift it out, taking
care not to touch the blade or the cutter lever.
Insert a new cutter unit. If the cutter lever is stuck in
the pushed-in position, rotate the new cutter unit as
you insert it, to push the lever back into its normal
position.
3)
CAUTION
When changing the cutter unit, be sure
not to touch the cutter blade.
Make sure that small children do not try
to put the cutter unit in their mouths.
Changing the tape cassette
1) To remove the tape cassette compartment cover,
press the textured area of the catch located on the end
of the machine closest to the tape cutter.
2) Press down firmly on the catch so that the cover
hinges up, then remove it.
3) Lift out the old cassette. Remove the paper tab from
the new tape cassette. Make sure that the end of the
tape in the new cassette feeds through the guide
posts on the cassette.
4) Insert the tape cassette, making sure that it clicks into
place. Ensure that the cassette sits properly on the
two metal posts.
Tape exit slot
Rubber
pinch roller
Metal
post
5)
6
)
To replace the cover, fit the tab on the cover into the
slots in the P-Touch case and push down firmly on
the cover so that it snaps securely back mto place.
Hold down the 0> key and press the ^ key, then
cut the tape.
The amount of tape left is visible through the zvin-
doiv in the back of the P-Touch.
When there is only a little tape remaining, the tape
becomes green.
Cleaning
If dust accumulates on the print head, one or more un
printed horizontal lines may appear on your labels.
Should this happen, clean the P-Touch as follows,
1) Turn off the P-Touch.
Open the cassette compartment and remove the cas
sette.
Wipe the print head and pinch roller up and down
using a dry cotton swab.
2
)
3)
4)
5)
Replace the cassette, replace the cover, switch on,
hold down the @ key and press the key to
feed the tape, and try a test print.
If the tape is still speckled with dust, repeat steps 1-4,
this time using a cotton swab dipped in rubbing alco
hol.