О о о о, Making connections, Cd'deck synchro function – Pioneer PD-M550 User Manual
Page 6: Care of discs
Attention! The text in this document has been recognized automatically. To view the original document, you can use the "Original mode".
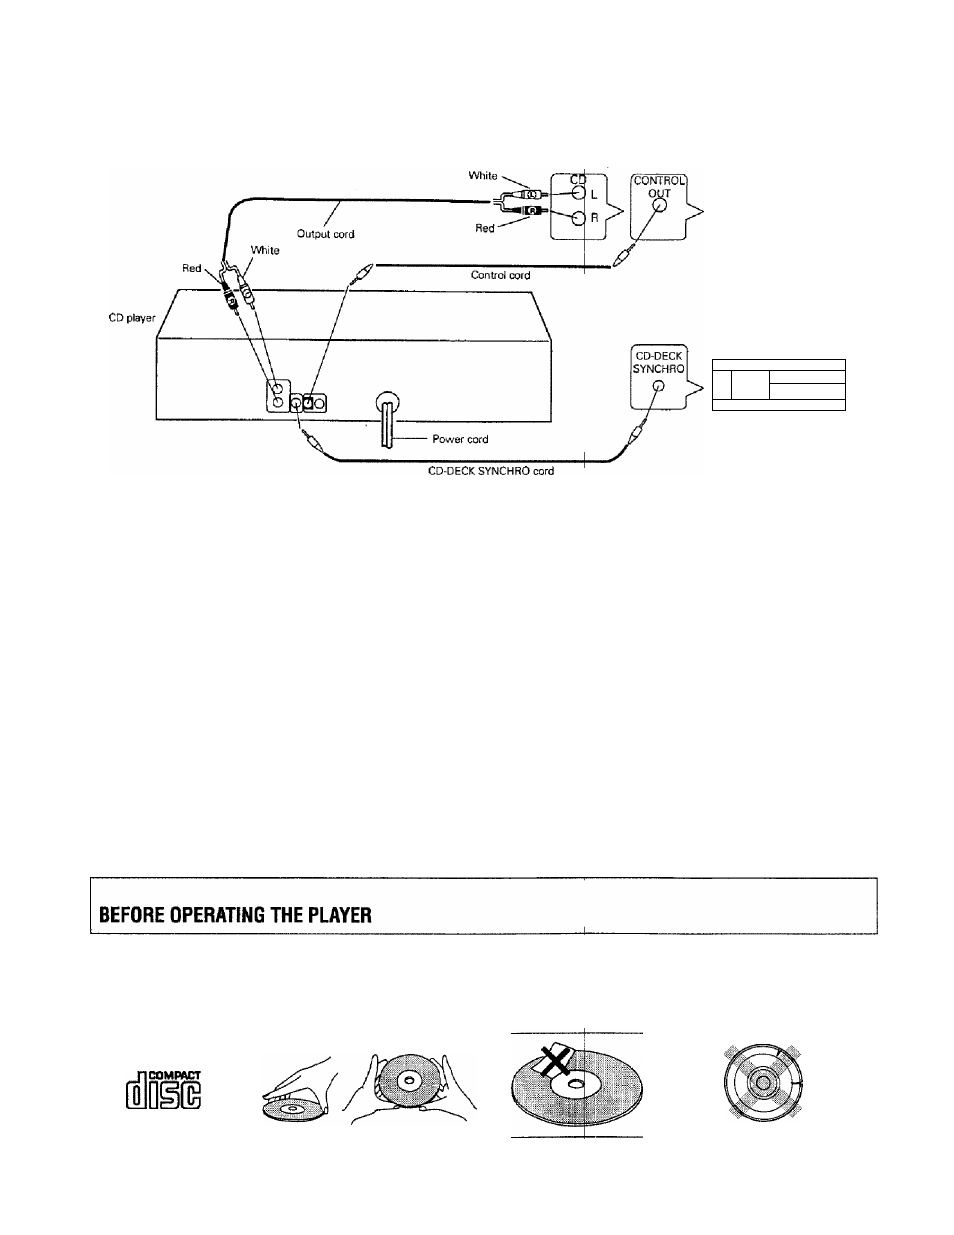
Make sure that a!l of the components are turned off before making connections.
Stereo amplifier
О О О О
Cassette deck
^ ...... .....................\
D
Ш
* ' ■ ■
о
*
Making connections
Q] Connect the OUTPUT jacks of this unit to the input jacks (CD or
AUX) of the amplifier. Make sure that the white plugs are
connected to the left (L) jacks and the red plugs to the right (R)
jacks.
•
Be sure not to connect this unit to the amplifier's PHONO
jacks, as sound will be distorted and normal playback will not
be possible.
E Connect the power cord to a household AC wall outlet or an AC
outlet on your amplifier.
• Make sure plugs are inserted fully into the jacks and wall outlet.
CD'Deck synchro function
If you have a Pioneer cassette deck provided with the CD-Deck
synchro function, connect the CD-DECK SYNCHRO jacks of the
CD player and cassette deck. With this function, synchro recording
can be carried out between player and deck.
•
For details on connections and operation, refer to the instruction
manual supplied with the cassette deck.
• The CD-DECK SYNCHRO cord is not supplied with the CD player.
iti
System
amplifier -III
{Available wr
PD-M550/PD'
military zones
When a Piori
connect the
to the CO NT
CD player to
with the start
Is not necass s
• The control
• The remoii
to control
operations
•
For instru
the opera|ti
amplifier,
NOTES;
pmote control with a Pioneer stereo
:hat has the ^ mark
the PD-M450 and U.S, and Canadian models of the
M455/PD-M453 only: Not available with models for
(multi-voitage types))
eer stereo amplifier bearing the mark is used,
C
ontrol
in
jack on the rear panel of the CD player
iOL OUT jack of the amplifier. This will enable the
be controlled using the remote control unit supplied
10 amplifier. If you do not plan to use this feature, it
ry to connect CONTROL IN/OUT jacks,
cord is supplied with the CD player,
e control unit supplied with the amplifier can be used
^lay. Stop, Pause, Track/Disc Search and Disc Change
,
:tions regarding connections and operation, refer to
:ing instruction manual provided with your stereo
ox
When a
jack, direi^t
not possi' '
by aiming
Be sure to
the CONT
only one
Be sure td
the powei
>ntrol cord is connected to the player's CONTROL IN
control of the pleyer with the remote control unit is
Operate the player with the remote control unit
it at the amplifier.
connect both of the control cord's plugs securely to
TOL IN and CONTROL OUT terminals. Do not connect
of the cable.
turn off the power of the amplifier when connecting
cord and output cord.
’Ые.
end
CARE OF DISCS
• With this player, use discs which display the mark shown below.
(Optical audio digital discs.)
• When holding discs, do not touch their signal surfaces, Hold by
the edges, or by one edge and the center hole.
Do not at ix gummed labels or tape to the label surfaces. Also,
do not scratch or damage the label.
Discs rotate at high speed inside the player. Do not use
damaged (cracked or warped) discs.
DIGITAL AUDIO
En