Kenmore 141.168600 User Manual
Page 10
Attention! The text in this document has been recognized automatically. To view the original document, you can use the "Original mode".
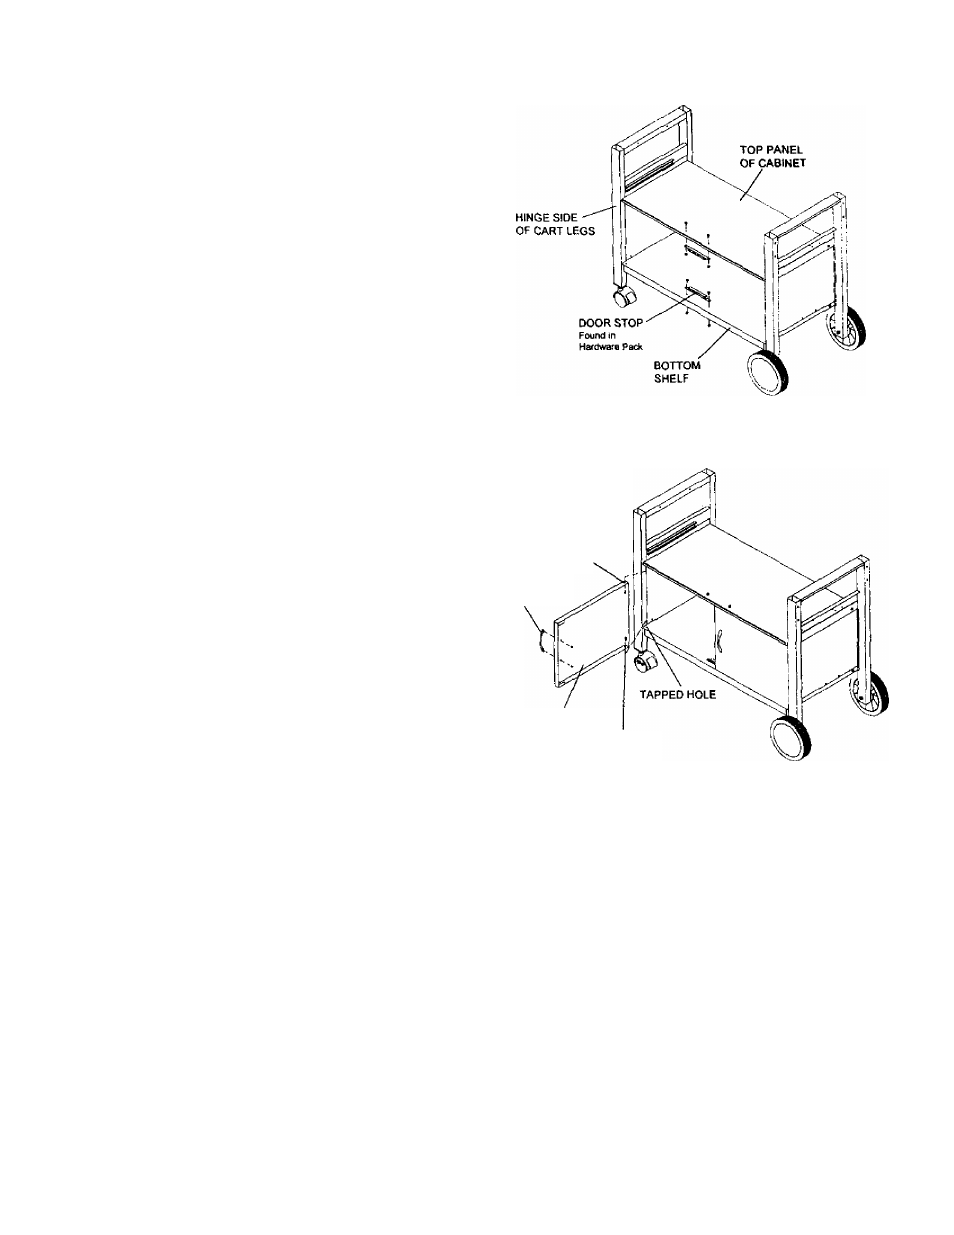
1. Install Door Stops to Bottom Shelf and Top
Panel of Cabinet. See Fig. 4. Secure firmly
using 4 of the 1/4"x1/2" Phillips head screws
and nuts.
2. If you haven't already done so, remove the
white protective film from the stainless steel
Doors. Attach a Door Handle to each Front
Door using 2 of the M4x6mm Phillips head
screws provided. See Fig. 5. Be careful not to
scratch the door surfaces.
3. When installing the Front Doors, make sure
the door bolt holes are located on the hinge
sides of the Cart Legs.
4. Install either Front Door by inserting 1/4"x5/8"
part-threaded bolt through the lower door bolt
hole of the Front Door and into the tapped
hole of the Bottom Shelf. Tighten securely.
Next, align the upper door bolt hole of Front
Door with the tapped hole in the Top Panel
of Cabinet. Insert 1/4"x5/8" part-threaded bolt
provided and tighten securely.
5. Repeat these steps to install the other Front Door.
Assembling The Cabinet Doors
How To Level The Grill Cart So The Doors Line-Up
When the top edge of the cabinet doors do not line-up
your grill cart needs to be leveled. This step is often
required after initial assembly and when your grill has
been moved to a new location. To level your grill cart,
use an 11/16" open-end wrench to unscrew either
front or rear Castor counterclockwise from its Castor
Seat (see bottom of the Cart Leg) until the cabinet
doors are aligned. See Fig. 5.
Figure 4
Figure 5
UPPER DOOR
BOLT HOLE
DOOR HANDLE
FRONT DOOR
LOWER DOOR
BOLT HOLE
10