Refrigerator use – Kenmore 2220698 User Manual
Page 9
Attention! The text in this document has been recognized automatically. To view the original document, you can use the "Original mode".
Please read before using the water system.
Immediately after installation, follow the steps below to make
sure that the water system is properly cleaned.
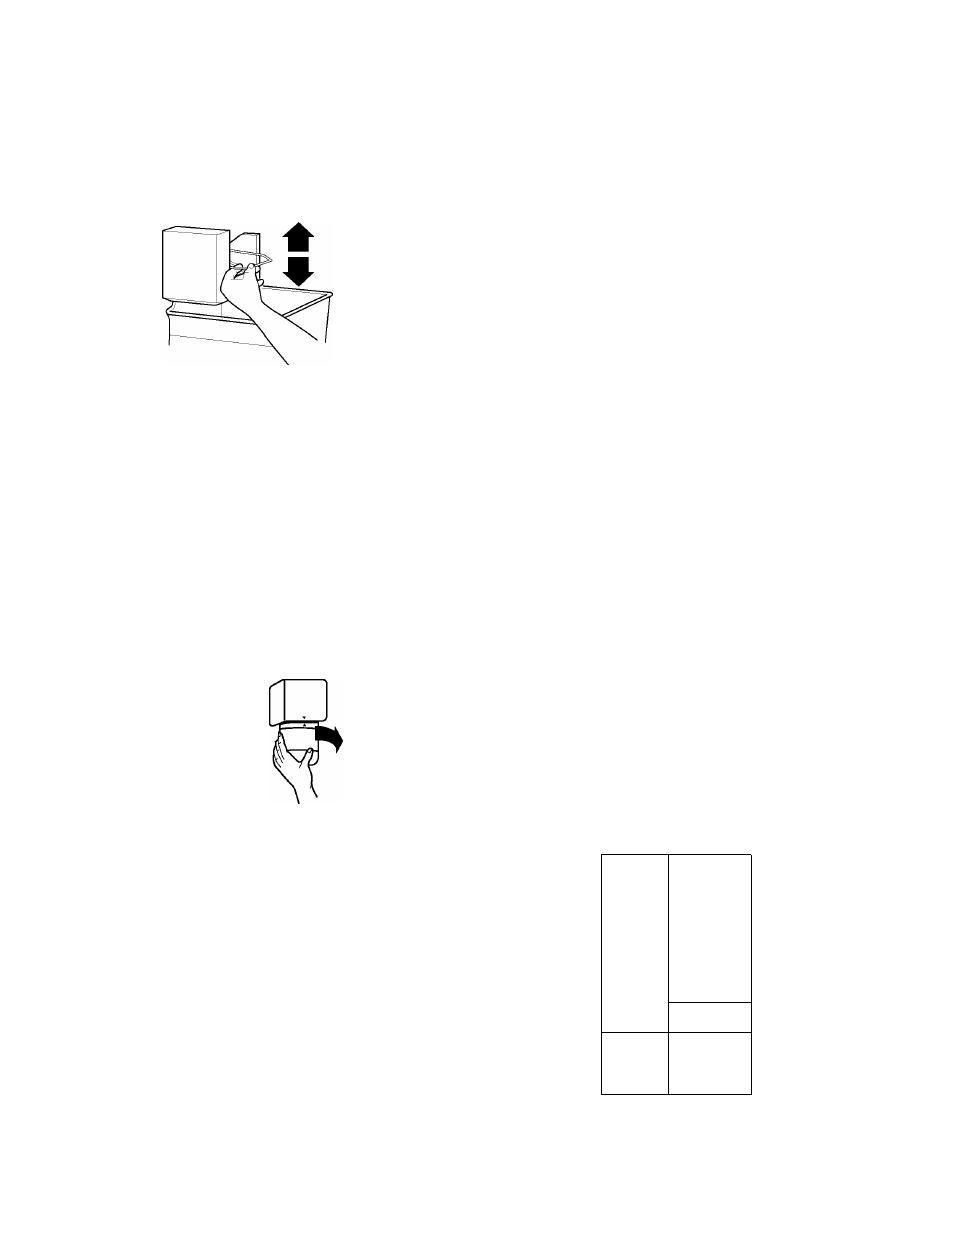
1. Turn off the ice maker by opening the freezer door and lifting
up the wire shutoff arm as shown.
2
.
Install the interior water filter cartridge (on some models). The
interior water filter mounting bracket is located in the upper
corner of the fresh food compartment of the refrigerator.
NOTE: Do not use with water that is microbiologically
unsafe or of unknown quality without adequate
disinfection before or after the system.
■ Carefully remove the interior water filter cartridge from its
packaging. Remove the red cap from the cartridge.
■
Apply the appropriate month sticker to the cartridge as a
reminder to replace the cartridge within six months. Then
apply the “Water Filter Replacement Reminder” sticker to
your calendar.
■
Line up the INSTALL mark on the water filter label with the
indicator line that is molded into the filter mounting
bracket cover. Push the cartridge into the filter mounting
bracket. Twist the cartridge
V
a
turn to the right to lock it
into place. The REMOVE mark should be lined up with the
indicator line located on the front cover.
&
3.
4.
5.
Use a sturdy container to depress the water dispenser bar
until the water begins to flow. Flush the water system by
dispensing and discarding 2 to 3 gal. (8 to 12 L) of water.
Cleaning the system will take approximately 6 to 7 minutes
and will help clear air from the line. Additional flushing may be
required in some households.
NOTE:
As air is cleared from the system, water may spurt out
of the dispenser.
Inspect the filter system for water leaks. If you see water
leaks, see the “Troubleshooting” section.
Turn on the ice maker by opening the freezer door and
lowering the wire shutoff arm as shown. Please refer to the
“Ice Maker” section for further instructions on the operation
of your ice maker.
■ Allow 24 hours to produce the first batch of ice.
■
Discard the first three batches of ice produced.
Your new refrigerator may make sounds that your old one didn’t
make. Because the sounds are new to you, you might be
concerned about them. Most of the new sounds are normal. Flard
surfaces, such as the floor, walls, and cabinets, can make the
sounds seem louder. The following describes the kinds of sounds
and what may be making them.
■
If your product is equipped with an ice maker, you will hear a
buzzing sound when the water valve opens to fill the ice
maker for each cycle.
■ Your refrigerator is designed to run more efficiently to keep
your food items at the desired temperatures and to minimize
energy usage. The high efficiency compressor and fans may
cause your refrigerator to run longer than your old one. You
may also hear a pulsating or high-pitched sound from the
compressor or fans adjusting to optimize performance.
■ You may hear the evaporator fan motor circulating air through
the refrigerator and freezer compartments. The fan speed
may increase as you open the doors or add warm food.
■
Rattling noises may come from the flow of refrigerant, the
water line, or items stored on top of the refrigerator.
■ Water dripping on the defrost heater during a defrost cycle
may cause a sizzling sound.
■ As each cycle ends, you may hear a gurgling sound due to
the refrigerant flowing in your refrigerator.
■ Contraction and expansion of the inside walls may cause a
popping noise.
■ You may hear air being forced over the condenser by the
condenser fan.
■ You may hear water running into the drain pan during the
defrost cycle.
REFRIGERATOR USE
In order to ensure proper temperatures, you need to permit air to
flow between the two sections. Cold air enters the bottom of the
freezer section and moves up. It then enters the refrigerator
section through the top vent. Air then returns to the freezer as
shown.
±i
'l*'
**
;
11------
Do not block any of these vents with food such as soda, cereal,
bread, etc. If the vents are blocked, airflow will be prevented and
the temperature controls will not function properly.