Important operating information – Whirlpool Clothes Dryer User Manual
Page 8
Attention! The text in this document has been recognized automatically. To view the original document, you can use the "Original mode".
IMPORTANT OPERATING INFORMATION
All models as received may have some ac
cumulated time remaining on the timer due to fac
tory testing. After connecting the electrical sup
ply. use the following to check operation.
ALL MODELS
1
.
Make sure the electric power is connected and
proper electrical contact made. Check fuses to be
sure they are good and tight.
2. To start dryer:
NOTE: Loading door must be closed for dryer
to operate.
a. Non coin operated models: Push timer set
button down. (Operating time will accumulate
per number of depressions and type of timing cam
used.) Push START/RESTART button. Dryer will
stop when time is used up.
b. Coin operated models; Insert coins in slide and
push in slowly. Operating time will accumulate per
number of coins and type of timing cam used.
Depress Push-to-Start button. Dryer will stop when
time is used up.
c. When door is opened dryer stops, but timer
continues to run. To restart, close door and push
START/RESTART button.
3. If drying time is too long, make sure lint screen
is clean.
4.
Periodically inspect motor and blower for lint
accumulation. Large quantities of lint in these
areas will affect performance of the dryer.
GAS DRYER MODELS
1
.
Make sure gas shut-off valve is open and gas is
available.
2. Remove air from gas supply line as follows
(after completing the installation):
a.
Turn the dryer on and allow it to run for about
five minutes in a full heat cycle.
b.
If the burner does not ignite during these five
minutes of operation, shut off machine and wait
for 15 minutes. While waiting, check to be sure
all supply valves are open and electric supply is
connected. Repeat the above procedure until the
burner ignites.
MOVING OPERATIONS PROCEDURE
GAS DRYER MODELS
1. Remove power cord from wall socket, coil it and
tape it to back of dryer.
2. Close shut-off valves in gas supply line and
behind dryer toe plate.
3. Disconnect gas pipe and remove protruding
fittings from dryer.
4.
Cap the open fuel line running to gas meter.
ELECTRIC DRYER MODELS
1. Shut off electric supply to the dryer.
2. Disconnect power supply cord or cable from
the dryer terminal block.
ALL DRYER MODELS
1. Make sure leveling legs are secure in dryer base.
2. Apply filament tape from Inside drum, out the
door opening to the front panel to prevent drum
movement.
3. Use masking tape to secure clothes door and
lint screen lid.
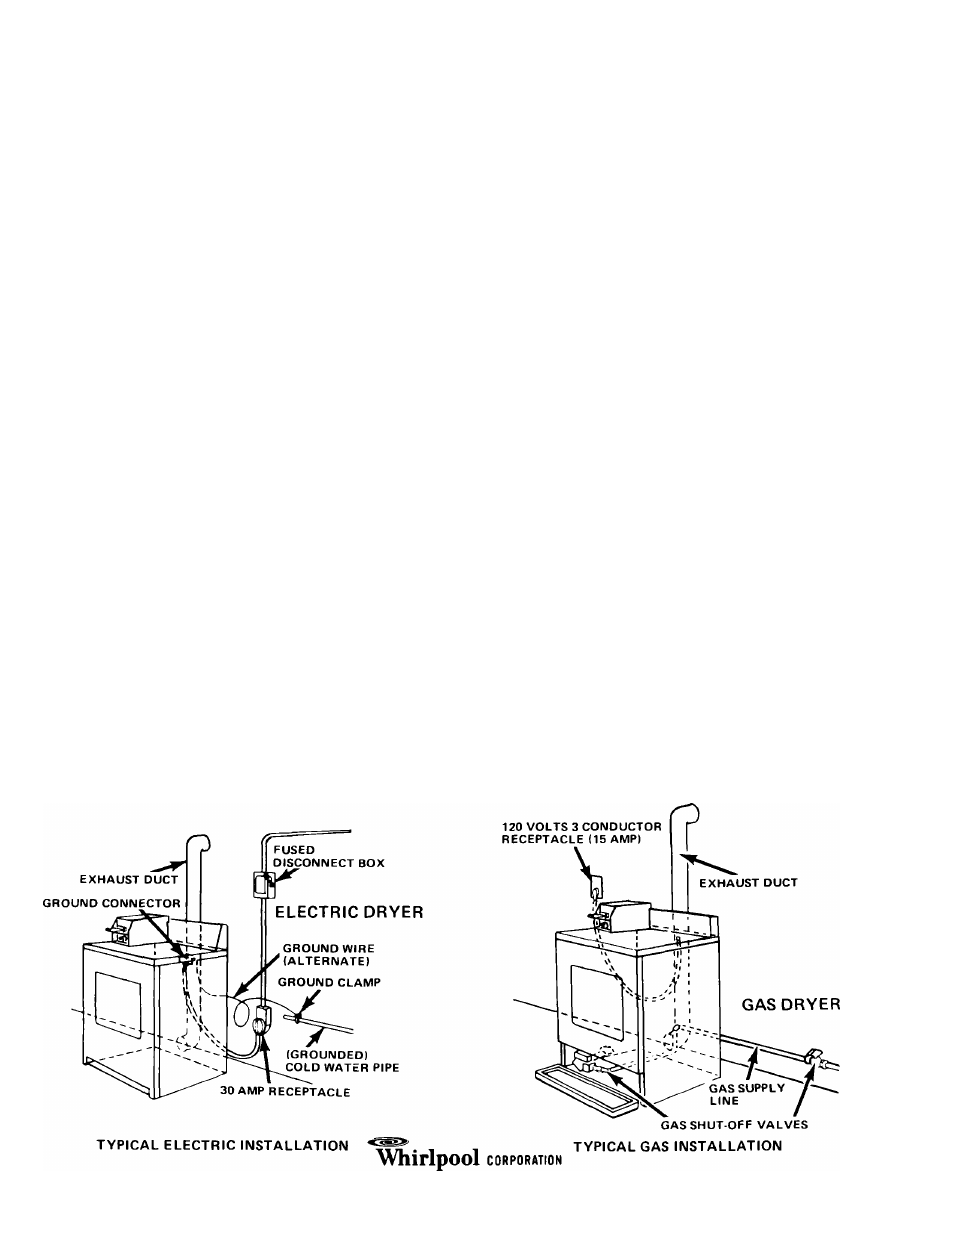
ILLUSTRATIONS SHOWING COMPLETE TYPICAL INSTALLATIONS
Part No. 687455
Benton Harbor, Michigan 49022
8