Go-Ped ESR750H PPV User Manual
Page 8
B. Rear Wheel
1. Remove axle nut and washers from end of rear axle. A4
2. Install rear wheel with valve stem on left side to prevent interference with gas tank bracket. A5
3. Rotate rear fender and tank mount bracket and align with rear axle.
NOTE: Make sure fender doesn’t rub wheel or interfere with drive components. A6
4. Install axle bolt with washers between bearings and bracket and nut.
5. Tighten rear axle bolt.
6. Check for free rotation of rear wheel.
7. Check for proper operation of rear brake if applicable.
8. Check for proper drive component operation.
C. Pneumatic Tire Information
• Never use tires or tubes not recommended by Go-Ped® or P.M.W. or exceed the maximum P.S.I.
limits of the tire assembly in use.
WARNING: Never exceed P.S.I. rating specified on the side wall of your tire or
serious injury can result. Only use original equipment. Aftermarket replacement
parts may not be suitable and can result in immediate loss of control, unstable
conditions, and failure.
WARNING: Tire wear, punctures, or ruptures can cause immediate loss of con-
trol, which may affect operator and precipitate serious bodily injury. Helmets,
goggles, gloves, elbow and knee pads and appropriate shoes with ankle sup-
port must be worn at all times.
WARNING: Patching a tube is an emergency repair. Patches can severely weaken
the integrity of a tube, resulting in possible tube failure, cause a loss of control,
and cause the rider to fall. Replace a patched tube as soon as possible. Never
replace the tube with anything other then the stock OEM tube. Using an after-
market tube or tire not intended for Go-Ped® specification could result in a
sudden loss of pressure that could cause damage to your scooter and/or a loss
of control.
CAUTION: Replace front or rear tires when tread is worn within 1/16" tread depth,
or if obvious tire damage has occurred.
D. Non-Pneumatic Tire Information
Non-pneumatic tires require no maintenance but must be replaced when normal wear and tear
makes the tire diameter reach the wear limit dimple found on the side wall of the tire. If split,
cracked or torn tires should be replaced immediately.
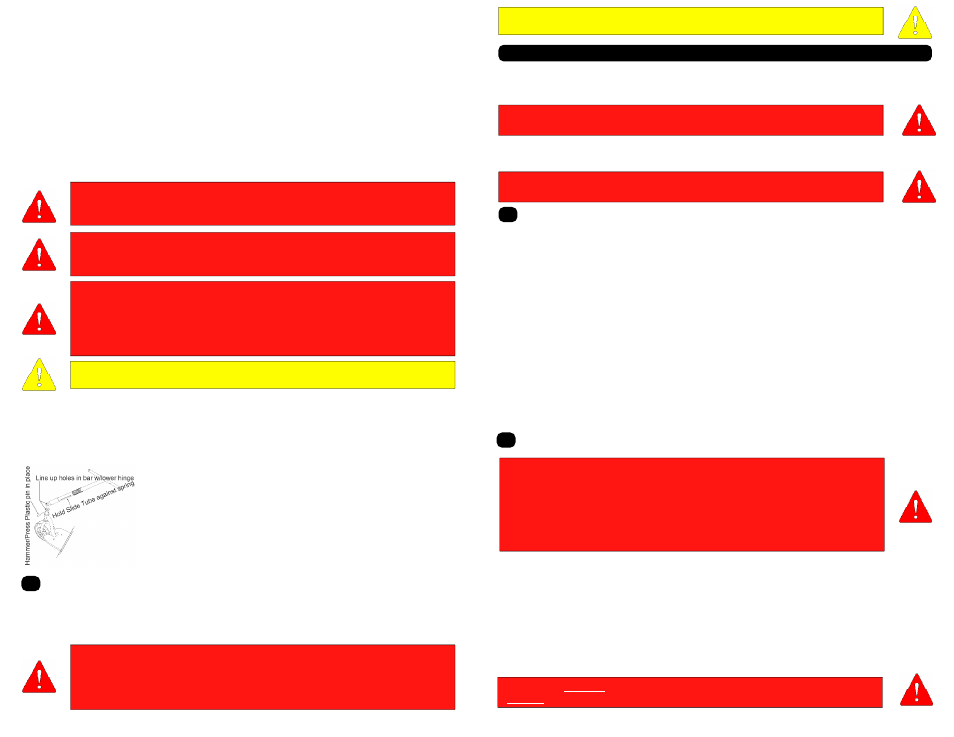
E. “T” Handle Installation
1. Remove the plastic hinge pin from the bottom of the handle bar
assembly.
2. Compress slide tube locking spring and hold in place.
3. Insert the handle bar assembly in the slot of the lower hinge assembly
found on the body of the frame assembly at the front fork.
4. Hold the slide tube in the up position and insert the plastic hinge pin.
5. Use a hammer and a spare bolt (not provided) to get the plastic hinge pin
centered in the hole so that the slide tube can slide over it and sit flush with the bearing
race. Note: Refer to “3.3 Folding Feature” for proper operation.
3.3
Folding Feature
Your Scooter is equipped with a folding feature for easy carrying and stowage. To fold pull up
against the spring tension on the slide tube found on the base of the “t” handle until it completely
exposes the hinge assembly and fold to the latching mechanism found next to the motor. Reverse
process to lock handle bar in the riding position.
WARNING: The “Lower Hinge” of the folding hinge assembly is also a “Mechani-
cal Fuse” designed to break if there is high shock loads, stress, and/or fatigue
exerted on the handlebar assembly. The lower hinge is a safety feature that will
leave your bars extremely loose and must be replaced before you continue to
operate the unit.
CAUTION: Before you ride - Be certain the handle lock tube is in its full down
position, locking the handle bar upright.
Section 4: Operations
Break-In Period
Like a gasoline powered vehicle your EV does have a short and simple Break-In period. Break-in
is best done by operating your ESR in the “Econo” mode for the first complete charge.
WARNING: Do not leave your unit on charge for more then 1 weeks at a time. This
will damage batteries and/or create a possible fire hazard.
Note: Your unit uses “Smart Charger” technology and can be plugged into any standard 110v or
the European standard 220V wall outlets.
WARNING: Do not operate the unit during while charging. This poses a serious
risk to the operator and can potentially damage the unit
4.1
Charging “Sealed Lead Acid” (SLA) models
Your Unit has an onboard charger built inside. In order to charge it, all you need to do is plug the
provided cord into the receptacle on the right side of the battery pan. It is recommended that you
charge your ESR immediately after each use. Avoid letting your ESR sit unused for long
periods of time with depleted batteries as this can damage the chemical make up of the
batteries that will shorten the usable life span of the batteries.
The Flux Capacitor on the handlebar indicates when the scooter is charging.
Plug the scooter in and the LEDs on the Flux Capacitor will begin to strobe:
Red/Yellow/Green. Repeat.
This indicates that the batteries are charging. When a full charge is achieved all three LEDs on the
Flux Capacitor will begin flashing simultaneously.
After the Flux Capacitor begins flashing, the charger automatically switches to a “trickle charge”
and will continue to charge the batteries at a safe level. It is a good idea to leave the scooter
charging even after the Flux Capacitor indicates a full charge. The “trickle charge” will slowly “top off”
the battery charge over the next few hours. It is safe, to leave the scooter plugged in for up to a
week. When the unit is not in use for long periods of time, have the batteries topped off by
placing back on a charger for a few hours once a month to help preserve battery integrity.
4.2
Charging “Lithium Ion” (Li-Ion) models
CHARGING WARNING: Though we anticipate none, and have encountered no safety
problems while charging the GoPed Li-ion polymer packs, there is always a remote
possibility that unanticipated electrical or electronic discrepancies due to
unintended uses and conditions could possibly cause a malfunction in the future
without notice.
Do all charging in a safe location where, should any unlikely safety issue arise in
the form of smoke or fire, it will not be possible to damage property.
Your Li-Ion model may have 2 chargers. One charger is “On-Board” the unit at all times and
should be used for general charging wherever the second “Off-Board” charger is not available.
A. On-Board Charger is a general use charger capable of putting a full charge back into the Li-Ion
battery packs. (Refer to section 4.1)
B. Off-Board Charger works in conjunction with the Battery Management System (BMS) for
proper battery maintenance and will keep batteries properly conditioned and balanced for
maximum battery cycle life. Use the off-board charger as often as possible or at least once a
week.
WARNING: DO NOT charge using both charging systems simultaneously.
DO NOT charge the packs with any charging system other than what is provided.