Go-Ped ESR750H PPV User Manual
Page 3
Attention: To find more information, news, replacement parts, accessories, and support on
California Go-Ped® Brand Products, please visit us on-line at www.goped.com. You can also
become a “Go-Ped Brand Products” fan on FaceBook, follow us on Twitter “Go_Ped” and or
connect, have discussions or just see what other Go-Ped owners and fans are saying at
www.gopednatiion.com
Section 5: Controls
Section 6: Maintenance and Parts
6.1) Service and Maintenance Schedule
Section 7: Adjustment
7.1) Brakes
7.2) Wheels
7.3) Chain tension adjustments
7.4) Suspension
Section 8: Operator Tips to
Optimize Performance
8.1) Keep Your Motor Cool
8.2) Battery Care
8.3) Riding surfaces to avoid
Contents
Section 1: Important Information
1.1) About this Manual
1.2) A SPECIAL NOTE FOR PARENTS
Section 2: Operator Safety
2.1) Safety Equipment
2.2) Mechanical Safety Check
2.3) Scooting Safety
2.4) Rules to Scoot By
2.5) Stunts, Wheelies, or Jumps
2.6) Wet Weather Riding
2.7) Night Riding
Section 3: Assembly
3.1) Pre-assembled scooters
3.2) Some assembly required
3.3) Folding Feature
Section 4: Operations
4.1) Charging “Sealed Lead Acid” (SLA) models
4.2) Charging “Lithium Ion” (Li-Ion) models
4.3) Fuel Gauge (Flux Capacitor
)
4.4) Power Switch
4.5) Auto-Off Feature
4.6) Economy/Turbo Modes
4.7) Batteries
Thank you for your recent acquisition of a California Go-Ped® brand product!
We are very happy and proud to welcome you to California Go-Ped®, the World’s Best
in Extreme Fun, Innovation and Quality. By choosing California Go-Ped®, you have
selected the highest quality scooter products in the World, which have been handcrafted
in the USA since 1985, using aircraft grade materials and the highest quality compo-
nents.
As the leader in innovation, design and performance California Go-Ped® has paved the
way for personal transportation by producing lightweight, fuel efficient, durable, perfor-
mance minded, and well-balanced machines.
As a new Go-Ped® owner and User, you now have access to the widest dealer network,
thousands of parts for your Go-Ped®, complete warranty coverage and instant access to
service.
You are now part of the fastest growing community of scooter enthusiasts in the world.
A technical hot line is available for further assistance 925-373-6309. You can also
find technical help videos and replacement parts by visiting the “FAQ” and
“Products” pages at www.goped.com
Note: Only use original Go-Ped® tires/wheels. Replacing the rubber tire takes some practice. If
you are having trouble, have your authorized Go-Ped® dealer teach you, or have them perform
this task for you.
Replacing pneumatic tires and tubes: The tires and tubes are critical components requiring
precise reassembly to insure proper alignments. An authorized Go-Ped® dealer using OEM parts
should do this operation.
Warning: Completely deflate wheel before wheel disassembly or any work on
the wheel. Failing to do so can result in serious injury.
7.3
Chain Tension Adjustments
Proper chain care and maintenance is essential to longevity and wear of the drive components on
your chain drive unit.
• Your unit may be fitted with an auto adjusting chain guild that will automatically self-adjust for
proper chain tension. The only maintenance required for it is to insure that it is still operating properly
and still keeping tension on the chain.
• Make sure that the sprockets are perfectly aligned to each other. Use a long straight edge or you
can check this visually by lining up the rear sprocket with the front and seeing that the chain is
straight.
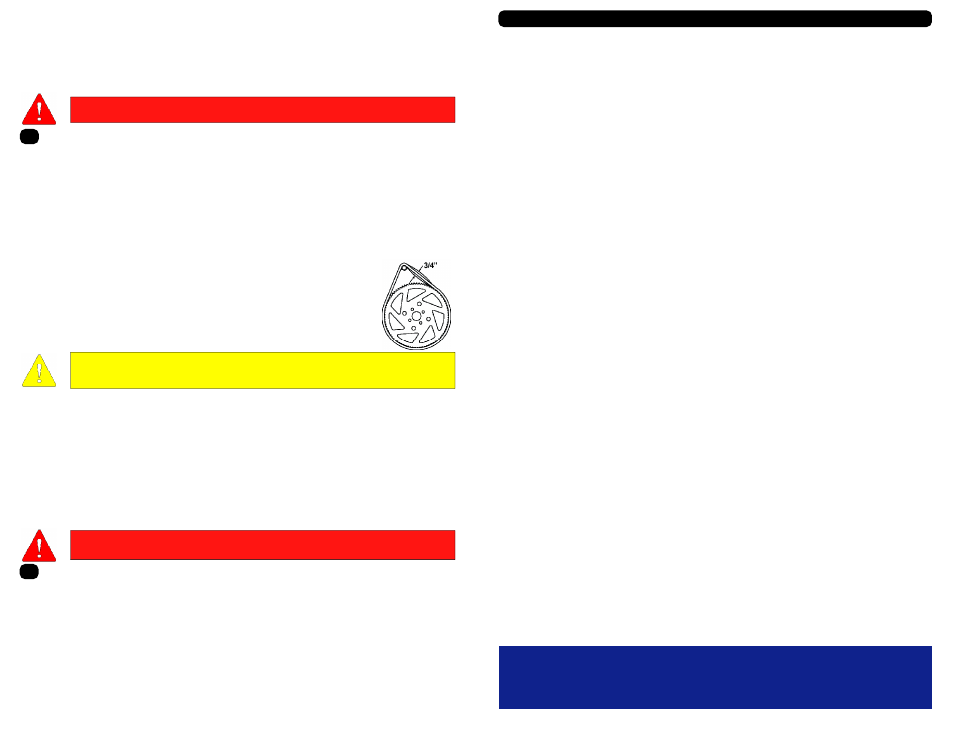
• For non self-adjusting chain tensioners, loosen the 6mm nut which retains the
chain tensioner. Push the chain tensioner down to take up slack in the chain.
Rotate the rear wheel and test the tension in several different places. You may find
that the chain gets slightly tighter when the wheel is in a certain position. With the
wheel in the “tight spot” leave about ¾” of chain play in the chain as shown.
Retighten the nut to lock the tensioner in place.
CAUTION: Tightening the chain more than necessary will cause your drive
components to wear prematurely and add performance reducing drive system
friction.
• The chain should be lubricated before each ride.
• Your chain should be clean and free of debris. Use a safe cleaning solvent but the chain must be
re-oiled once it is dry.
• Sprockets should be periodically checked for damage and wear. If you notice that there is any
damage to the sprockets or a tooth missing it should be replaced immediately.
• A small setscrew holds the small tooth sprocket in place on the motor shaft. Periodically check to
make sure this setscrew is tight. If the setscrew loosens or falls out, the motor will spin but will not
turn the rear wheel.
WARNING: Never lubricate chain while motor is running. Always keep fingers,
clothing, and other objects clear of any rotating chain or wheel.
7.4
Suspension
• Your suspension comes pre-adjusted and ready to ride from the factory.
• The nut in the middle of the suspension “knuckle” is for the disassembly of the suspension. It
takes special tools to assemble the suspension properly so consult an authorized Go-Ped® Dealer
before attempting any replacement of internal suspension parts. However, tightening and or
loosening this center nut also stiffens and loosens the suspension you can tighten CW this center
nut for a stiffer feel or loosen CCW for a softer one. You just need to make sure that the nut does
not come off and liquid thread lock like Locktite is recommended if loosening for a softer feel.
• It may take a bit of riding for the suspension to adapt completely to the adjustments made.
Adjustments should be made in small increments and a light thread lock fluid may be needed to
secure center nut setting.