Freerider FR168-3A2/Companion User Manual
Page 17
DISMANTLING YOUR COMPANION FOR JOURNEYS
AWAY.
To enable your Companion Scooter to be carried in a
suitable estate or hatchback car (see fig 15), follow these
simple instructions for dismantling your scooter. This
procedure can be carried out quickly and without tools.
Please Note: Your two batteries are supplied in carrying
holders. These will be fitted to your batteries by your
Freerider Agent.
(Your battery packs are temporarily
secured to the scooters chassis for initial transportation by
two black securing straps. Please remove these before
driving your scooter).
Do not attempt to lift batteries
without these carrying holders fitted. Always use two
hands to safely lift your batteries. If your batteries do not
have these lifting holders fitted, you will find them packed
into your front basket.
Fitting is as follows:
1. Lay each battery on a soft non-metallic surface. Fit the
battery connection cable supplied to the battery using a
nut, washer and bolt. The red positive (+) cable is
attached to the “+” positive terminal (marked in red on
some battery models). The black negative (-) cable is
attached to the “-” negative terminal (marked in black
on some battery models) see fig 16.
Warning:
The batteries nut and bolt must be fastened tightly
onto the terminal and covered with the red and black plastic
terminal protection covers. Failure to observe this warning
could result in poor electrical connections and place you in
a dangerous situation.
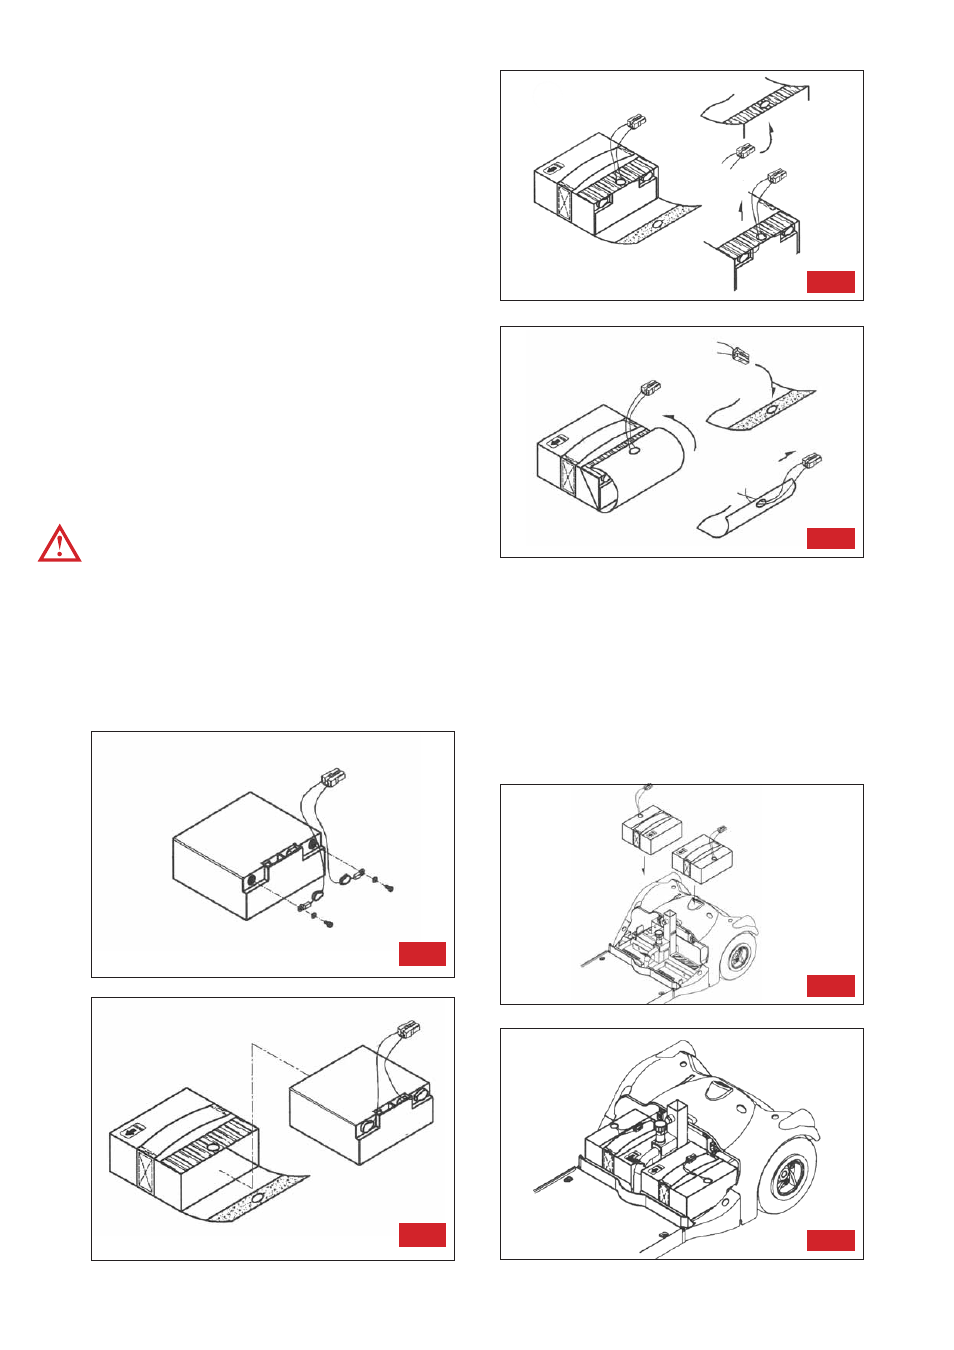
2. Slide the battery into the carrying holder with the
battery terminals and connecting cable facing the opening
(fig 17).
3. Place the battery connector through the hole in the
holders covering flap (fig 18).
4. Close the flap over the carrying holder making a tight fit
onto the Velcro® seal (fig 19).
Repeat this procedure for each battery.
Your batteries are positioned under the black body cover
located under your seat. The two battery holders are
secured to the scooter frame by the velcro® adhesive
technique see fig 20 and 21.
FIG 16
FIG 17
FIG 18
17
FIG 19
FIG 20
FIG 21