Drive belt, Adjusting brake – Cub Cadet 414 User Manual
Page 15
15
•
Remove oil cap and add approximately 22 oz of 80-
90 Weight Oil.
•
Install oil cap, and lower and latch cargo box.
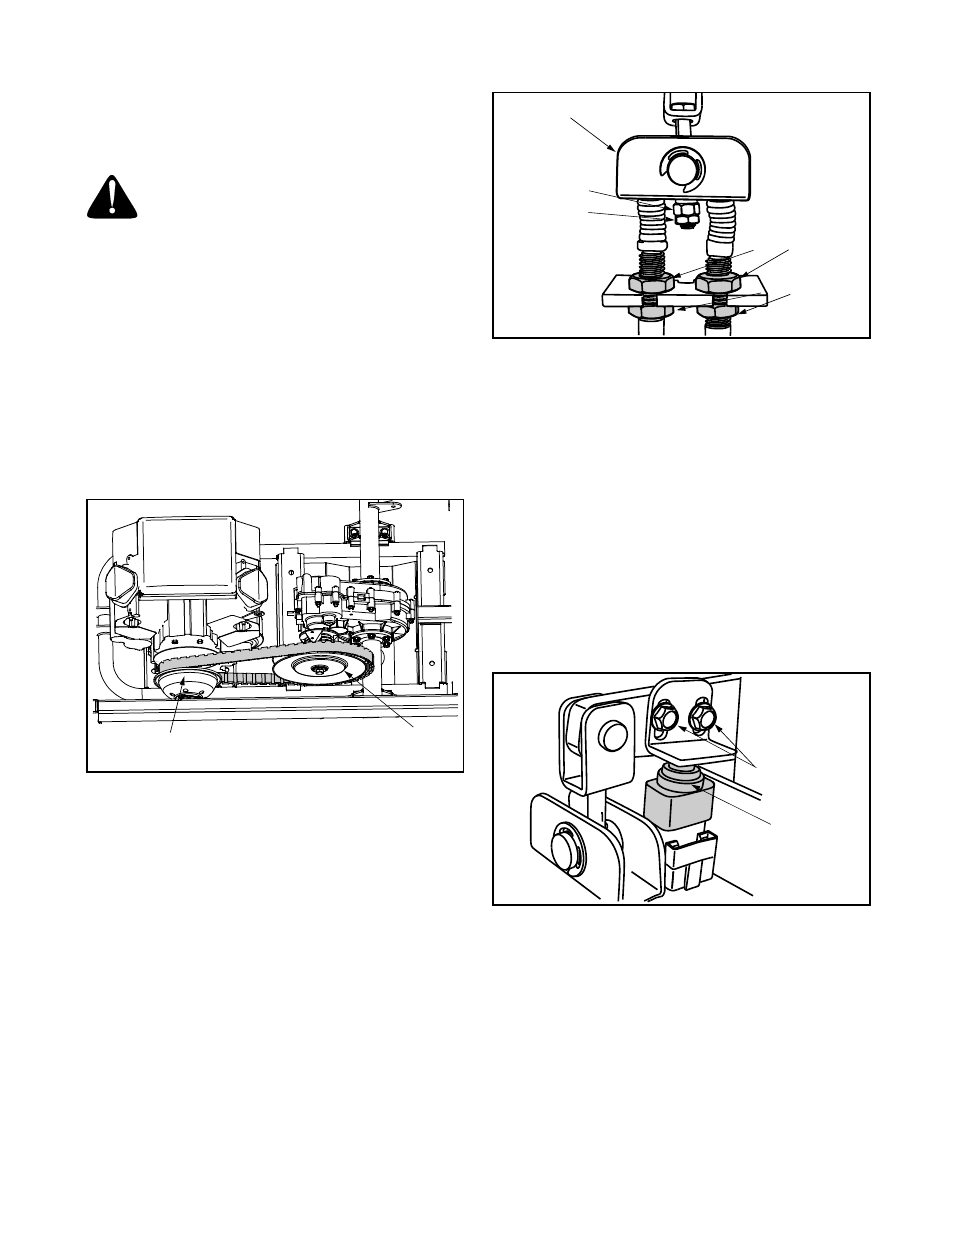
Drive Belt
WARNING: Fingers or loose clothing can get
caught in rotating parts. Stop engine and wait
for all moving parts to stop before servicing.
•
Park vehicle on level surface and apply parking
brake.
•
Raise and secure cargo box, if manual lift.
•
Rotate and inspect belt for wear or damage.
•
Measure width of belt on top surface. The width
should be a minimum of 1.1” (27 mm).
•
Replace belt if worn beyond limit.
To replace belt:
•
Route belt over drive clutch pulley (front pulley).
•
Route belt from drive pulley (rear pulley).See
Figure 18.
•
Install new belt by routing over drive pulley (front
pulley) and then over the drive clutch pulley (rear
pulley).
Figure 18
Adjusting Brake
To adjust the brakes:
•
Stop the vehicle on a level surface.
•
Turn the ignition key to the STOP position and
remove the key.
•
Make sure the parking brake is released and the
vehicle is in neutral.
•
Remove the wing nuts securing the hood, and lift it
forward.
•
Check to see if the equalizer bracket is in a
horizontal position. If not, loosen the jam nut and
tighten or loosen brake adjustment nut until
satisfactory brake performance is obtained and
equalizer is level. See Figure 19.
Figure 19
•
Tighten jam nut up against brake adjustment nut.
WARNING: Failure to tighten jam nut against brake
adjustment nut may cause complete loss of brakes.
•
If this minor adjustment does not achieve
satisfactory brake performance, loosen brake cable
and jam nuts and adjust until desired brake
performance is attained, again making sure to keep
equalizer horizontal. See Figure 19.
IMPORTANT:
If gear selector buttons fail to work after
making brake adjustment, adjust brake switch actuator
upwards. If it is found that the gear selector buttons
operate before the vehicle comes to a complete stop,
adjust brake switch actuator downwards. To adjust,
loosen brake switch actuator bolts, then move the
actuator up or down accordingly. See Figure 20.
Figure 20
•
Cautiously complete the testing on level ground by
operating the machine and applying brakes in a
normal manner.
•
Repeat the adjustment procedure if necessary.
Clutch Pulley
(Rear)
Drive Pulley
(Front)
Equalizer Bracket
Brake
Adjustment Nut
Jam Nut
Brake Cable Nuts
Jam Nuts
Brake Switch
Actuator
Brake Switch
Actuator Bolts