Exposure – COP-USA CC25NVD-H User Manual
Page 2
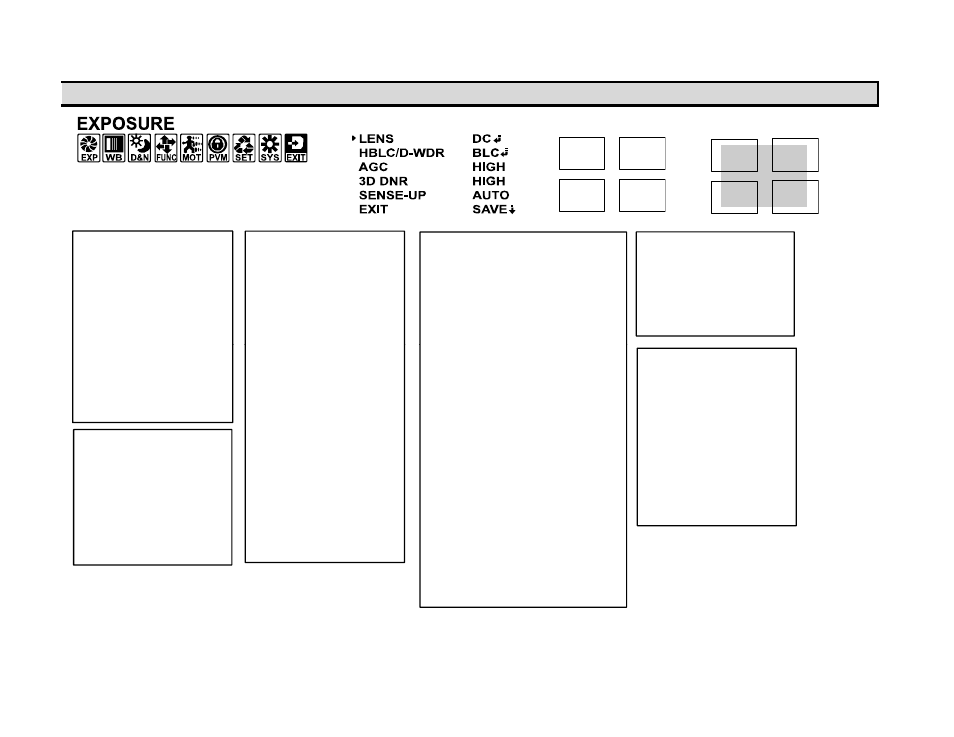
1. EXPOSURE
DEFAULT HLI AREA
DEFAULT HBLC AREA
HBLC/D‐WDR:
OFF / BLC / HLI / D‐WDR
BLC MODE:( Backlight
Compensation)
Manual (Backlight Compensation
will be in effect whenever the
d
d
l
AGC :( Increases Brightness , the
higher the setting the more noise
will get on the video)
OFF AGC disabled
LOW Low AGC Setting
MIDDLE Middle AGC Setting
HIGH High AGC Setting
Lens:
DC IRIS (Use this feature when
using a DC Lens)
Go to Submenu and adjust the
settings:
E.Shutter (1/60 ~1/100000)
Bright (001~100)
DC REF (000~20)
ELECTR.( use this feature when
i
DC L
)
HLI (High Level Interface)
HBLC ( It is Highlight Backlight
Compensation. And what this will do is intensify
the area around the
bright light to help you see the object better. If
you leave this off, regular
HLI will do its work and will only black out the
bright lights but will not
drawn area detects low
illumination)
TOP (000~016)
BOTTOM(000~016)
LEFT(000~016)
RIGHT(000~016)
Auto ( Adjusts the Backlight
Automatically)
BLC WEIGHT (Sensitivity to
Backlight can be adjusted or
disabled)
(OFF/LOW/MID/HIGH)
D‐WDR (Wide Dynamic Range)
This Function is used to
compensate the strong Backlight
Sense up: (Slowshutter Speed)
AUTO
OFF
X2~X512 Manual Slowshutter
mode select from low x2 up to high
x512
using a non‐DC Lens)
E.Shutter (Auto,1/60,
1/100FLK,1/120~1/100000)
Bright (001~100)
3D‐DNR (OFF/LOW/MID/HIGH)
(This Feature is to reduce the
Background noise in a low light
environment.)
toggle this setting at night time. If
you notice a nice clear picture at
night with this
setting as being off, then please
leave it like that. However, if you
notice a great deal of
noise you can toggle between the
strength settings to see what best
suits your
scenario
intensify the objects that are directly around
the bright light. You can
select the intensity of the BLC as well as the
area.)
LEVEL: OFF/LOW/MID/HIGH
TOP:(000~030)
BOTTOM:(000~030)
LEFT:(000~030)
RIGHT:(000~030)
HLI MODE: (NIGHT / ALL DAY)
SET LEVEL: (001~100)
GRAYMODE:( Select the HLI area color :
GRAY/D.GRAY/BLACK)
MASK SEL:(MASK1/MASK2/MASK3/MASK4)
for each mask you have an option to adjust the
size and location. the feature will take effect
only on selected areas
MODE :(ON/OFF)
TOP:(000~030)
BOTTOM:(000~030)
LEFT:(000~030)