Inserting viscometer tubes/thermometers – Cannon Instrument CT-2000 (Contant Temperature Bath) User Manual
Page 11
9
CANNON
®
CT-2000 Constant Temperature Bath
Revision 1.0g—February, 2012; CANNON
®
Instrument Company
2139 High Tech Road • State College, PA 16803 • USA
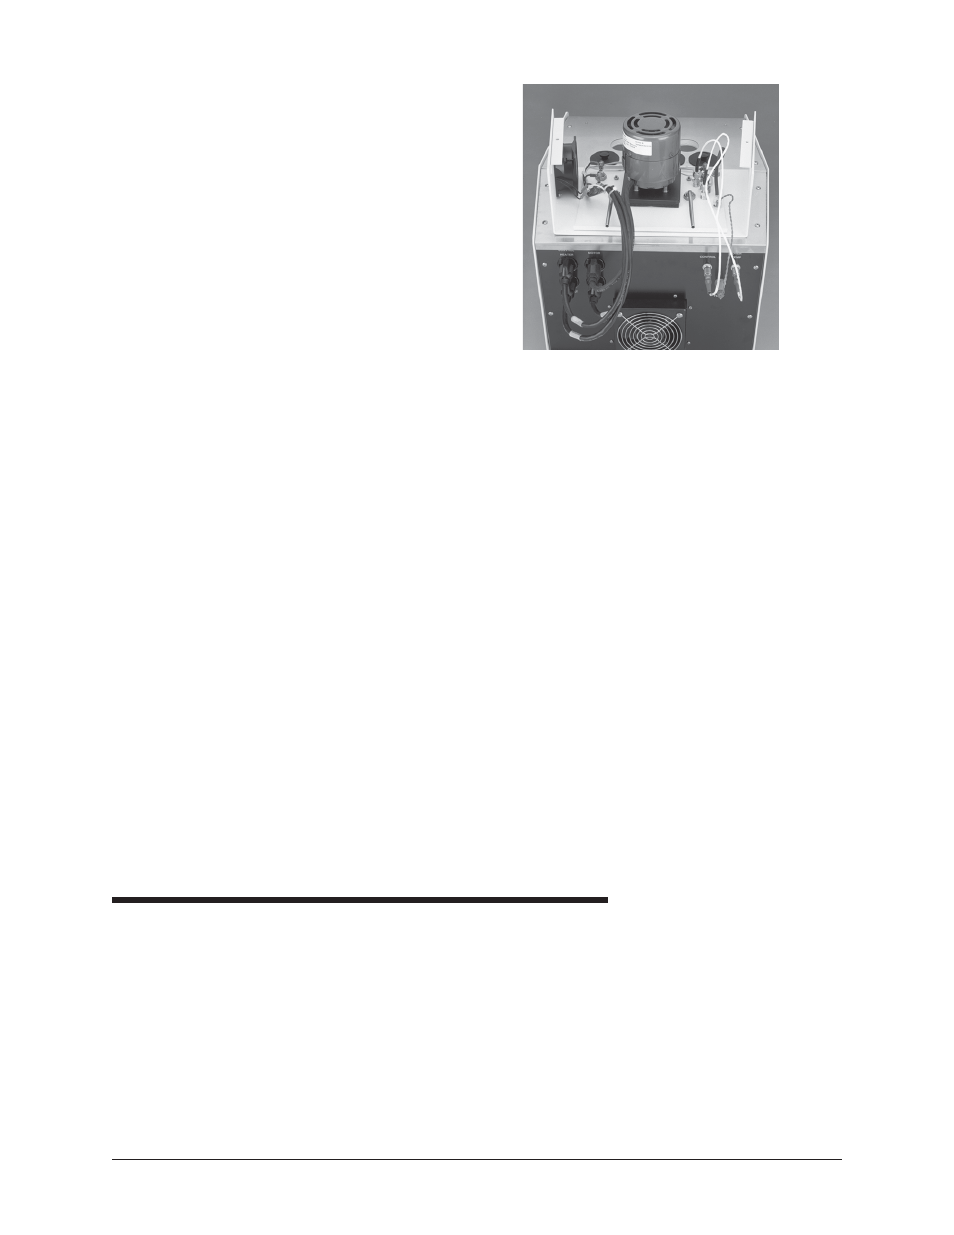
PREHEAT cable to PREHEAT socket
CONTROL HEATER cable to CONTROL HEATER socket
FAN cable to FAN socket
MOTOR STIRRER cable to MOTOR socket
CONTROL PROBE cable to CONTROL PROBE socket
OVER TEMP cable to OVER TEMP socket
LEVEL FLOAT CABLE to LEVEL FLOAT socket
4. Reattach the top heater housing, making sure that the heater, motor,
and fan cords pass through the left-hand opening (as viewed from the
rear) and that the control probe, over-temperature probe, and level
switch cords exit from the right opening (as viewed from the rear).
The back lip on the rear top cover fits into the slot on the top heater
housing. Line up the holes, insert screws, and tighten.
5. Adjust the four feet on the bottom of the bath housing to level the
bath jar. This should be done prior to filling the bath with fluid.
6. Plug the CT-2000 main power cord at the back of the electronics
drawer into an outlet with electrical specifications matching the label
on the rear of the instrument.
Inserting viscometer tubes/thermometers
The top cover of the CT-2000 contains seven apertures, 51 mm (2") in
diameter, for the insertion of viscometer tube holders. Two additional
holes are provided for insertion of thermometers.
Inserting viscometer tubes
Remove the viscometer tube cover(s) from the top of the bath and
carefully place the viscometer tube(s), with the proper holder attached,
into the bath through the aperture(s) in the top cover. The viscometer tube
should be inserted to a depth which ensures that the liquid under test and/
or any timing marks are a minimum of 6 mm (¼") below the top level of
the liquid.
Figure 10: CT-2000
electrical connections