User’s manual aw-hsnetappliance – AvaLAN Wireless AW-HSNetAppliance User Manual
Page 9
PAGE 9
Technical Support (650) 384-0000
www.avalanwireless.com
User’s Manual
AW-HSNetAppliance
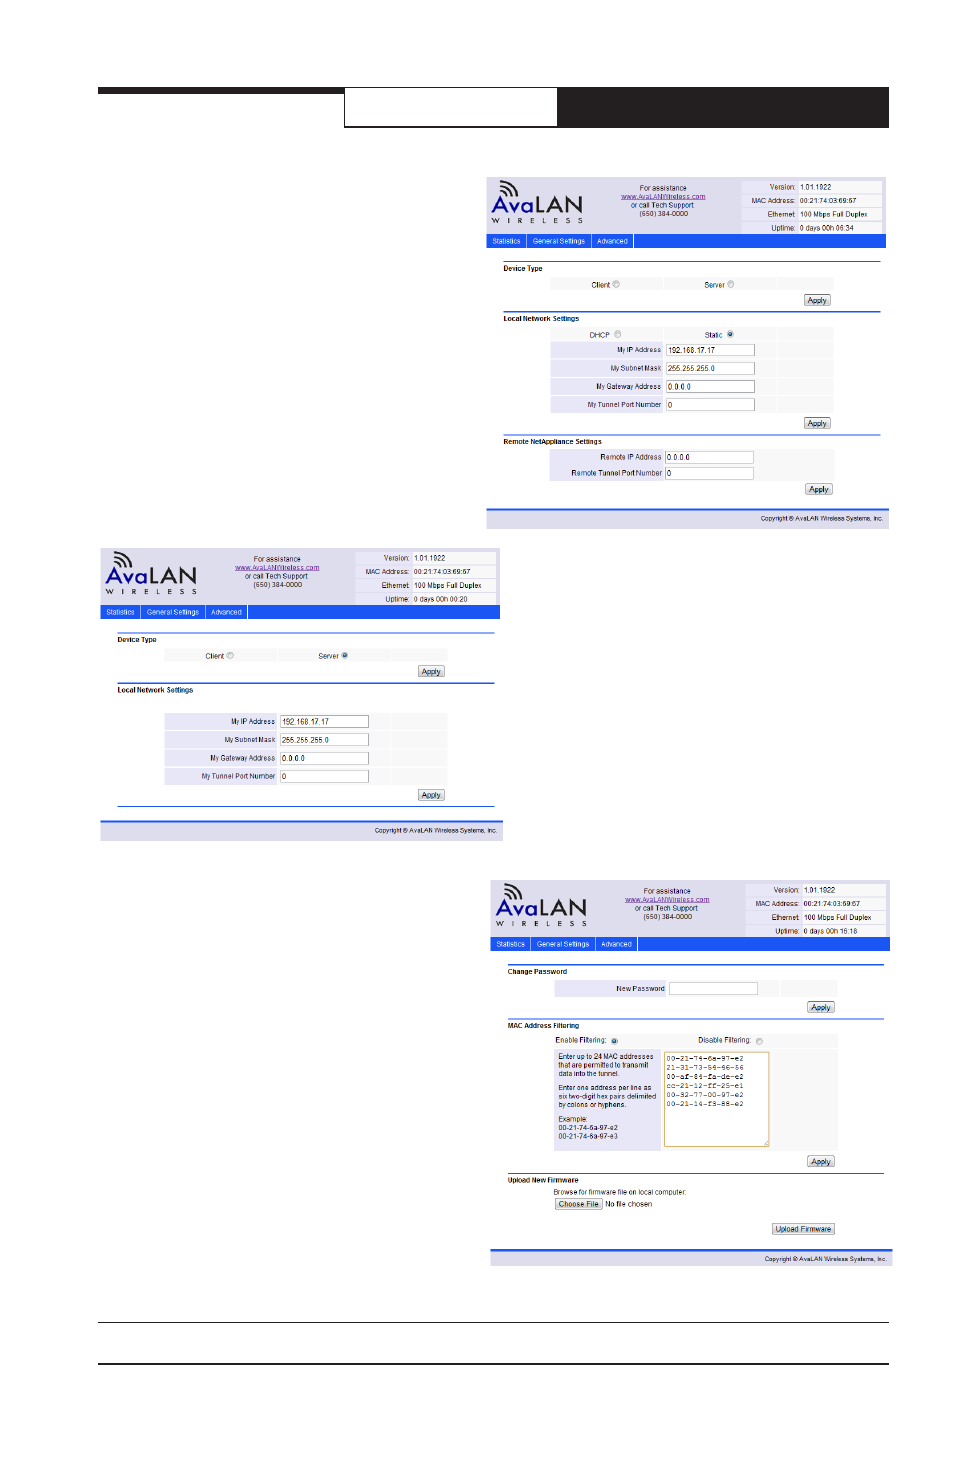
4. Having successfully logged in to the
Net Appliance’s web interface, click the
“General Settings” tab in the navigation
bar. This screen will appear and you will first
need to configure this unit to be a Server.
In the “Device Type” section of the page,
click the Server radio button and then click
“Apply.” The Net Appliance will reboot and
you should be returned to the home page in
a few seconds.
5. For the Server Net Appliance, you will
need to specify the IP Address, Subnet Mask,
Gateway Address and Tunnel Port that the
device will use when connected to the Main
Network. On the “General Settings” page
and in the “Local Network Settings” section,
enter these parameters and click “Apply.”
Note that your choice of Server rather than
Client caused the “Remote NetAppliance
Settings” section and the choice of “DHCP”
or “Static” to disappear since these items
do not apply.
6. If you wish to add MAC Address filtering
or change the web interface password, click
on the “Advanced” tab in the navigation bar.
Enter the desired information and click the
appropriate “Apply” buttons. The “Upload
New Firmware” section on this page is for
use whenever AvaLAN releases an update for
the product.
7. With the second Net Appliance unit, browse
to it in the same fashion as before in Steps 1
to 3. Once successfully logged in, choose the
“General Settings” tab in the navigation bar
and then click the “Client” radio button and
then click the “Apply” button in the “Device
Type” section. The Net Appliance will reboot
and you should be returned to the home page
in a few seconds.