Windy Nation Windtura 750 (No Slip Ring version) User Manual
Page 13
13
washer
on
each
of
these
bolts,
followed
by
a
lock
washer,
followed
by
a
nut.
Tighten
until
the
slot
on
the
pivoting
tail
boom
very
firmly
grips
the
tail
mounting
bracket.
See
Step
1
of
Figure
4.
Step
2:
Use
the
remaining
fasteners
in
the
“Tail
Assembly
Fasteners”
bag
to
secure
the
directional
tail
to
the
tail
mounting
bracket.
Slide
the
bolts
through
their
respective
holes
and
then
attach
the
flat
washer,
followed
by
the
nut.
See
Step
2
of
Figure
4.
Attaching
the
Completed
Tail
Assembly
to
the
Yaw/Generator
Mount:
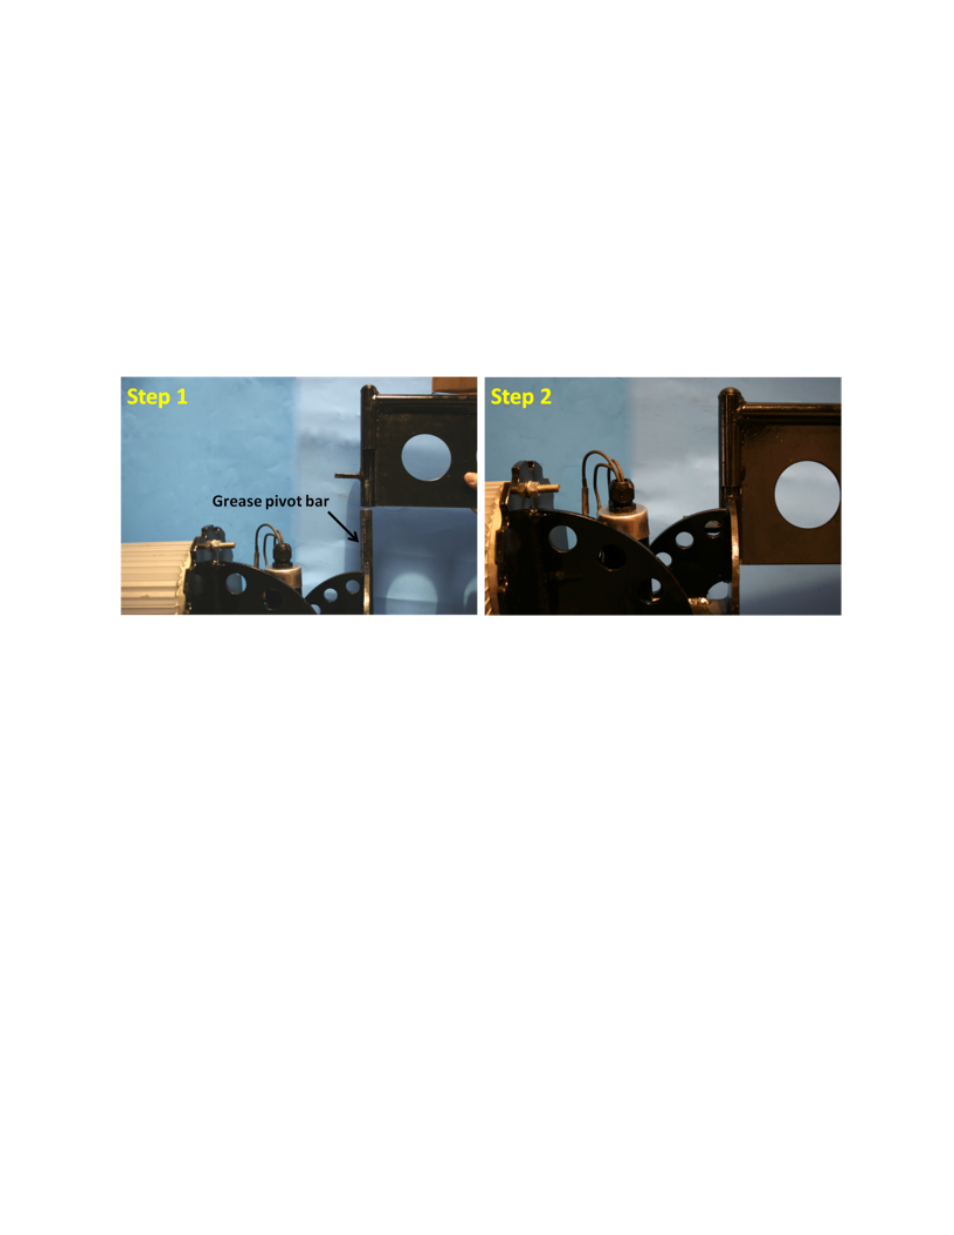
Figure 6: Diagram of tail assembly attachment to pivot bar
Step
1:
Grease
the
pivot
bar
shown
in
Step
1
of
Figure
6.
After
greasing
the
pivot
bar,
the
tail
assembly
can
be
slid
onto
the
pivot
bar.
Step
2:
Slide
the
tail
assembly
onto
the
pivot
bar
as
shown
in
Step
2
of
Figure
6.
Confirm
that
you
have
slid
the
tail
assembly
completely
onto
the
pivot
bar
by
pushing
firmly
down
on
the
tail
assembly.
Attaching
the
Blades
and
Hub
to
Generator:
Figure 7: Diagram for attaching blades and hub to generator: