Basic controls – Panasonic TC 42P1F User Manual
Page 10
Attention! The text in this document has been recognized automatically. To view the original document, you can use the "Original mode".
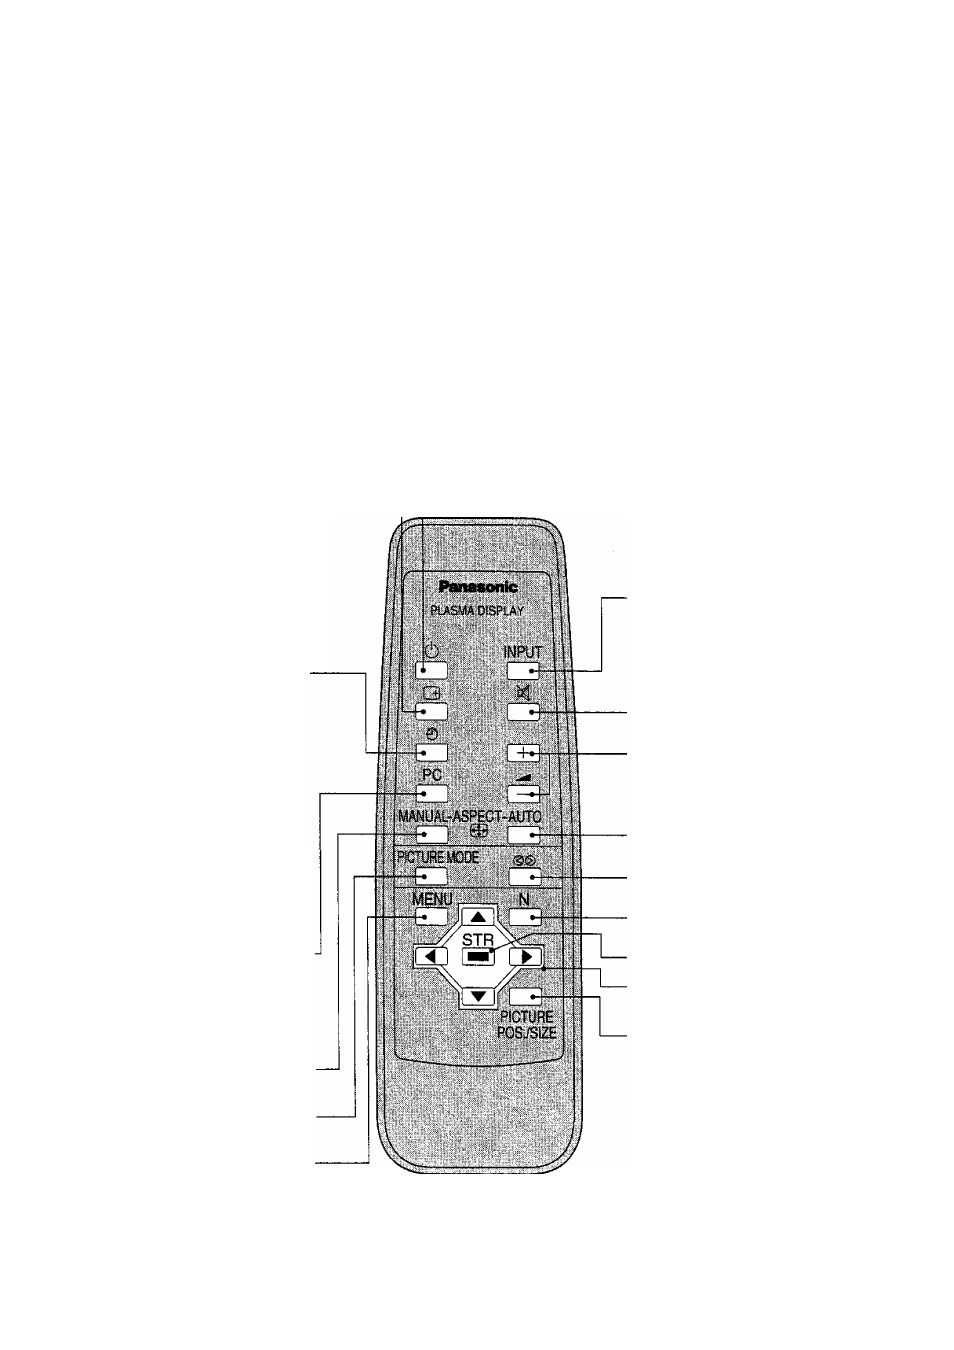
Basic Controls
Ô/l
Main Power
On/Off Switch
Power indicator —J
NPUT - ^ +
INPUT button---------------------------------
(AV(S-VideoyComponent, RGB/PC Mode
Selection)
Push the “INPUT Button to seiect AV(S-Video)
/Component, RGB/PC input signai modes
sequentially.
Volume Adjustment
Push the Volume Up “+” or Down
Button to increase or decrease the
volume level.
Status Button
Push the “Status” Button to display the
current system status.
AV
4:3
Off tinner
-(D
(3)AV{S-Video)/Component, RGB/PC Mode
d) Aspect Mode (See page 18)
(D Off timer
The off timer indicator is displayed only
when the off timer has been set.
Off Timer Button
The Wide Plasma Display may be
preset to switch to stand-by after a fixed
period.
The setting changes to 30 minutes, 60
minutes, 90 minutes and 0 minutes (off
timer cancelled) each time the button is
pressed.
□30-^060-^090 —
t
■
00
^
When three minutes remain, “Off timer
3” will flash.
The off timer is cancelled if the mains
supply fails.
PC Mode Selection
Push the “PC” mode selection button to
select the PC mode.
This button is used to switch directly to
PC mode.
ASPECT-MANUAL button
(see page 18)
PICTURE MODE button
(see page 23)
MENU button
— Stand-by (ON/OFF) button
The Wide Plasma Display must first be switched on at the wall
outlet and at the Power Switch. (See page 9)
Push this button to turn the Wide Plasma Display ON, from
STANDBY mode. Push it again to turn the Wide Plasma Display
OFF, STANDBY mode.
-INPUT button
(AV(S-Video)/Component, RGB/PC
Mode Selection)
Push the “INPUT Button to select
AV(S-Video)/Component, RGB/PC input
signal modes sequentialiy.
-Sound mute On/Off
-Volume Adjustment
Push the Volume Up “+" or Down
Button to increase or decrease the
sound volume level.
-ASPECT-AUTO button
(see page 18)
-Surround button
(see page 22)
^M button
(see page 21,24,25,26)
-STORE button
-Cursor buttons to make selections
and adjustments
-PICTURE POSySIZE button
(see page 20)
10