Front panel, Rear panel, Front panel rear panel – Yamaha MS20S User Manual
Page 4
Attention! The text in this document has been recognized automatically. To view the original document, you can use the "Original mode".
FRONT PANEL
REAR PANEL
CAUTION: TO PREVENT ELECTRIC SHOCK DO NOT USE THIS
(POLARIZED) PLUG WITH AN EXTENSION CORD, RECEPTACLE
OR OTHER OUTLET UNLESS THE BLADES CAN BE FULLY IN
SERTED TO PREVENT BLADE EXPOSURE.
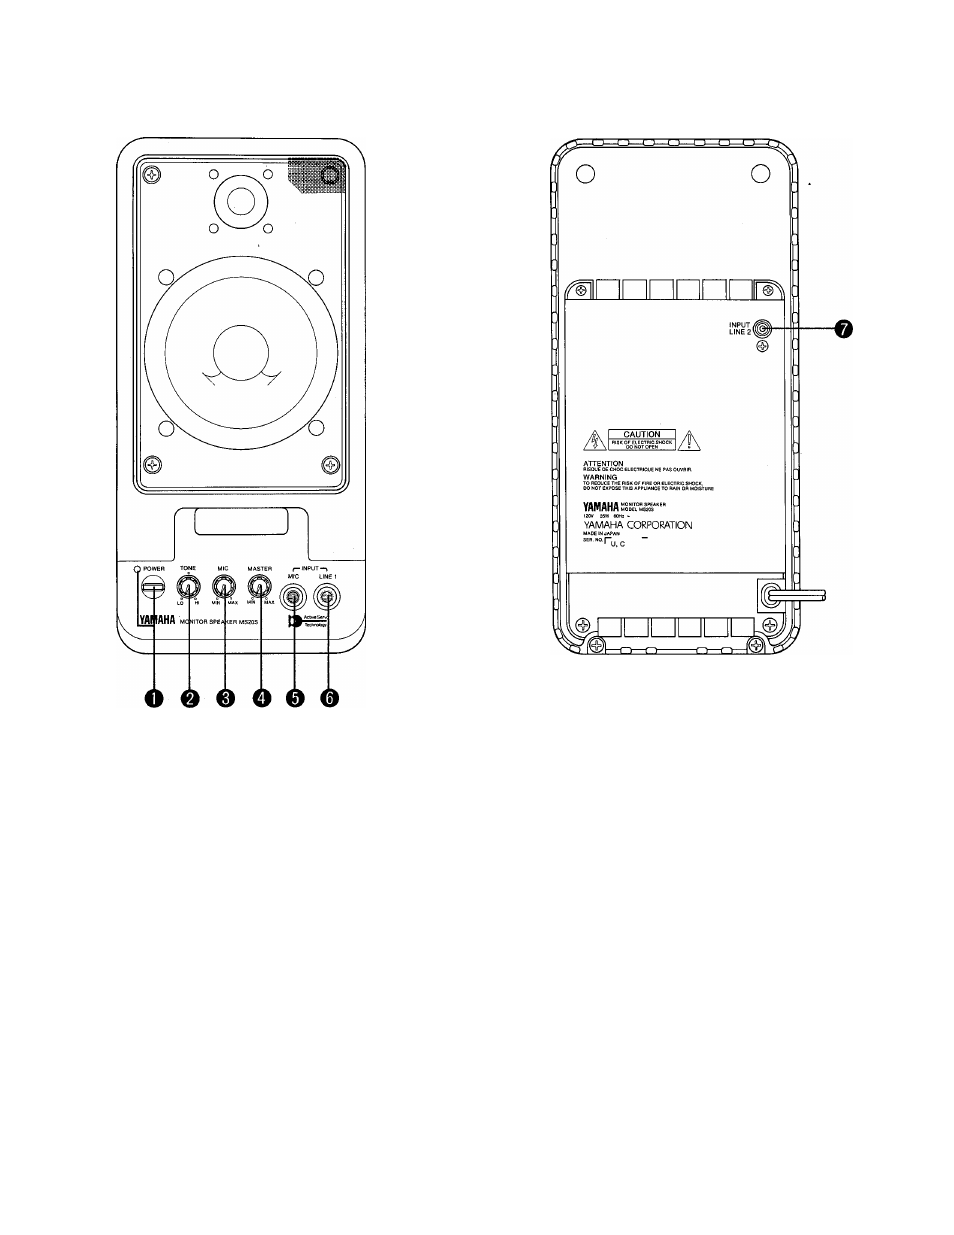
FRONT PANEL
0 POWER INDICATOR
When the switch is turned on, this red indicator wiii iight
up.
o
TONE CONTROL
As you turn this controi to the ieft, the iow frequencies
(100Hz) wiil be boosted up 4 dB max. As you turn this
controi to the right, the high frequencies (10kHz) wiil
be boosted up 7 dB. The center position does not cut
or boost either of the equalization bands.
e MIC (volume)
This control adjusts the level of the signal connected
to the MIC input relative to the other inputs (overall level
is controlled by the MASTER LEVEL control).
0 MASTER LEVEL CONTROL
This control adjusts the overall level of the MS20S’
output. The balance between the MIC input level and
the two LINE inputs is adjusted using the MIC (volume)
control. To adjust thè balance of the two LINE sources,
use the output volume controls on the sources, (syn
thesizer volume controls, etc).
0 MIC INPUT
This is a high-impedance { —50dB/10kohms) unbal
anced 1/4” phone input.
0
LINE 1 INPUT
Electronic musical instruments such as keyboards can
be
plugged
directly
into
this
1/4”
phone
input
{ —lOdB/IOkohms).
REAR PANEL
0
LINE 2 INPUT
An audio signal from equipment such as tape players,
CD players. Video Disk players, or VCRs can be plugged
directly into this RCA pin input (- lOdB/IOkohms).