Installation, Continued, Check gas type – Desa Tech 107434-01C.pdf User Manual
Page 7: Clearances to combustibles, Connecting to gas supply, Vent-free operation only), Minimum wall and ceiling clearances (see figure 4), Installation items needed
107434-01C
For more information, visit www.desatech.com
For more information, visit www.desatech.com
7
7
IMPORTANT:
Vent-free heaters add moisture to the air. Although
this is beneficial, installing heater in rooms without enough venti-
lation air may cause mildew to form from too much moisture. See
Air for Combustion and Ventilation, pages 4 through 6.
CHECK GAS TYPE
Use only natural gas. If your gas supply is not natural gas, do not install
heater. Call dealer where you bought heater for proper type heater.
CLEARANCES TO COMBUSTIBLES
(Vent-Free Operation Only)
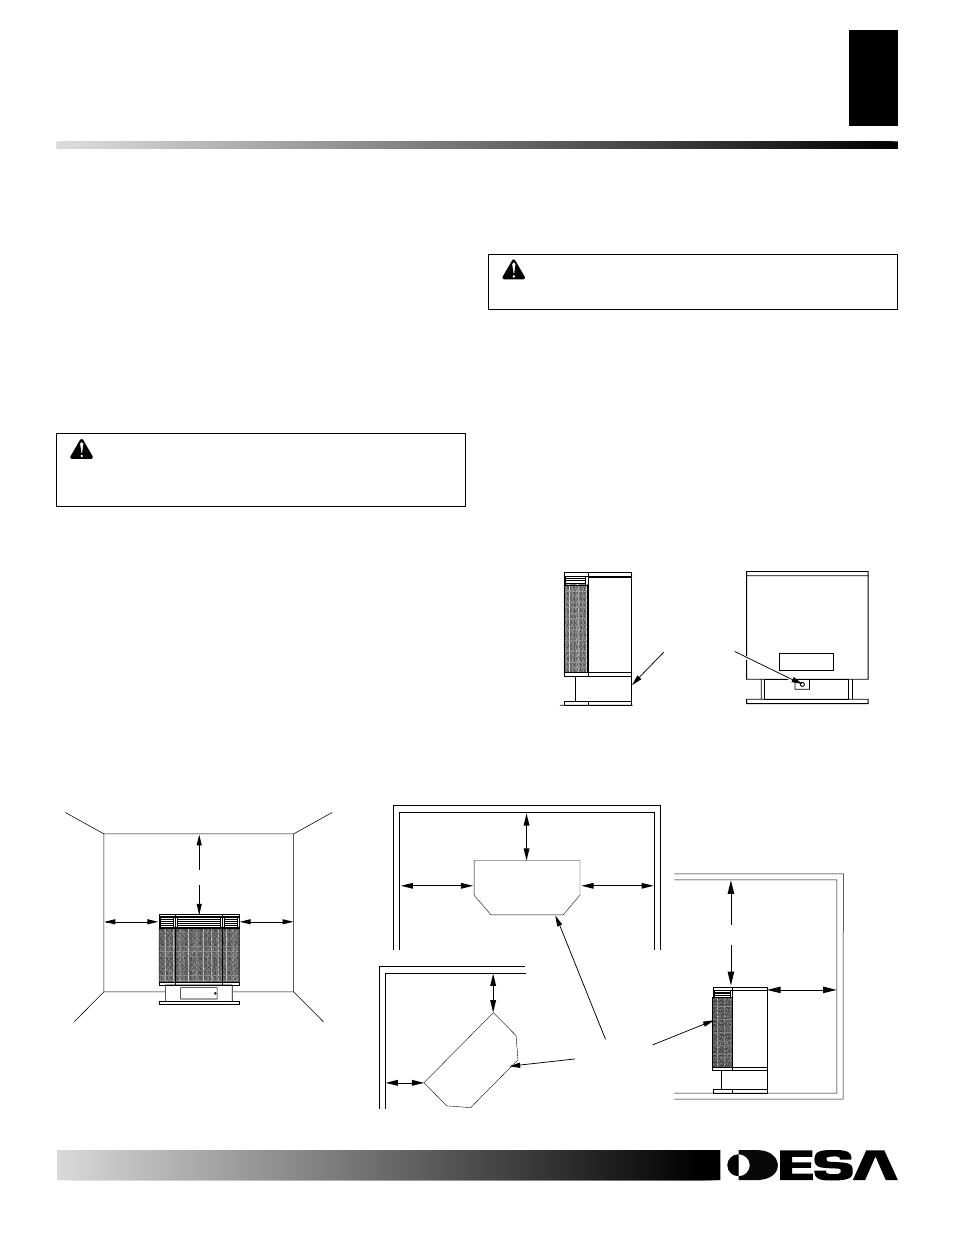
INSTALLATION
Continued
WARNING: Maintain the minimum clearances. If
you can, provide greater clearances from floor, ceil-
ing, and adjoining side and back walls.
Carefully follow the instructions below. This stove is a freestanding
unit designed to set directly on the floor.
IMPORTANT:
You must
maintain minimum wall and ceiling clearances during installation.
The minimum clearances are shown in Figure 4. Measure from
outermost point of stove top.
Minimum Wall and Ceiling Clearances (see Figure 4)
A. Clearances from outermost point of stove top to any combus-
tible side wall should not be less than 12 inches.
B. Clearances from outermost point of stove top to any combus-
tible back wall should not be less than 6 inches (Includes cor-
ner installations).
C. Clearances from the stove top to the ceiling should not be less
than 48 inches.
Figure 4 - Minimum Clearance to Walls and Ceiling
Front View
12"
Minimum
12"
Minimum
48"
Minimum
Ceiling
Side Wall
Side Wall
Top View
Side View
Front of
Stove Unit
Back Wall
Side Wall
Side Wall
12
"
Minimum
12
"
Minimum
6
"
Minimum
6"
Minimum
48"
Minimum
Ceiling
Floor
Back Wall
Corner
Wall
Wall
6
"
Minimum
6
"
Minimum
CONNECTING TO GAS SUPPLY
WARNING: A qualified service person must con-
nect heater to gas supply. Follow all local codes.
Installation Items Needed
Before installing heater, make sure you have the items listed below.
• piping (check local codes)
• sediment trap
• sealant (resistant to propane/LP gas)
• tee joint
• equipment shutoff valve *
• pipe wrench
• test gauge connection *
* A CSA design-certified equipment shutoff valve with 1/8" NPT
tap is an acceptable alternative to test gauge connection. Purchase
the optional CSA design-certified equipment shutoff valve from
your dealer. See Accessories, page 24.
Figure 5 - Gas Regulator Location and Gas Line Access Into
Stove Cabinet
Front of
Stove Unit
Gas Regulator
Inlet Connection
Back View
Side View
INSTALLATION
Check Gas Type
Clearances to Combustibles
Connecting to Gas Supply